
Receive data from Arduino in Isadora
(These are notes, still need to be converted into a nice report)
Arduino code:code for a push button:
source: https://roboticsbackend.com/arduino-push-button-tutorial/
Isadora settings
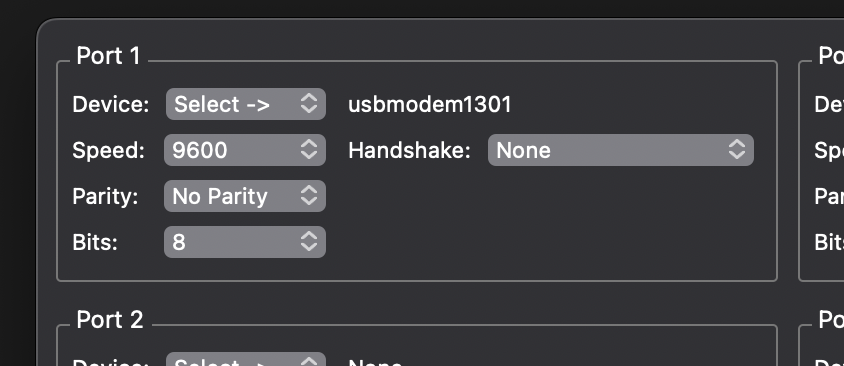
Communications:> Serial port setup
Port 1
Device: select -> usbmodem
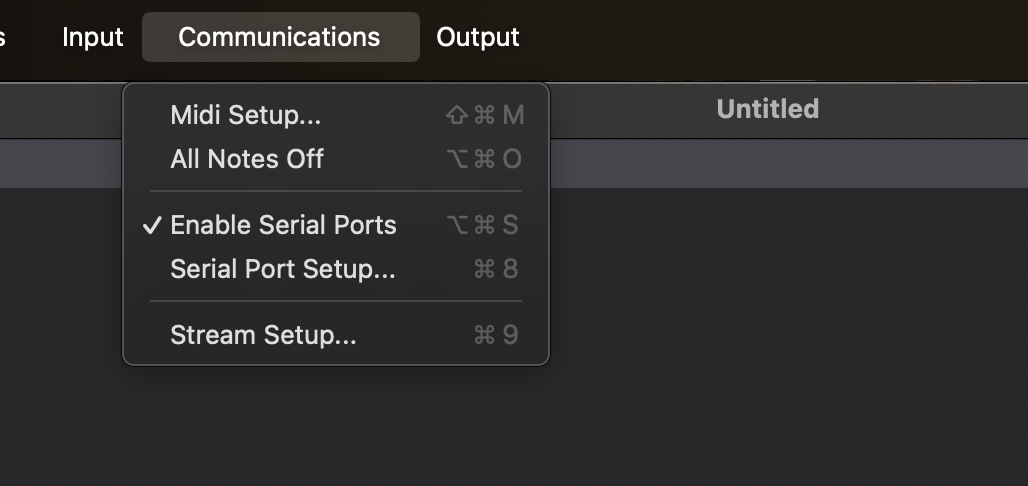
Communications>
Enable serial ports
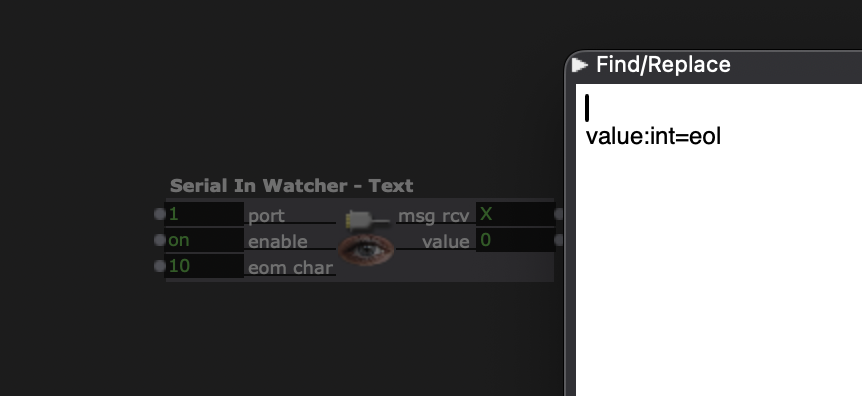
Use serial in watcher actor
open the actor by double klikking it and fill in this code : value:int=eol
in actor put eom char on 10
NB! If you have this on, close the serial monitor in Arduino,
If the serial monitor is on, Isadora cannot connect to the Arduino.
This also works the other way around. If you want to adjust your code in Arduino and you want to test the code, you must turn off the serial monitor in Isadora.
Open serial monitor in isadora:
windows > show monitor
Here you can see that the data is coming in from the Arduino. On the far right you can see that the value changes from 0 to 1 when you press the button. The serial monitor is for monitoring purposes only. You can turn it off when you see that the connection works.
In the Serial in watcher actor you see that the value changes from 0 to 1. You can use that output for your patch.
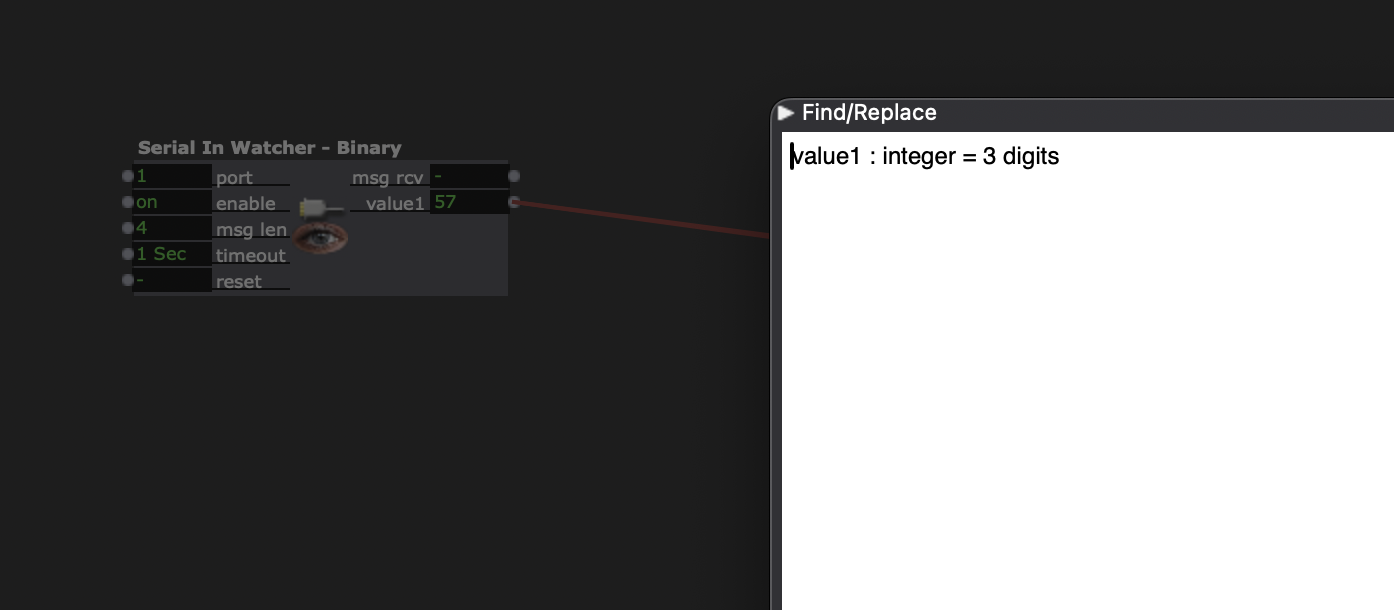
Example with a LDR light sensor + code
A sensor usually outputs a range of data so not just 1 or 0. In that case I use the Serial in watcher - Binary and fill in when i open the actor: value1 : integer = 3 digits
you could folow this tutorial for connecting the LDR sensor
I used this arduino code voor LDR light sensor:
/*
* Created by ArduinoGetStarted.com
*
* This example code is in the public domain
*
* Tutorial page: https://arduinogetstarted.com/tutorials/arduino-light-sensor
*/
void setup() {
// initialize serial communication at 9600 bits per second:
Serial.begin(9600);
pinMode(BUTTON_PIN, INPUT_PULLUP);
}
void loop() {
// reads the input on analog pin A0 (value between 0 and 1023)
int analogValue = analogRead(A0);
Serial.print("Analog reading: ");
Serial.print(analogValue); // the raw analog reading
// We'll have a few threshholds, qualitatively determined
if (analogValue < 10) {
Serial.println(" ");
} else if (analogValue < 200) {
Serial.println(" ");
} else if (analogValue < 500) {
Serial.println(" ");
} else if (analogValue < 800) {
Serial.println(" ");
} else {
Serial.println(" ");
}
Serial.println(digitalRead(BUTTON_PIN));
delay(100);
}