Instruction on how to start and use the multiplane cabinet
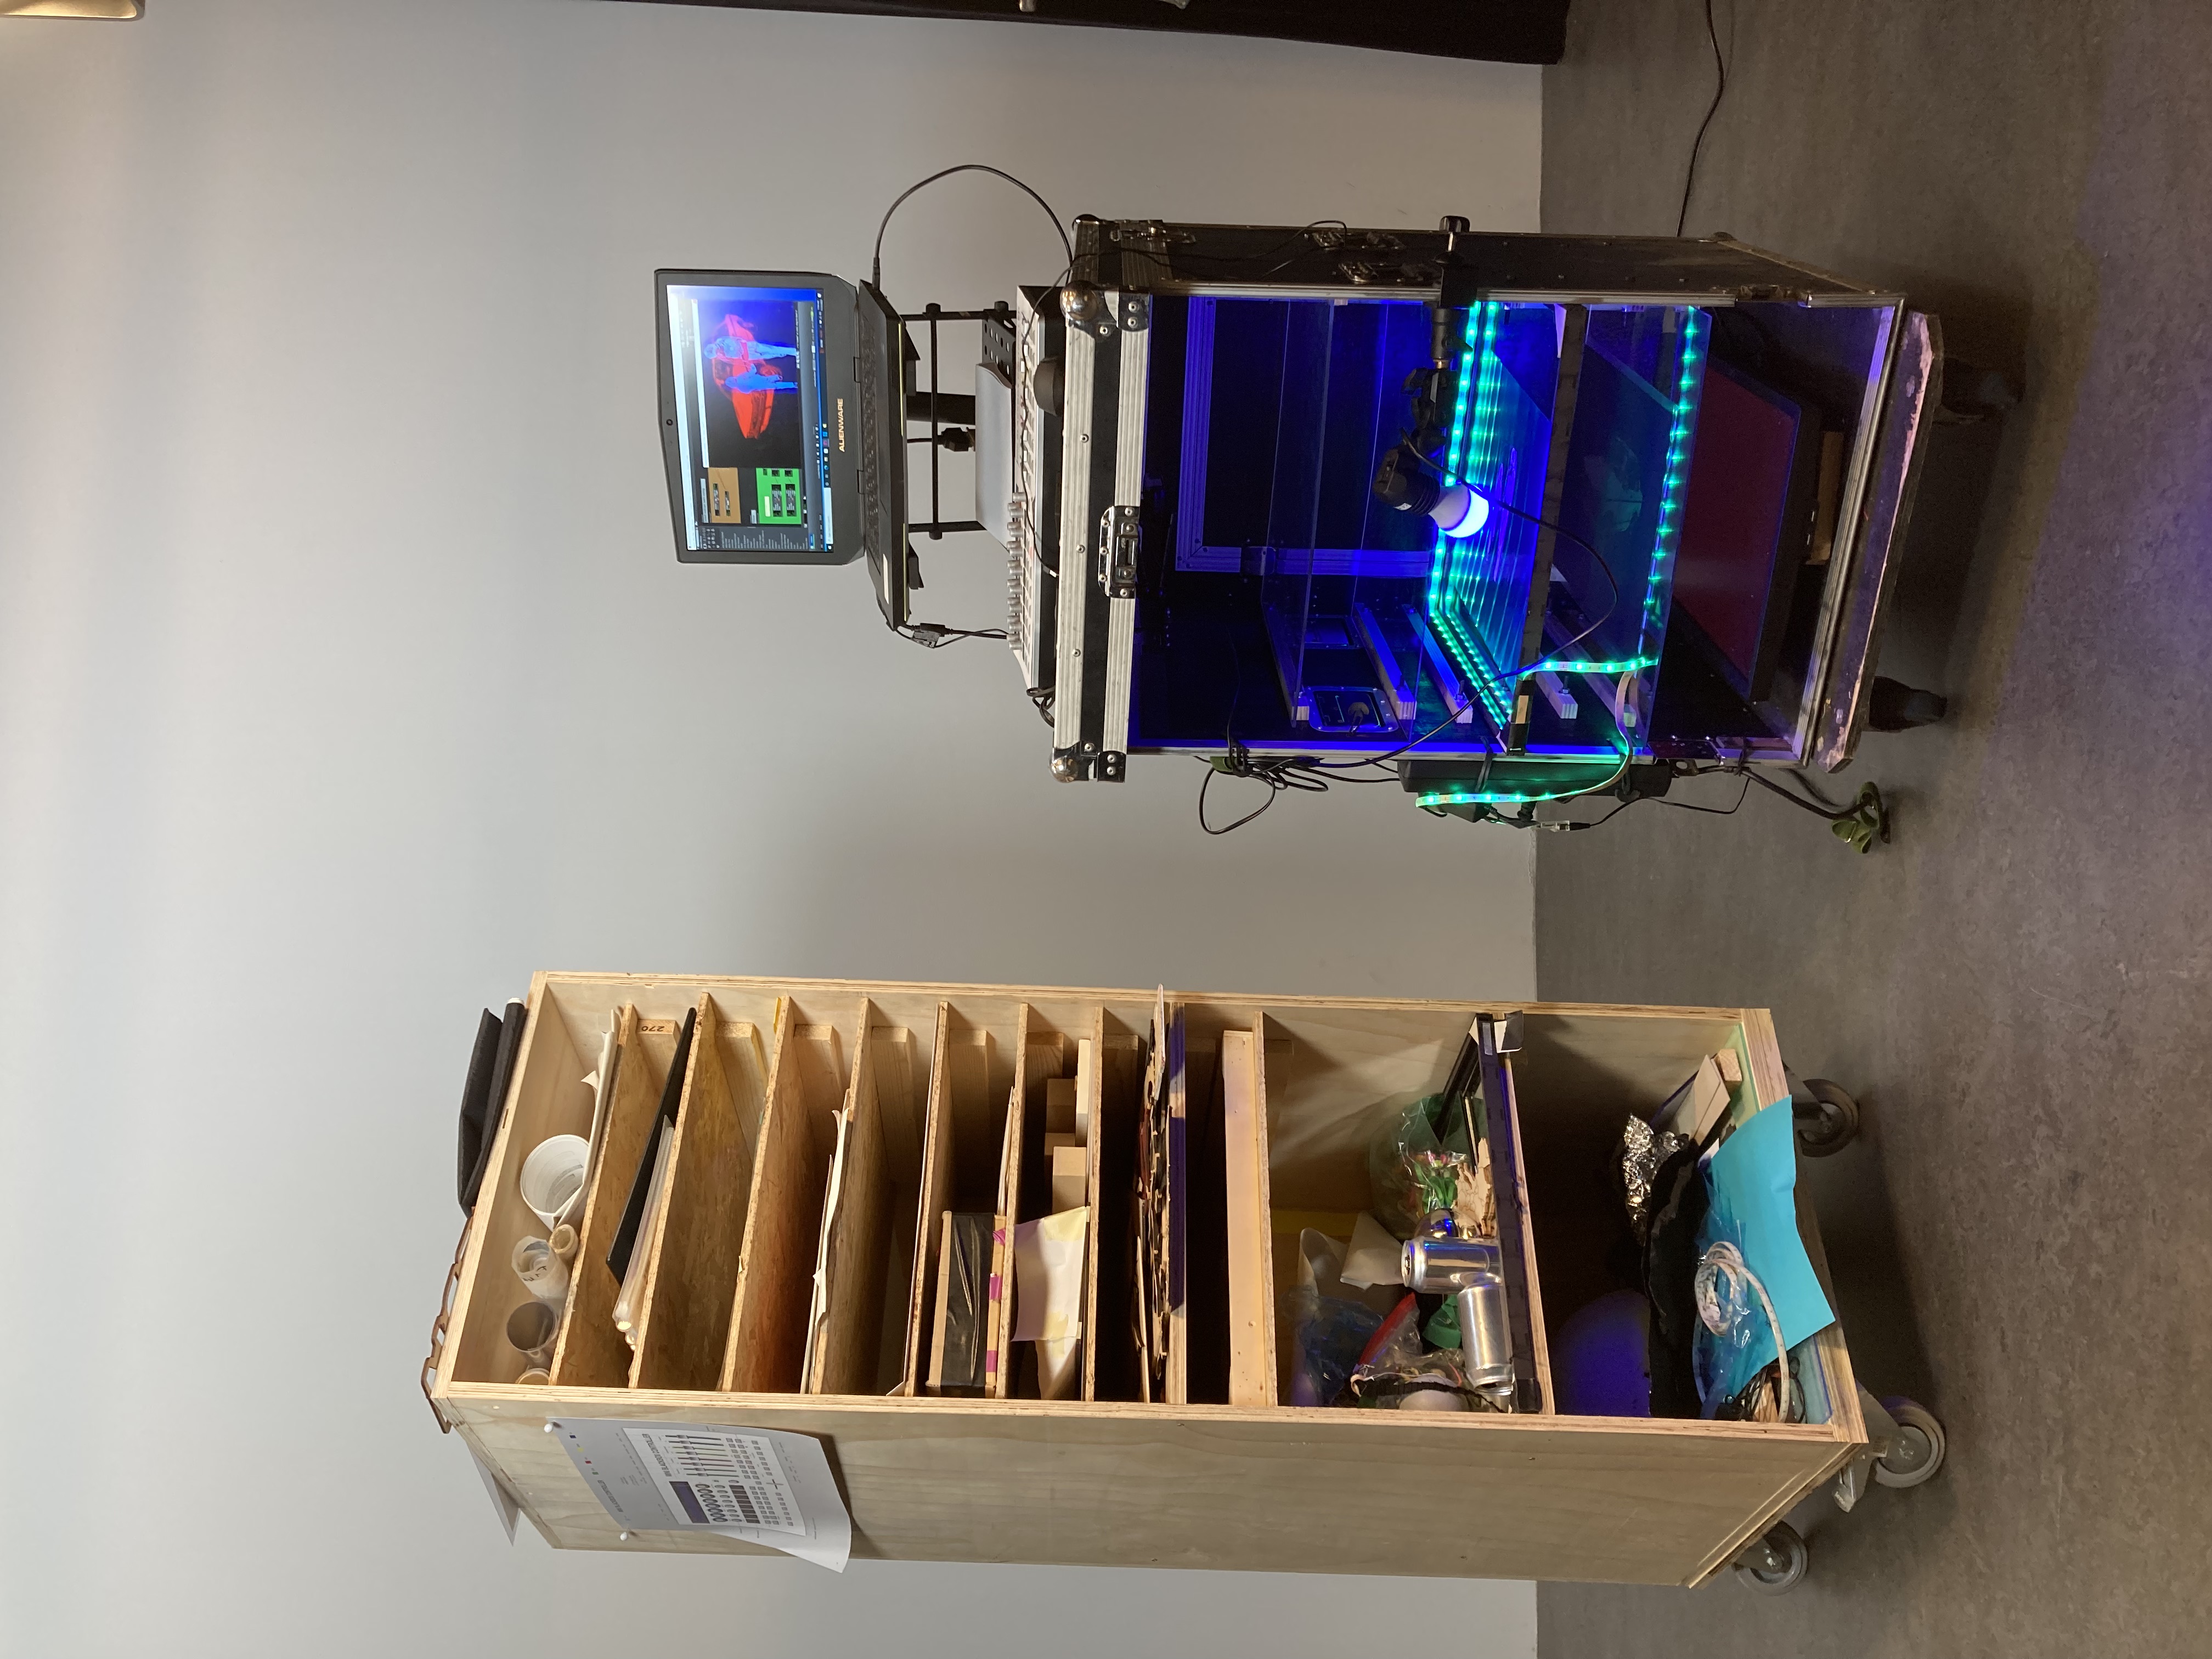
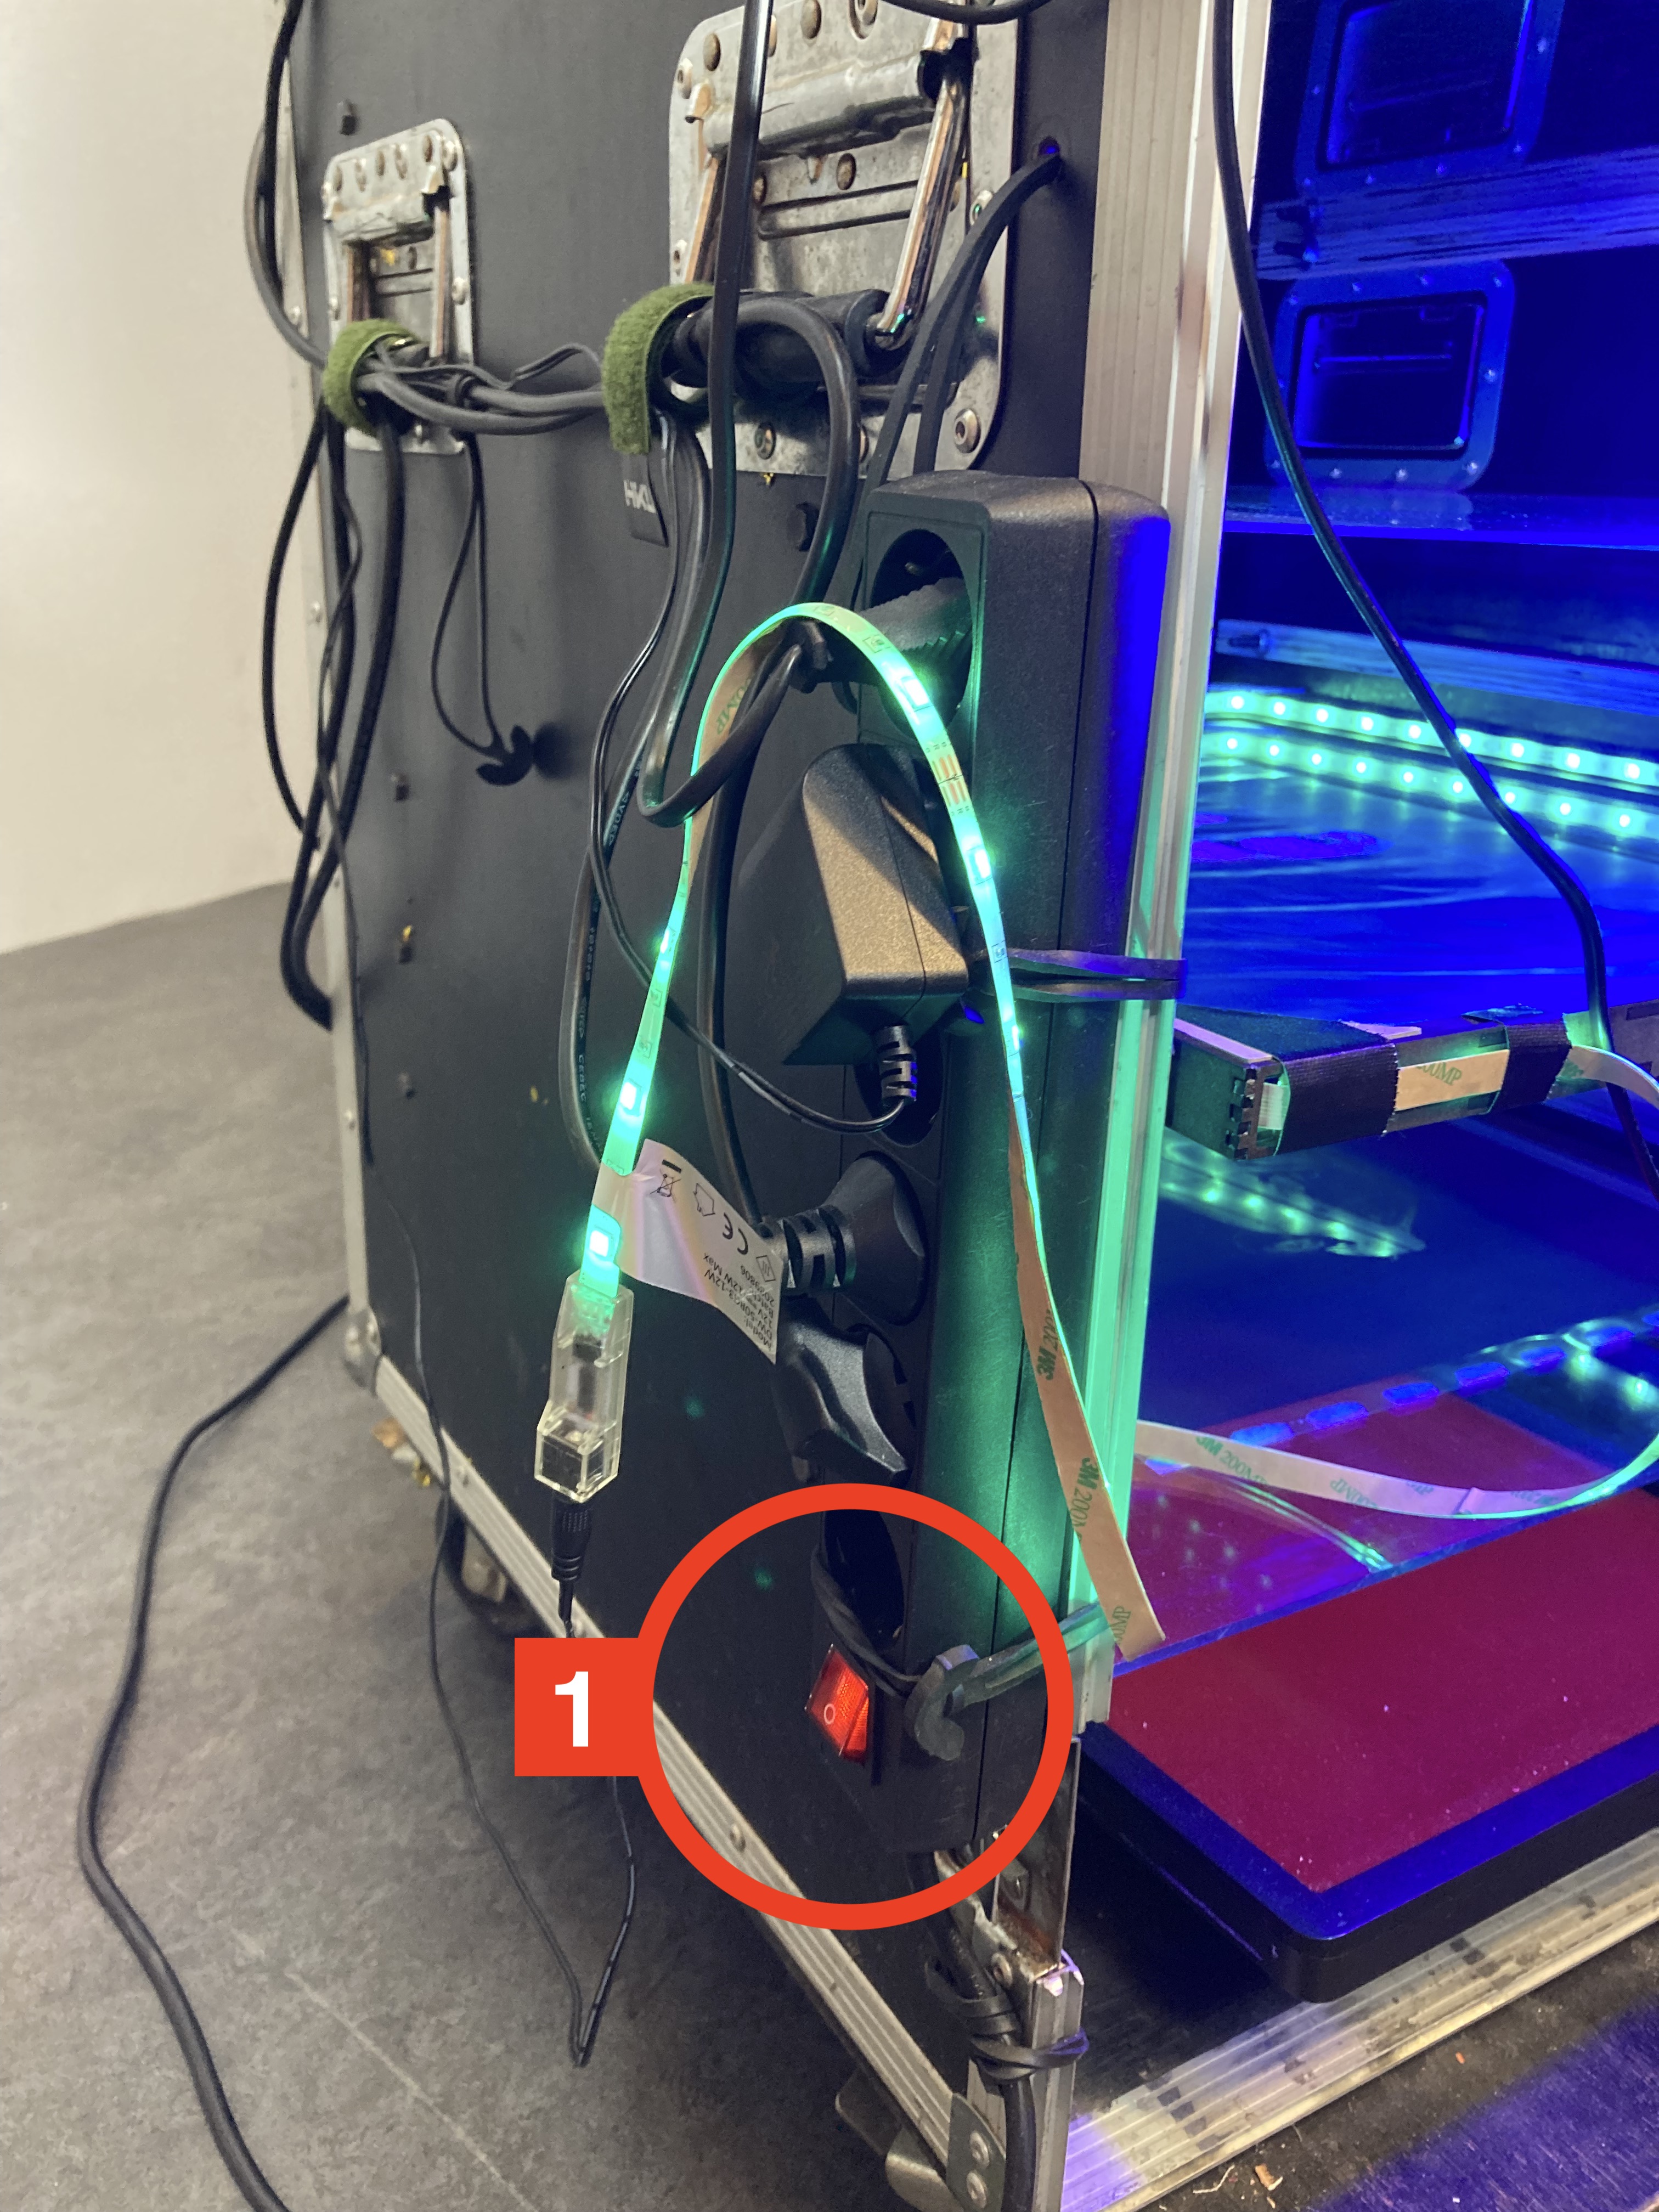
1 Power up
Connect the power strip power cord of the cabinet to a power point and switch on the power strip
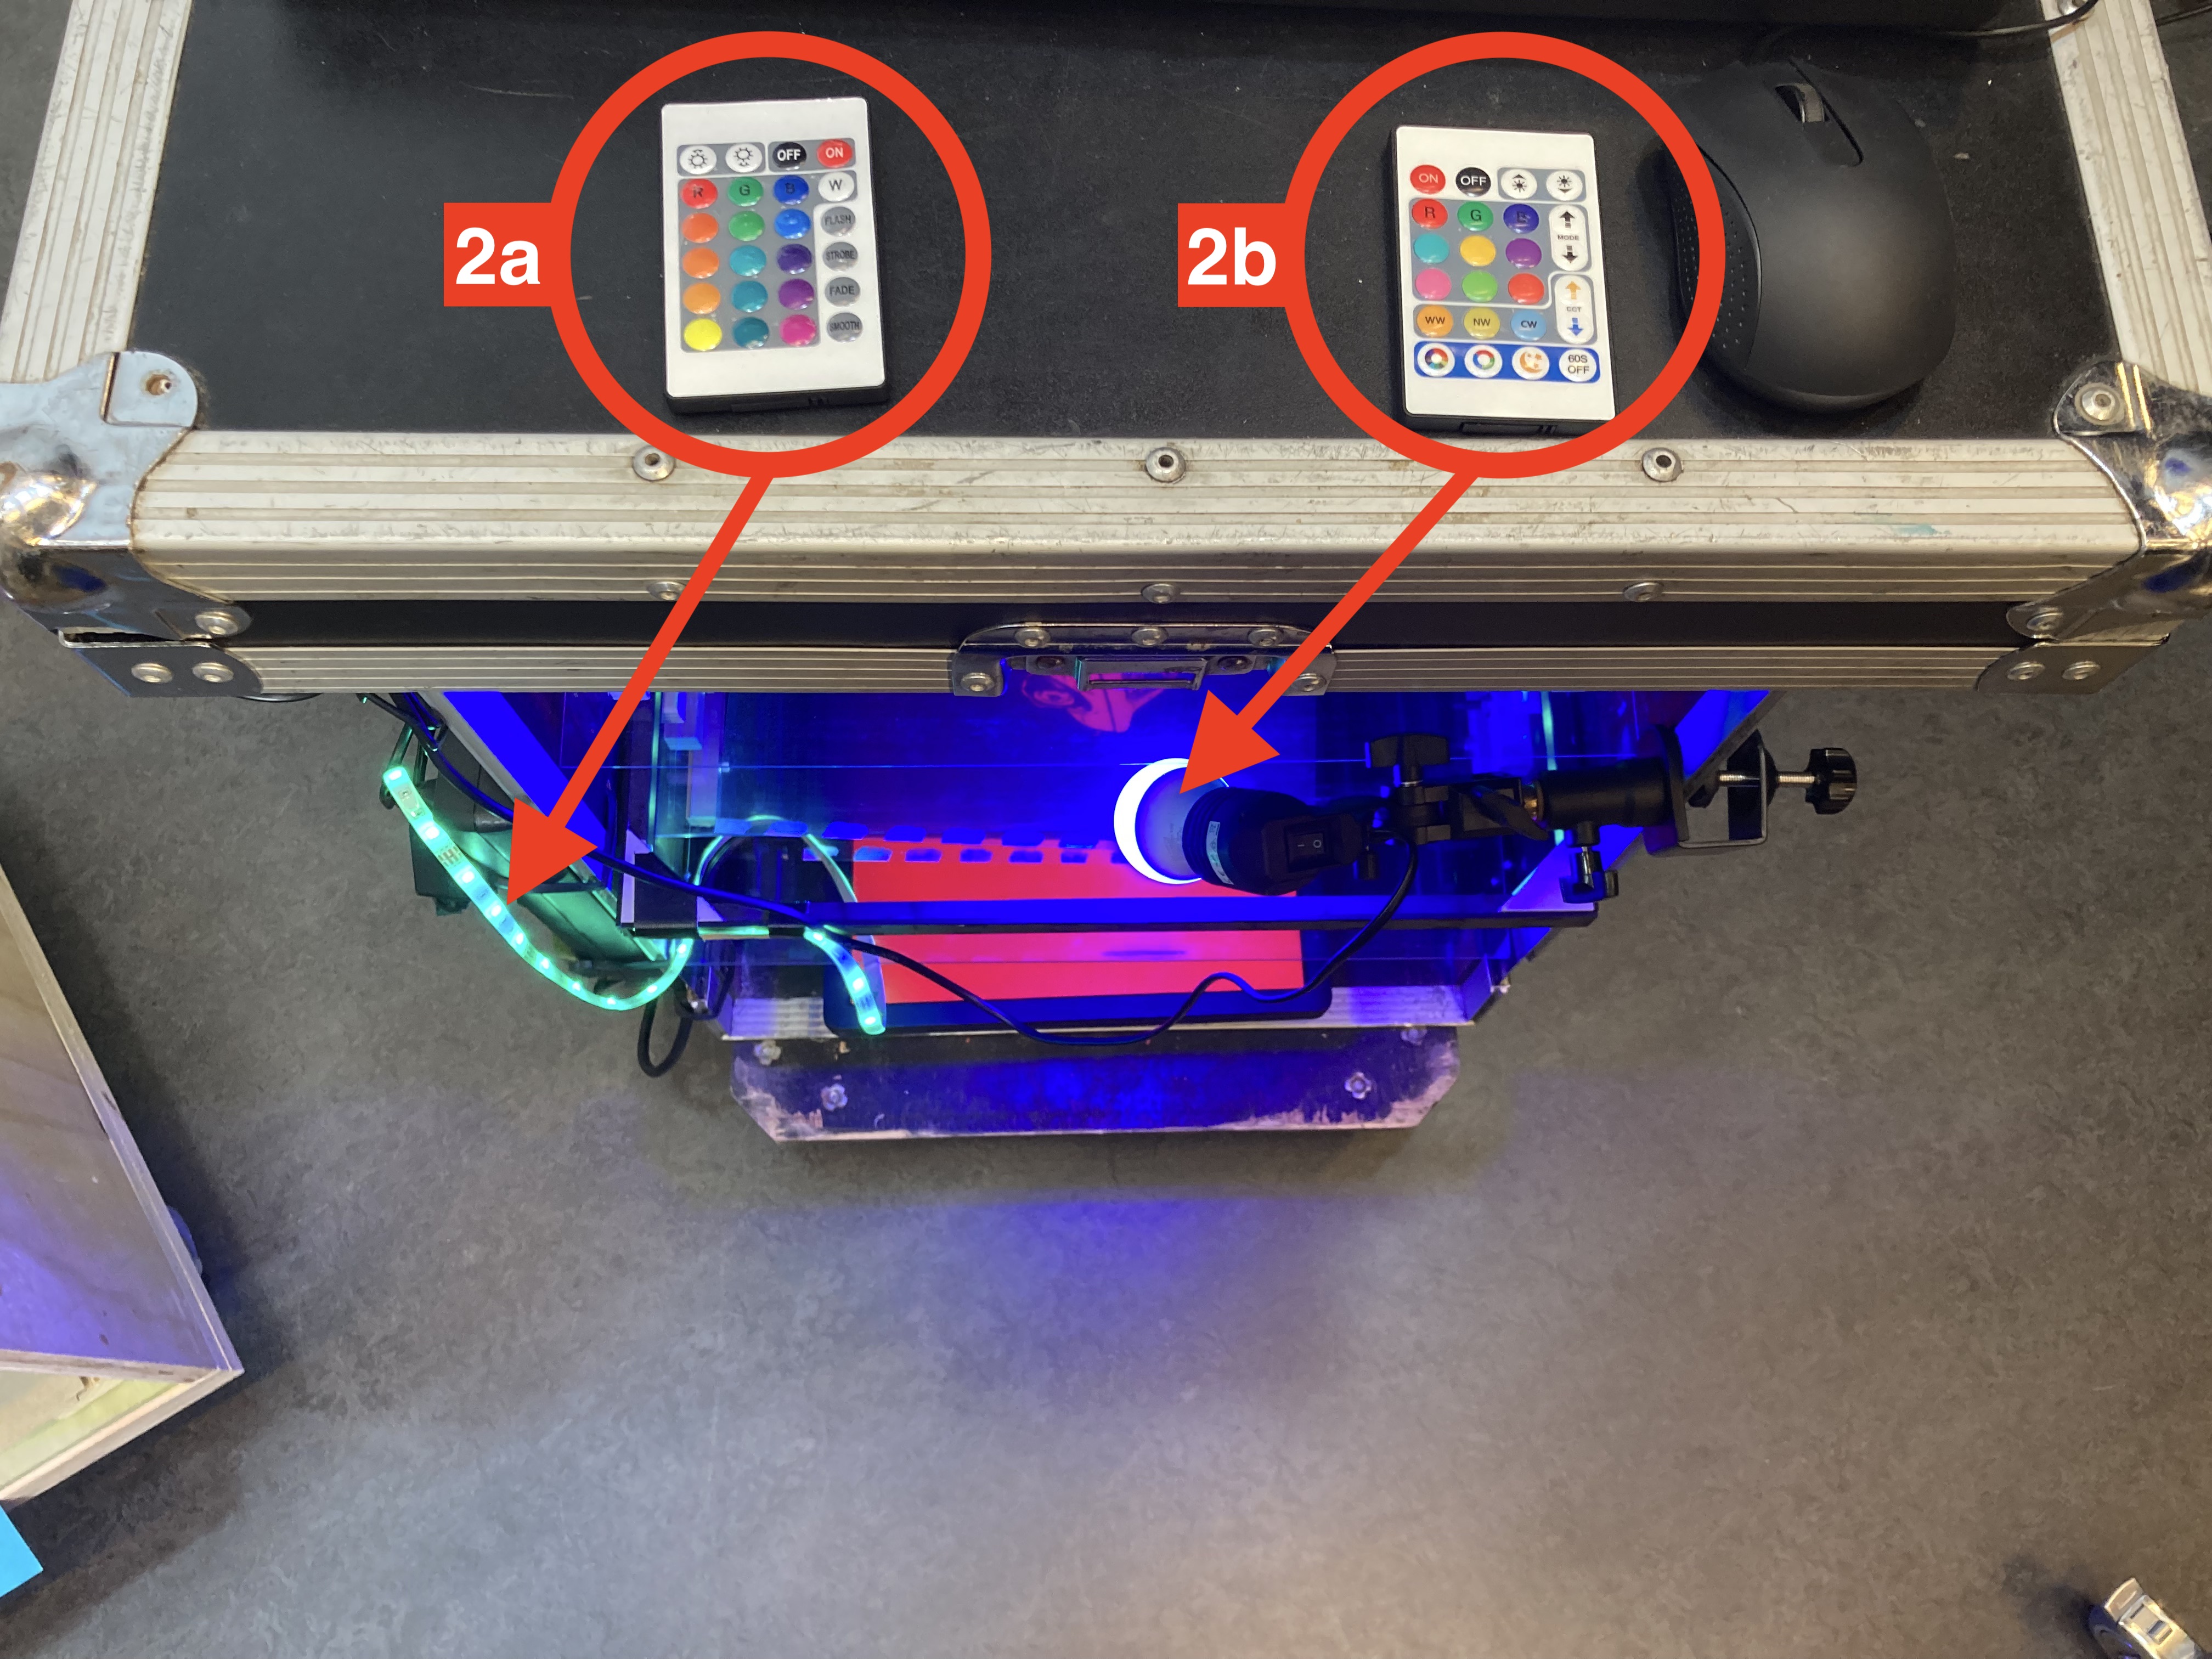
2 Led light
Turn on the LED strip (2a) and LED lamp (2b) with the corresponding remote controls
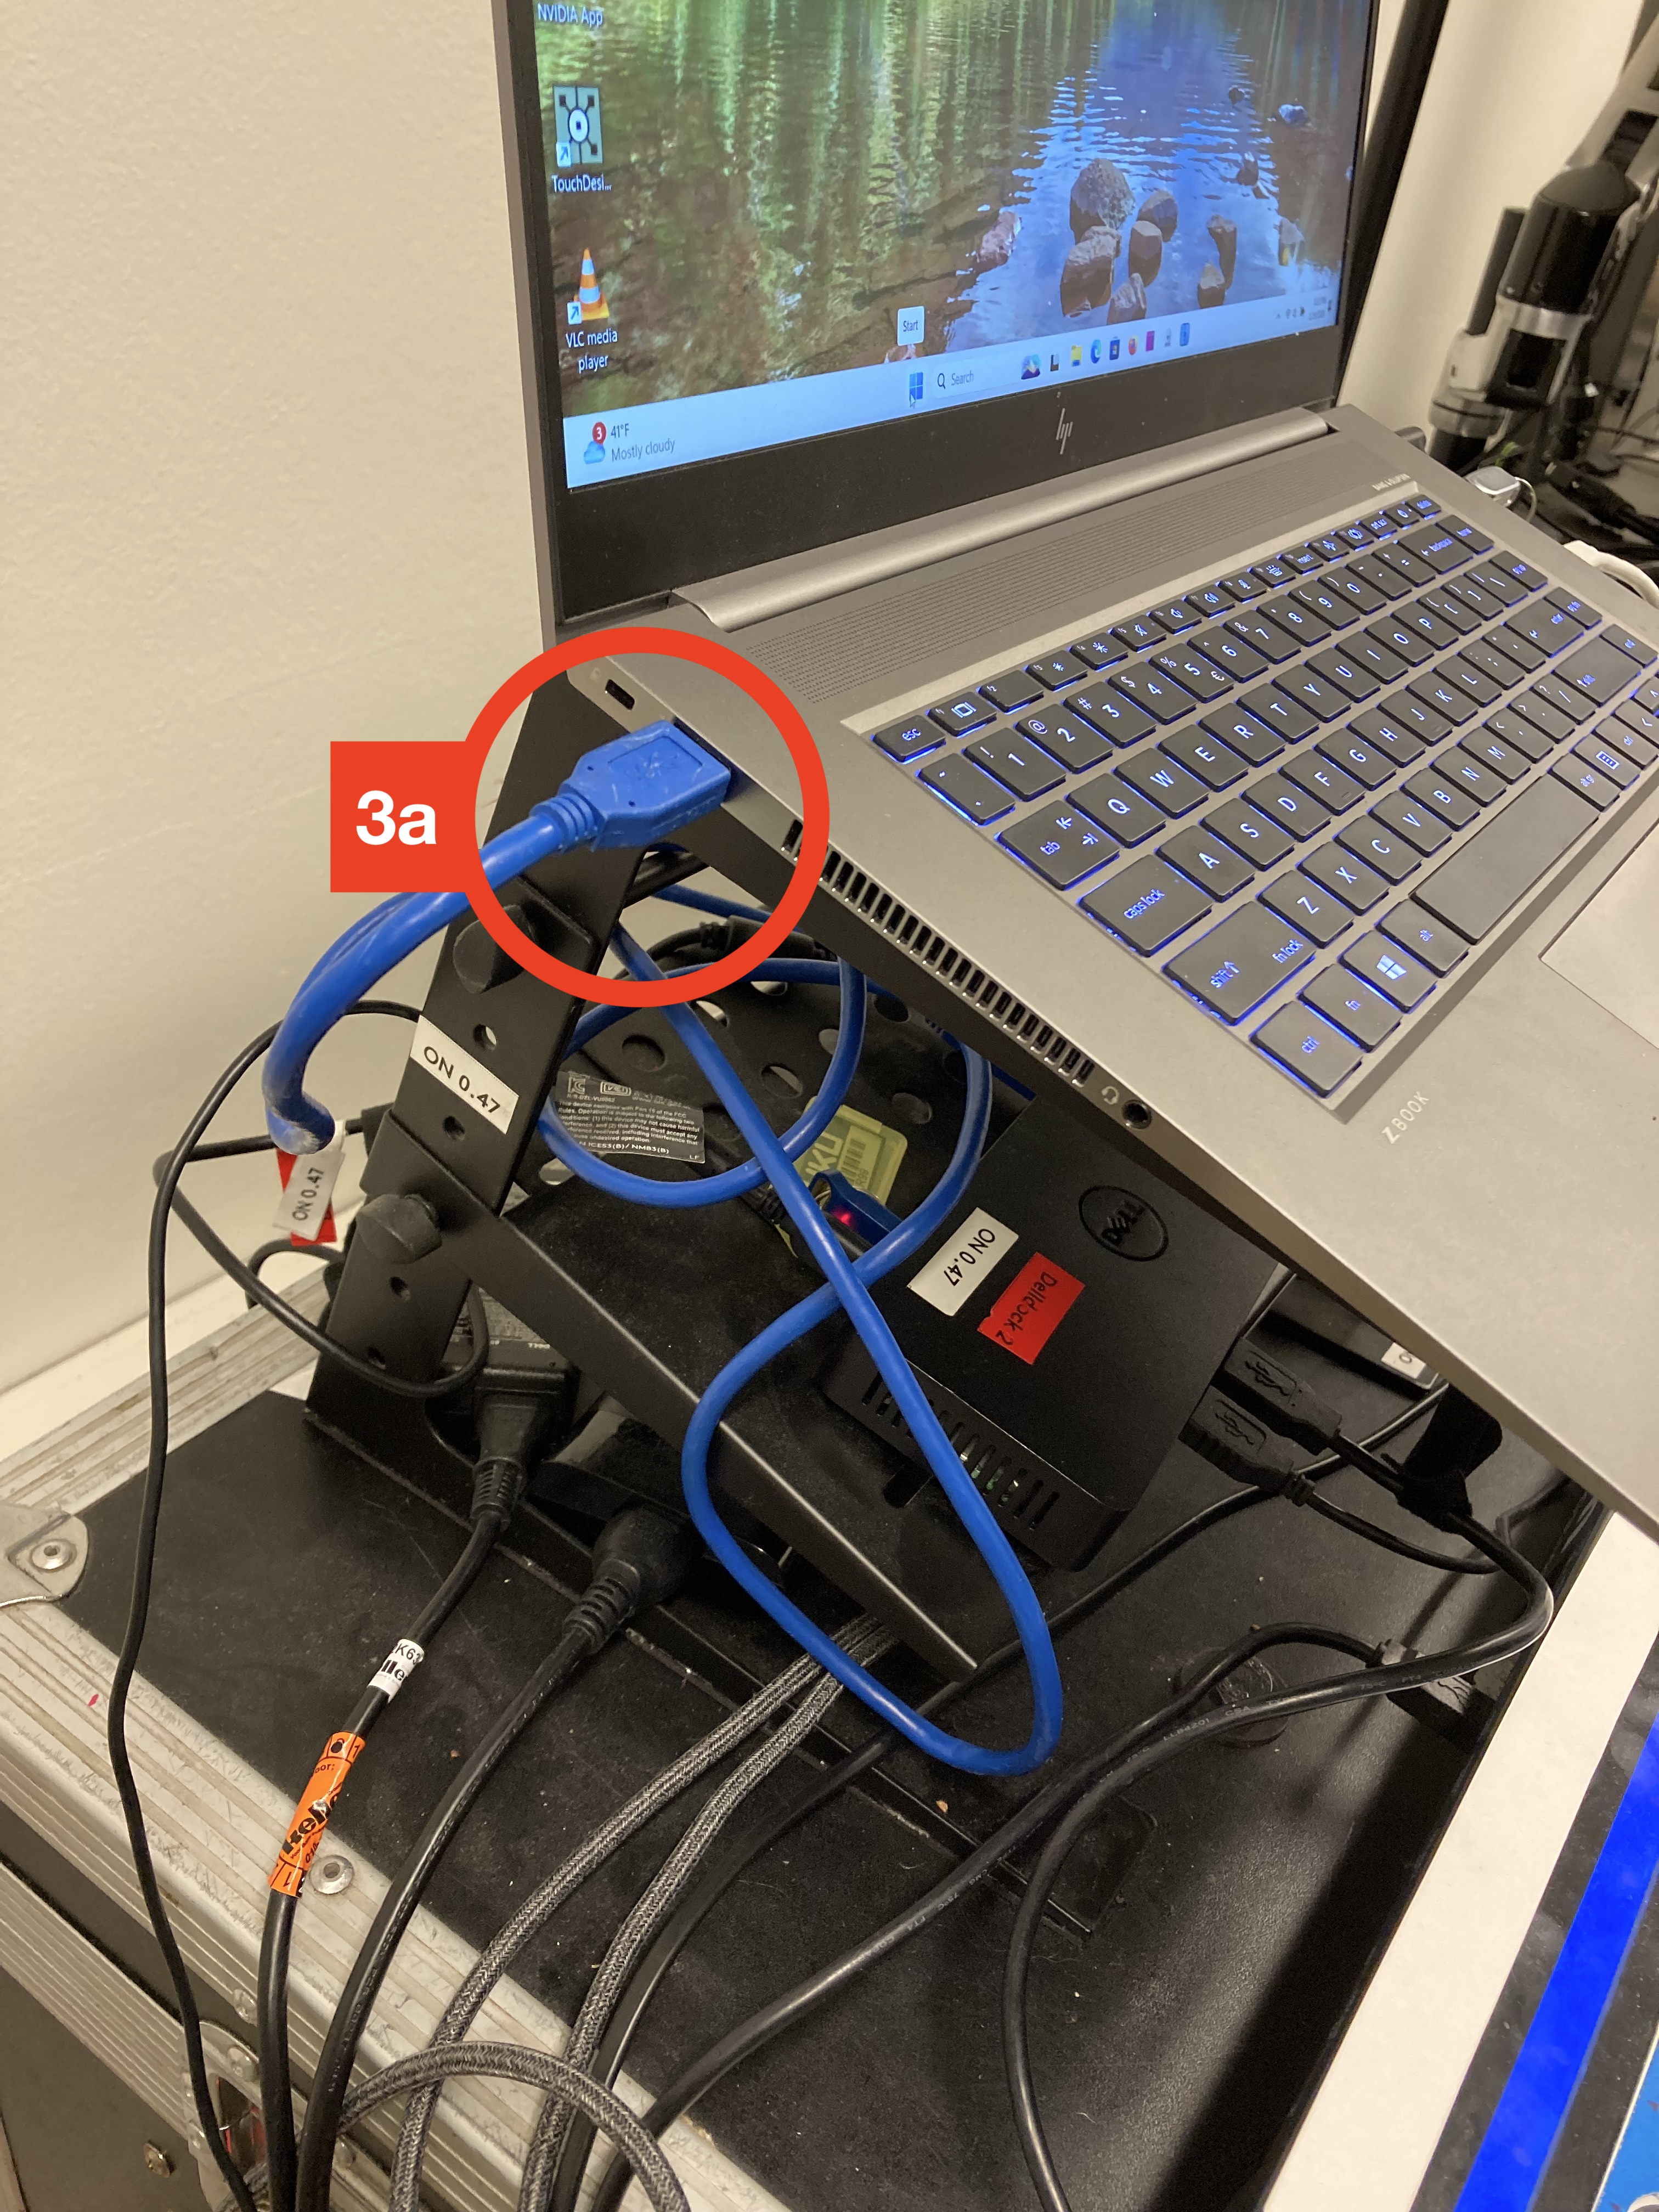
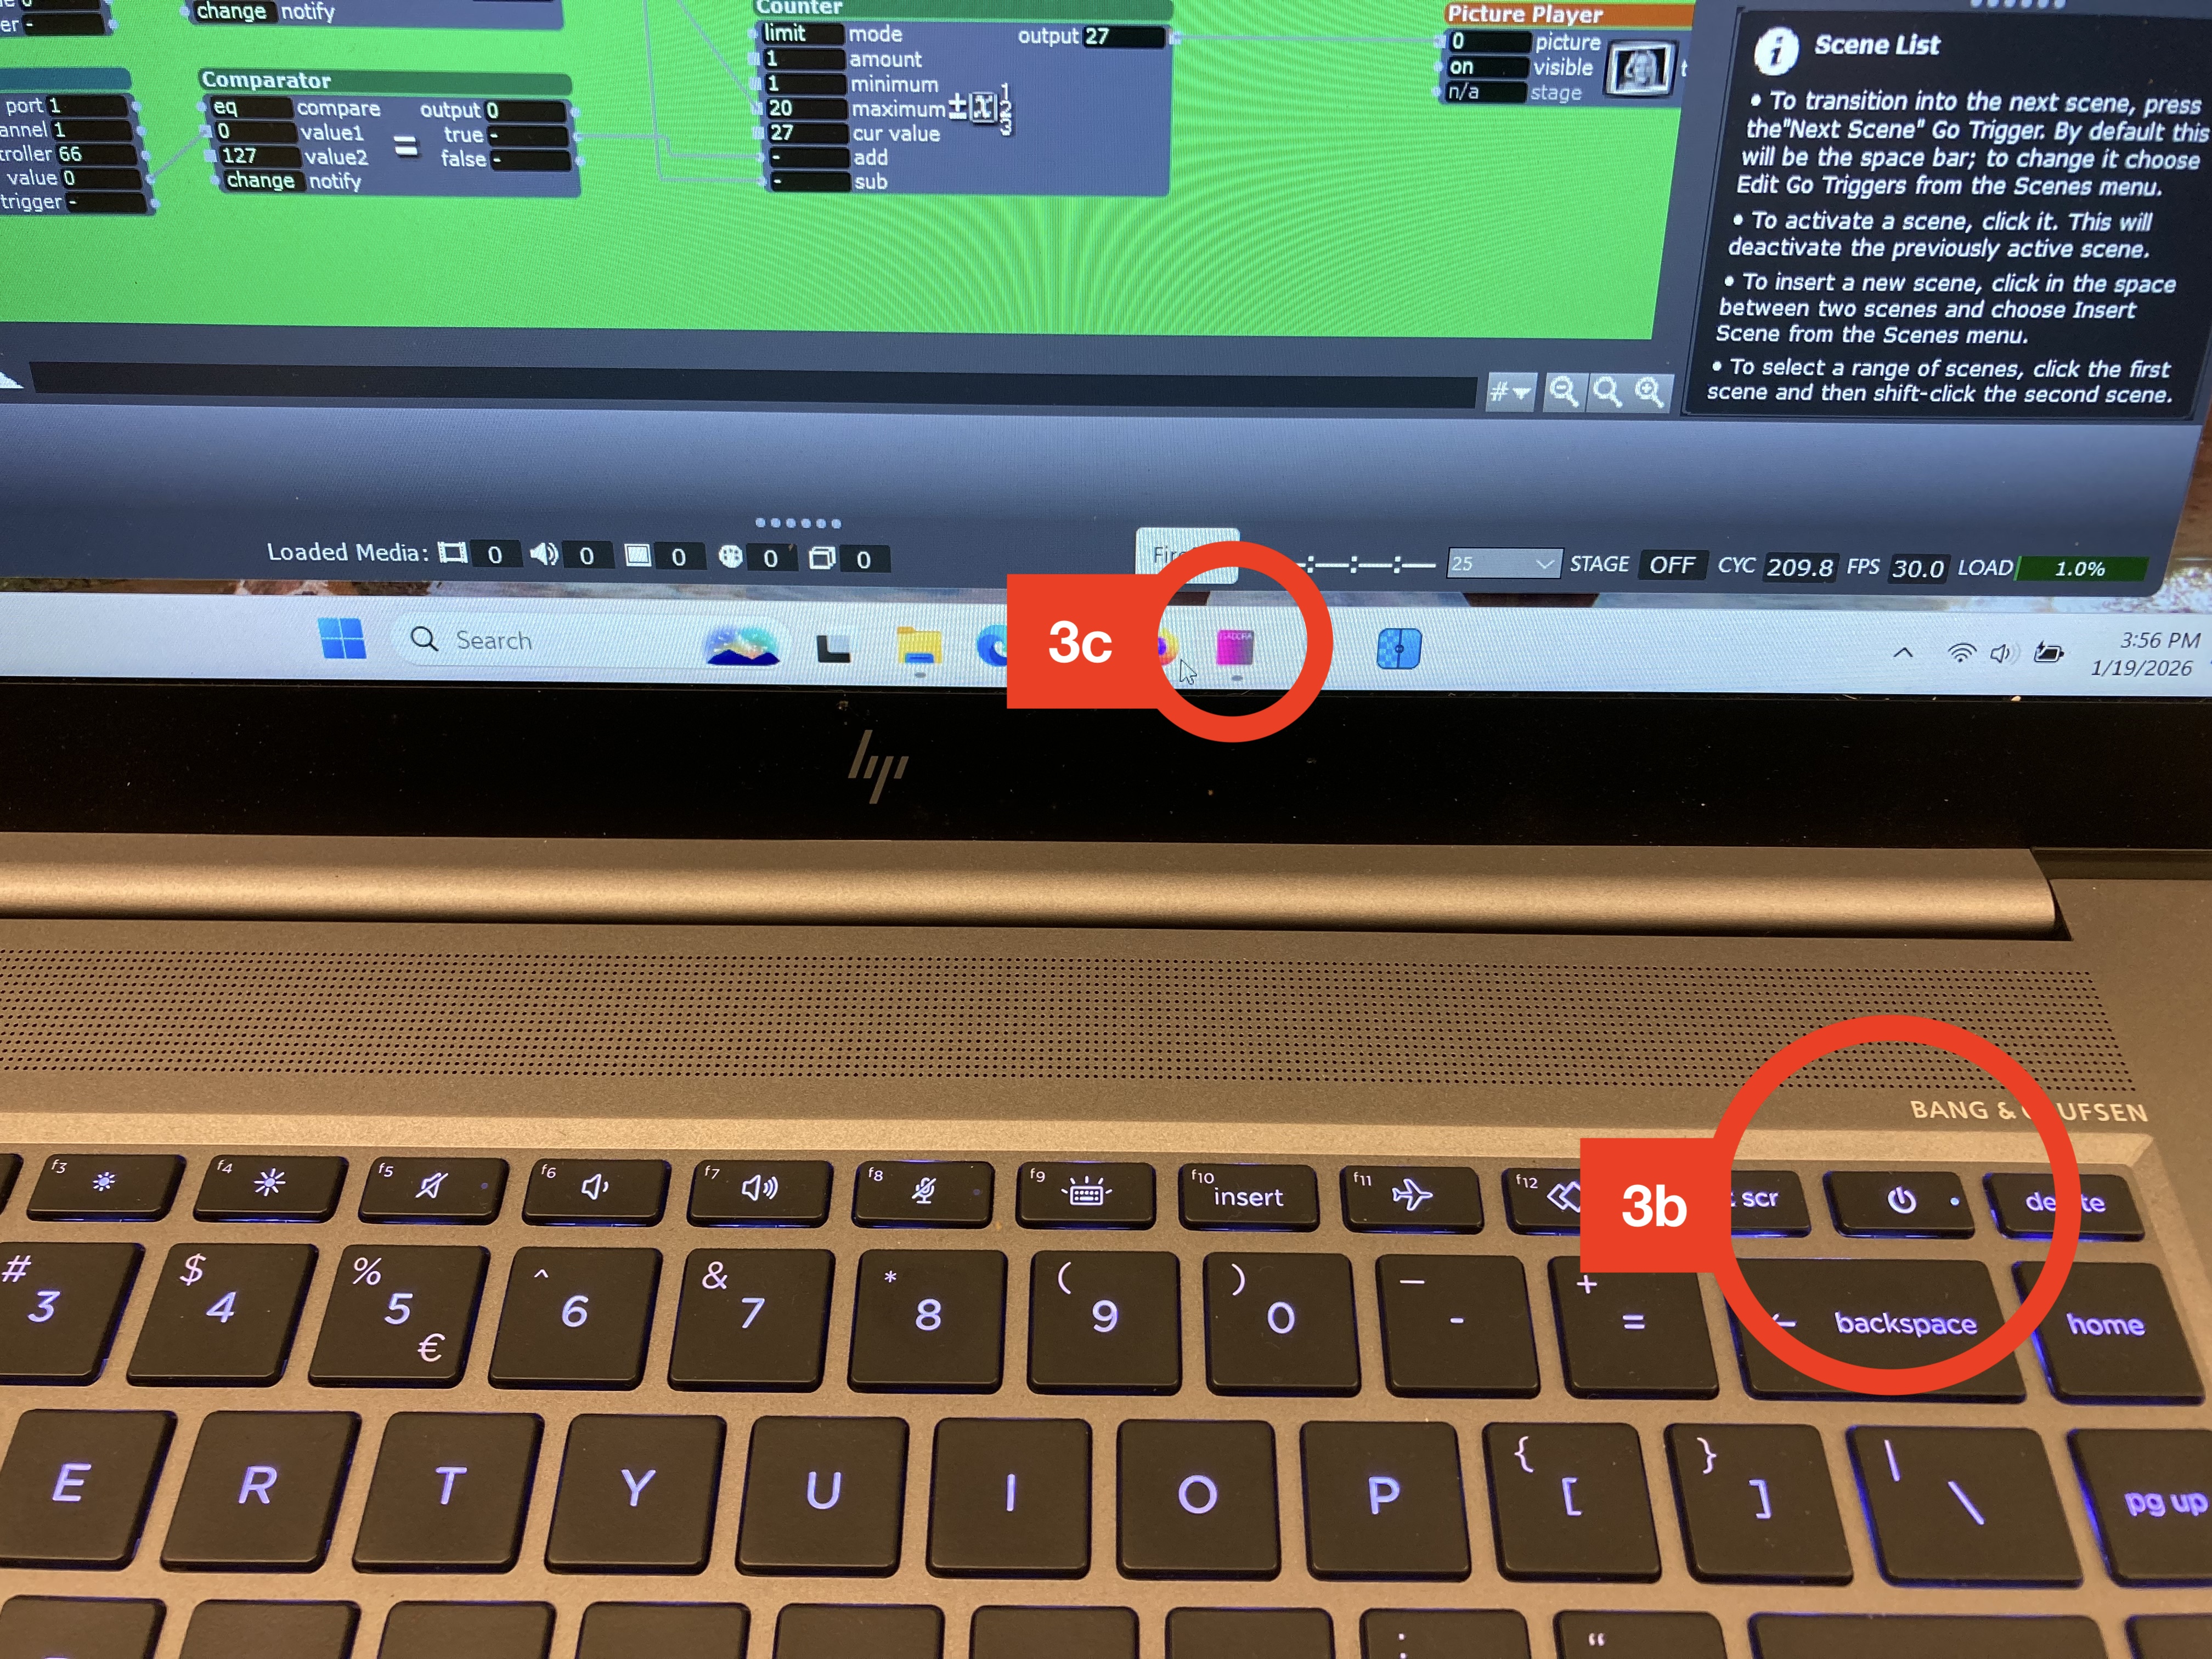
3 start up computer and run software
Plug in the blue USB cable before starting up the computer (3a). Start up the computer (3b) and log in (see usrnm & ww computer), and start up the Isadora software (3c)
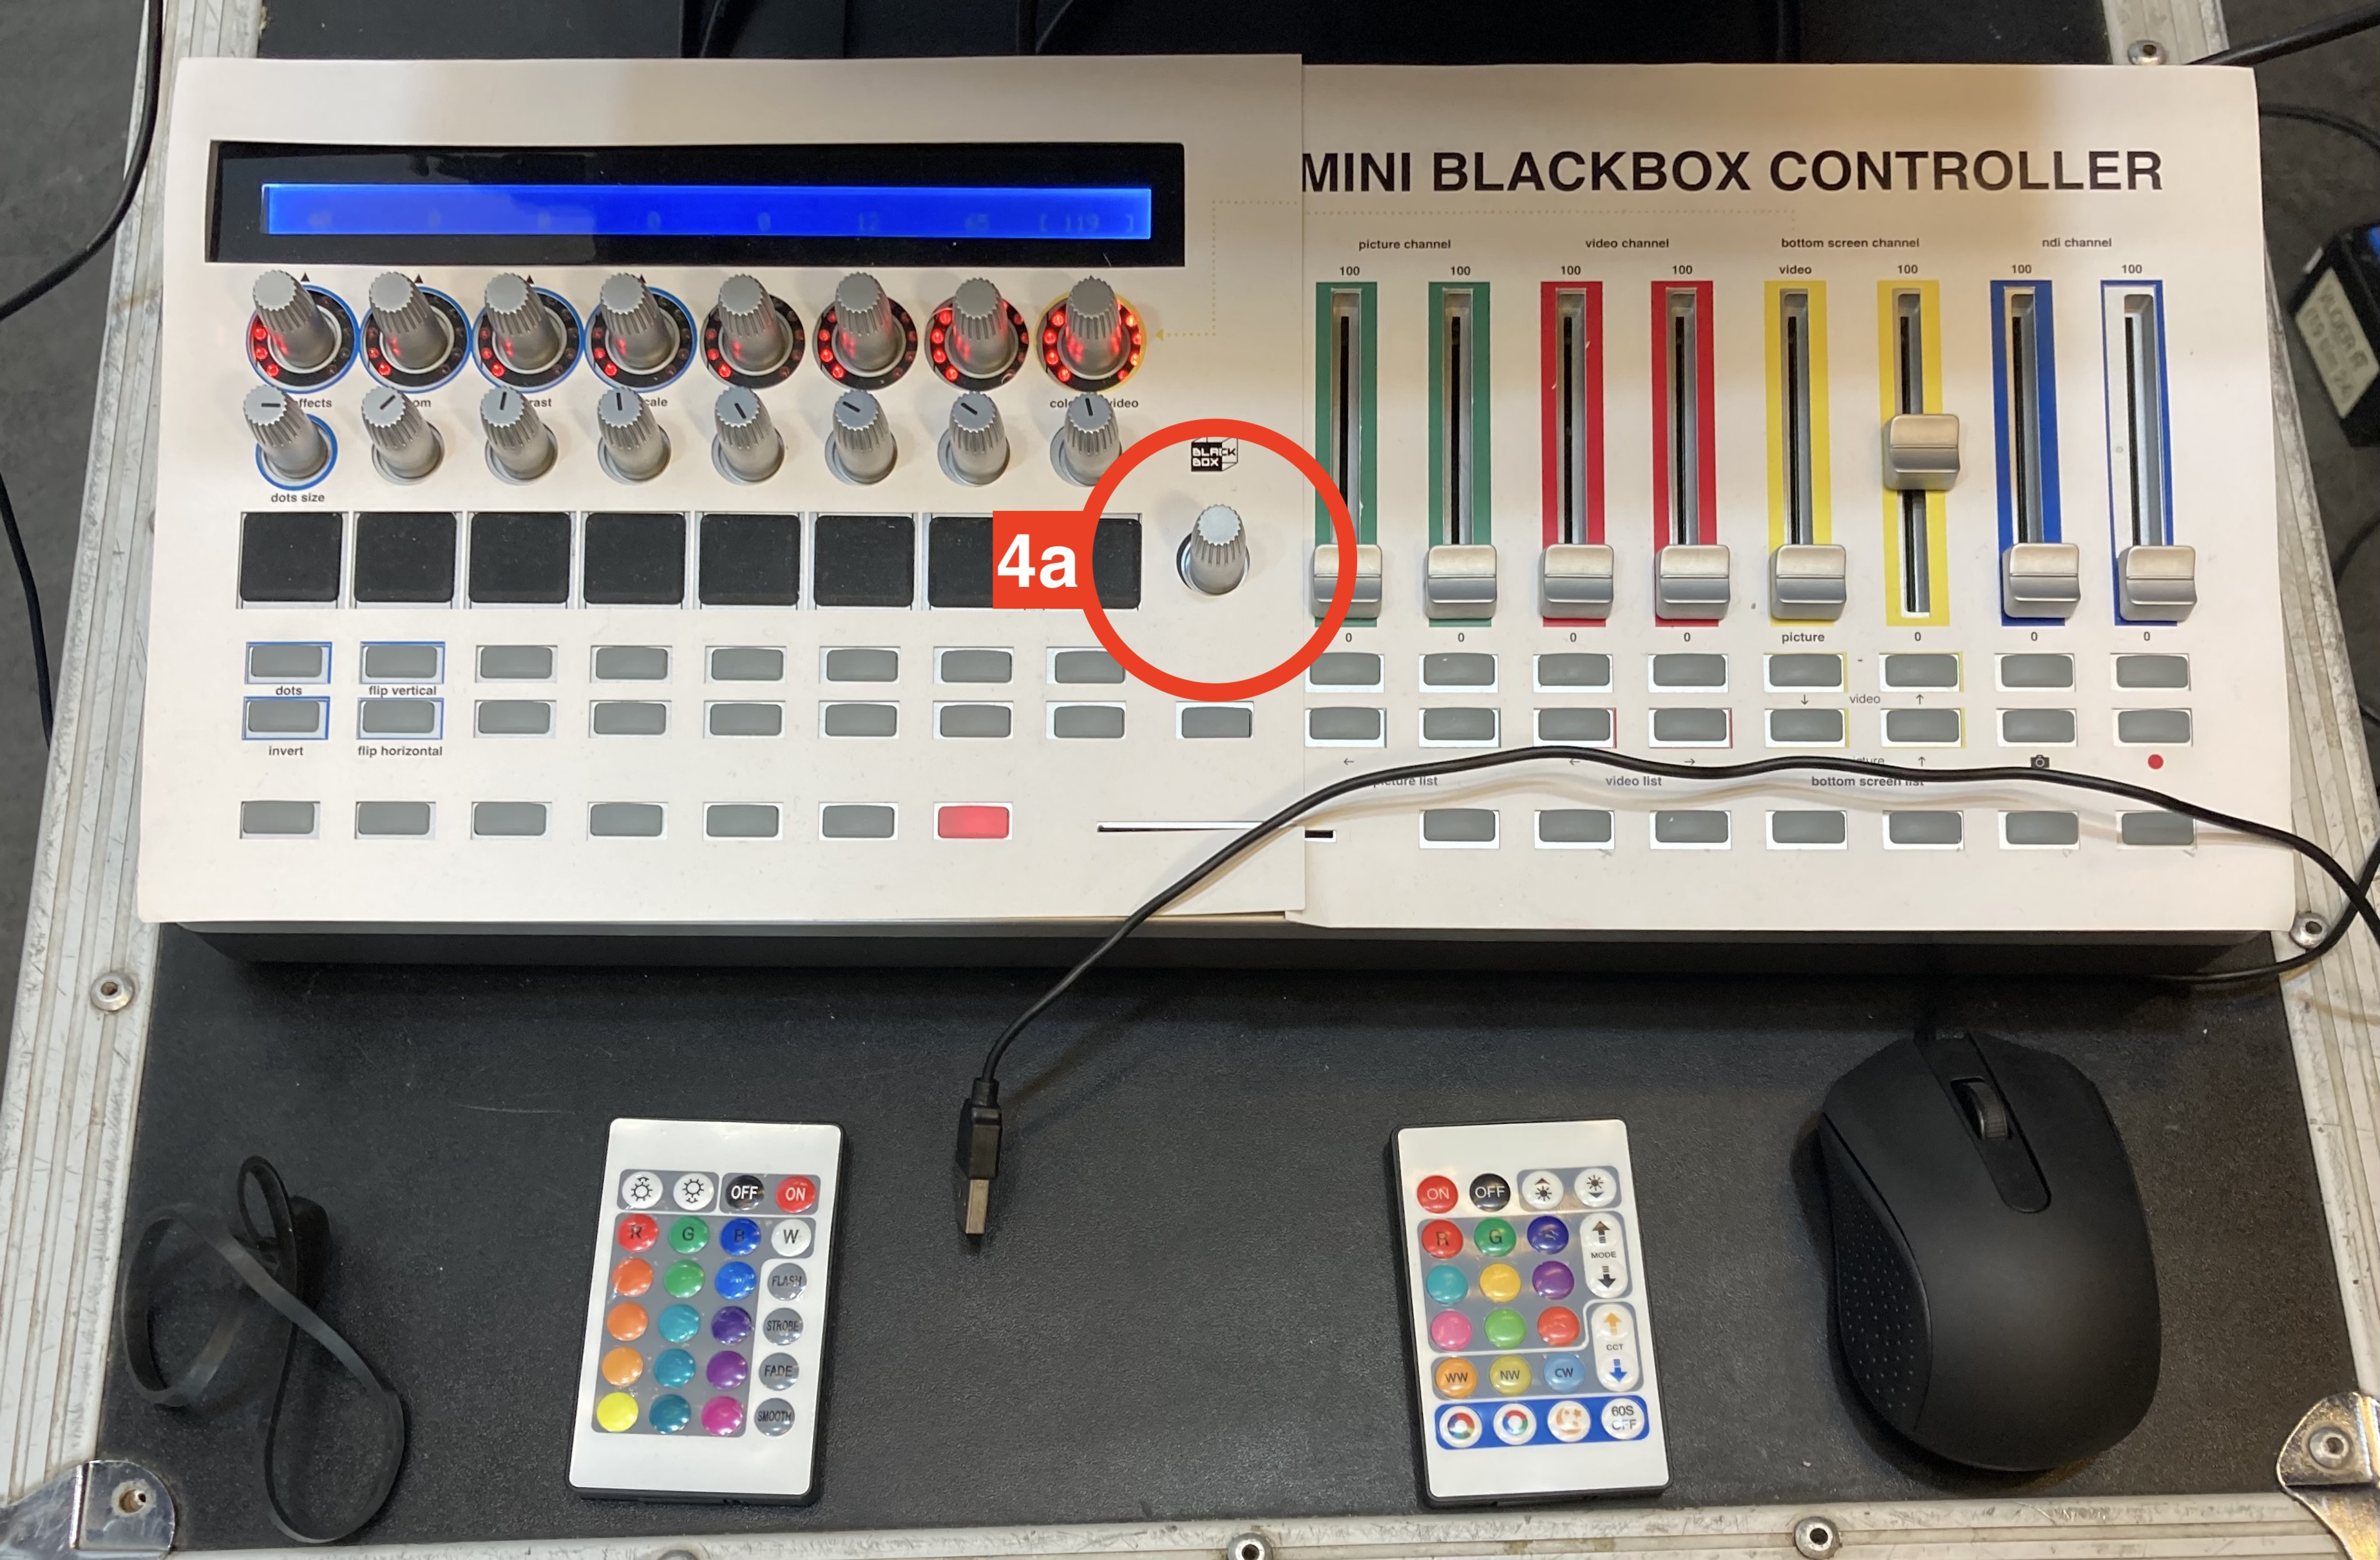
4 Load controller preset
On the Midi controller press the “preset” button (4a) and select the template ON047 (see controller display). Mostly it is the default setting.
5 Open and create file
Double click on the Isadora file “blank_????”, or open through it through the file menubar. Click away all notifications.
- 5a save this file in a newly created personal file and folder
- 5b select the folder via the menu “output” and “set captured media folder”
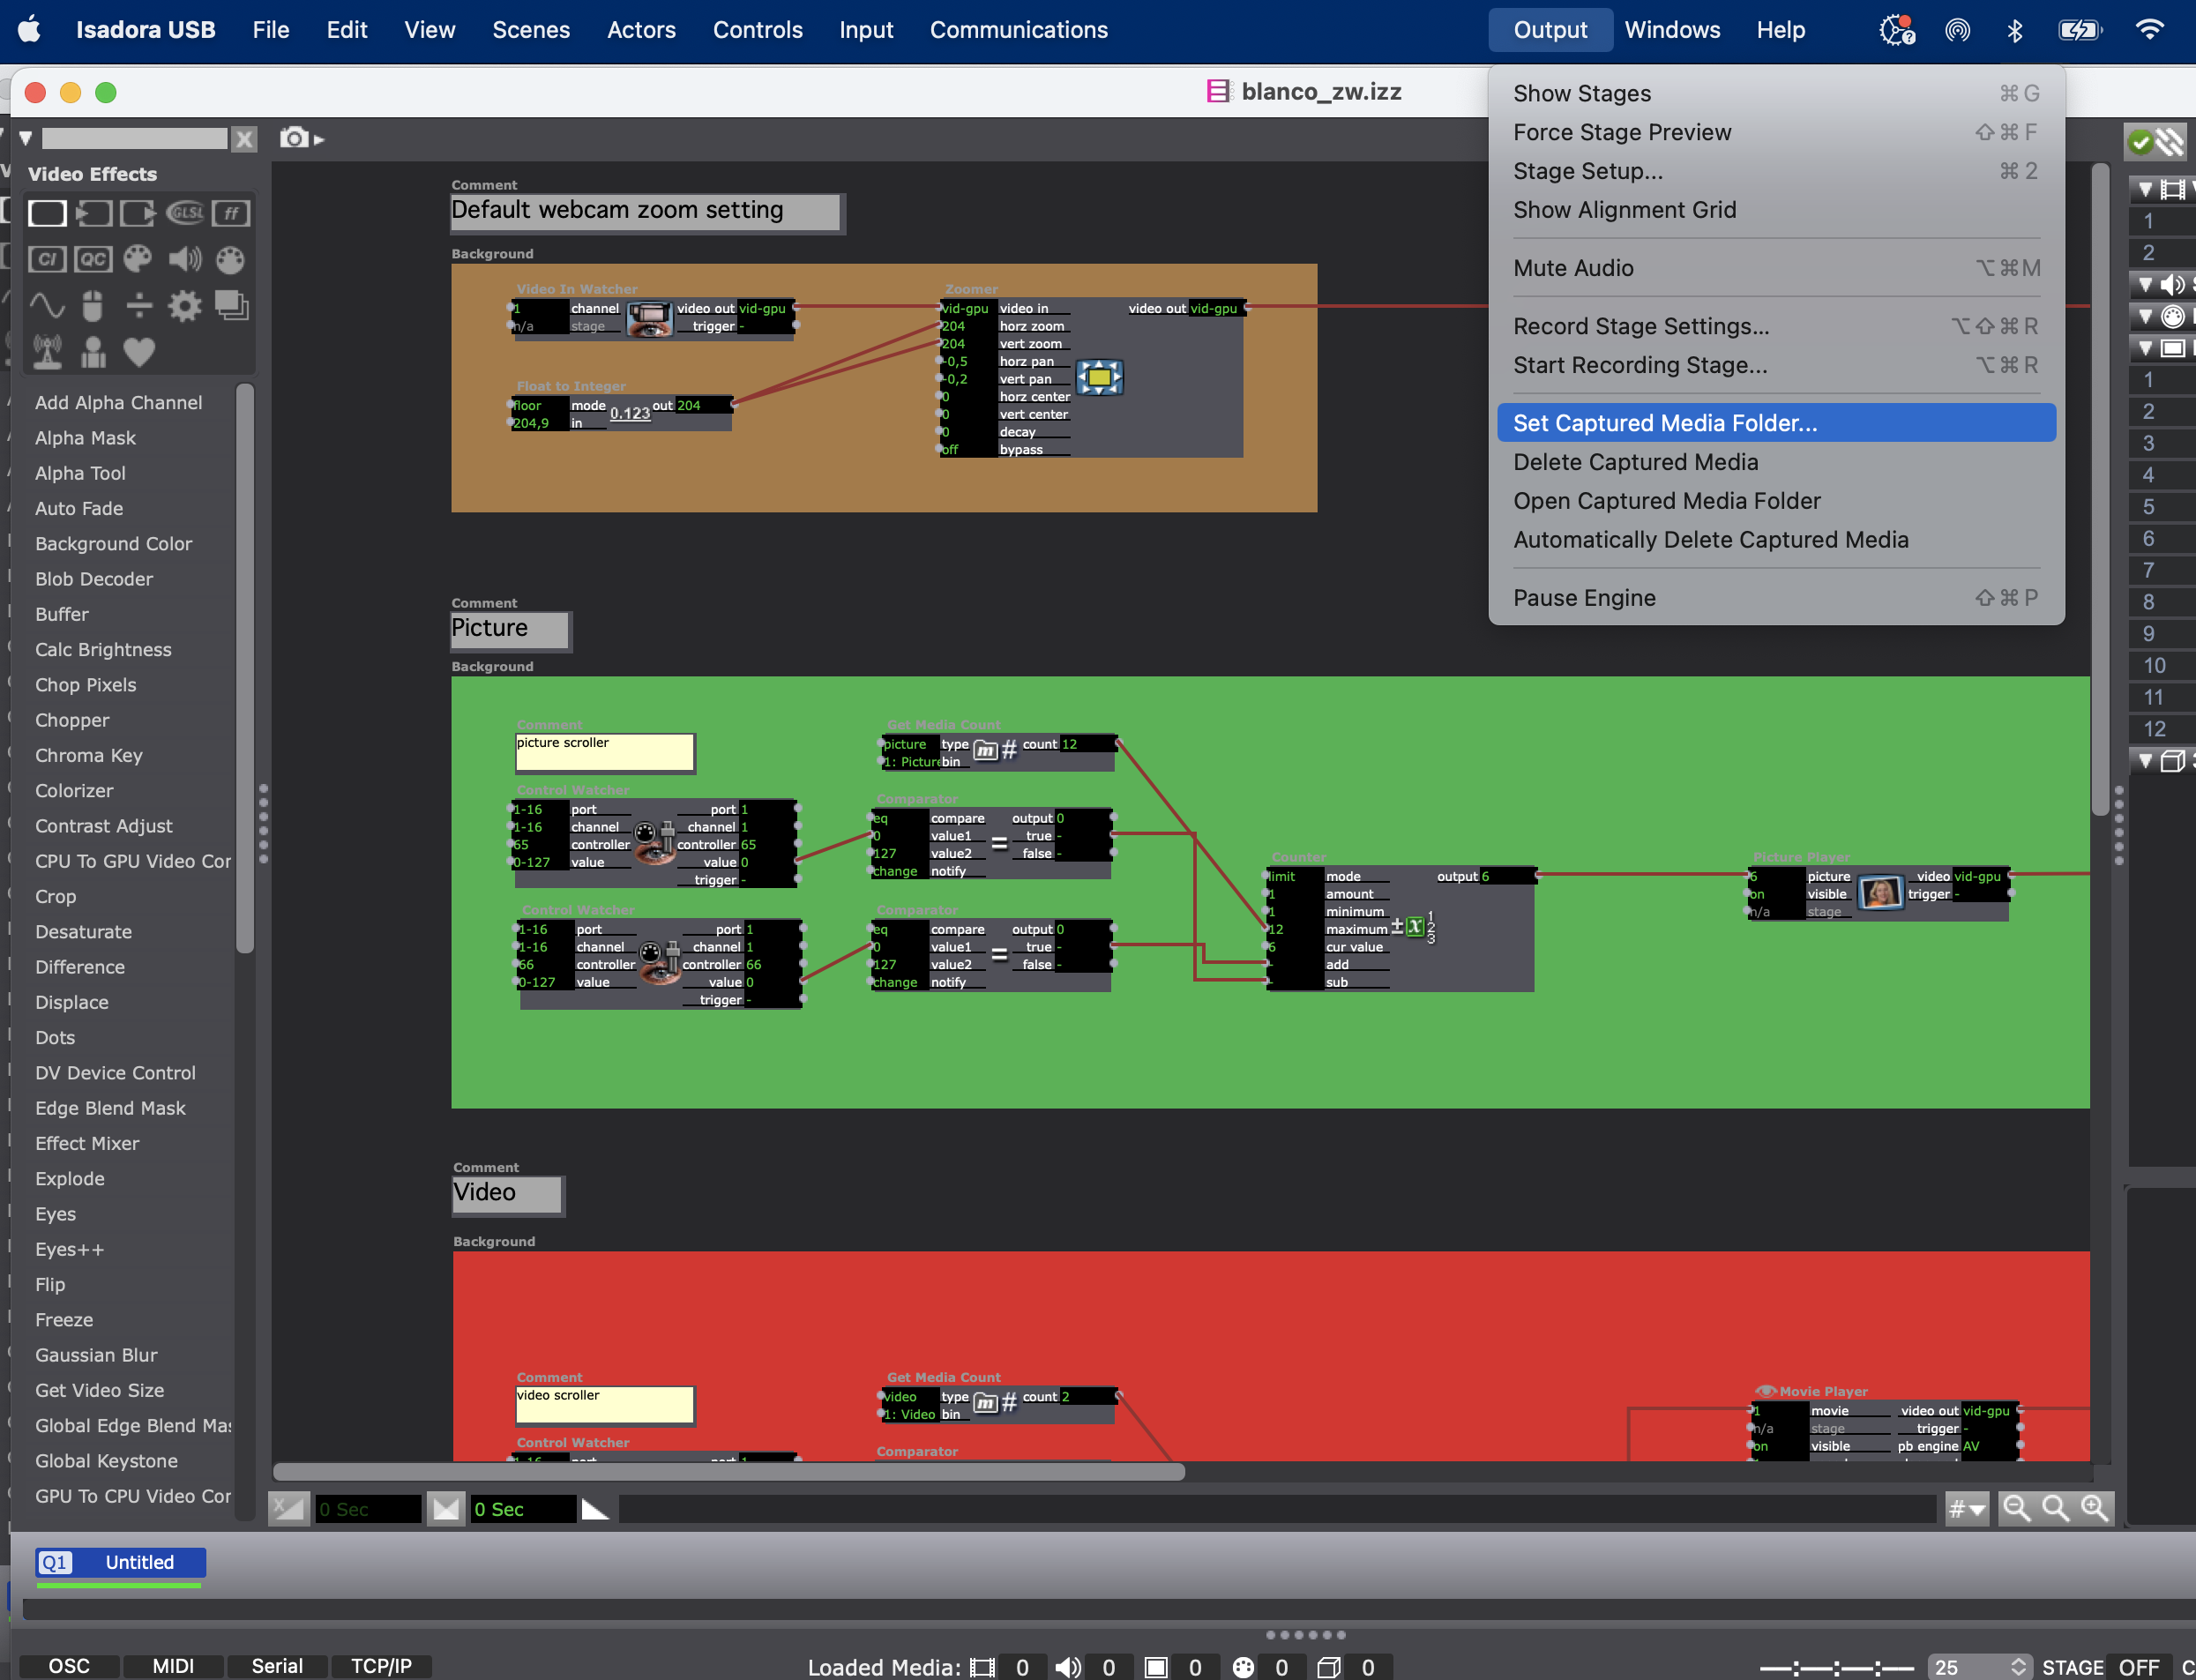
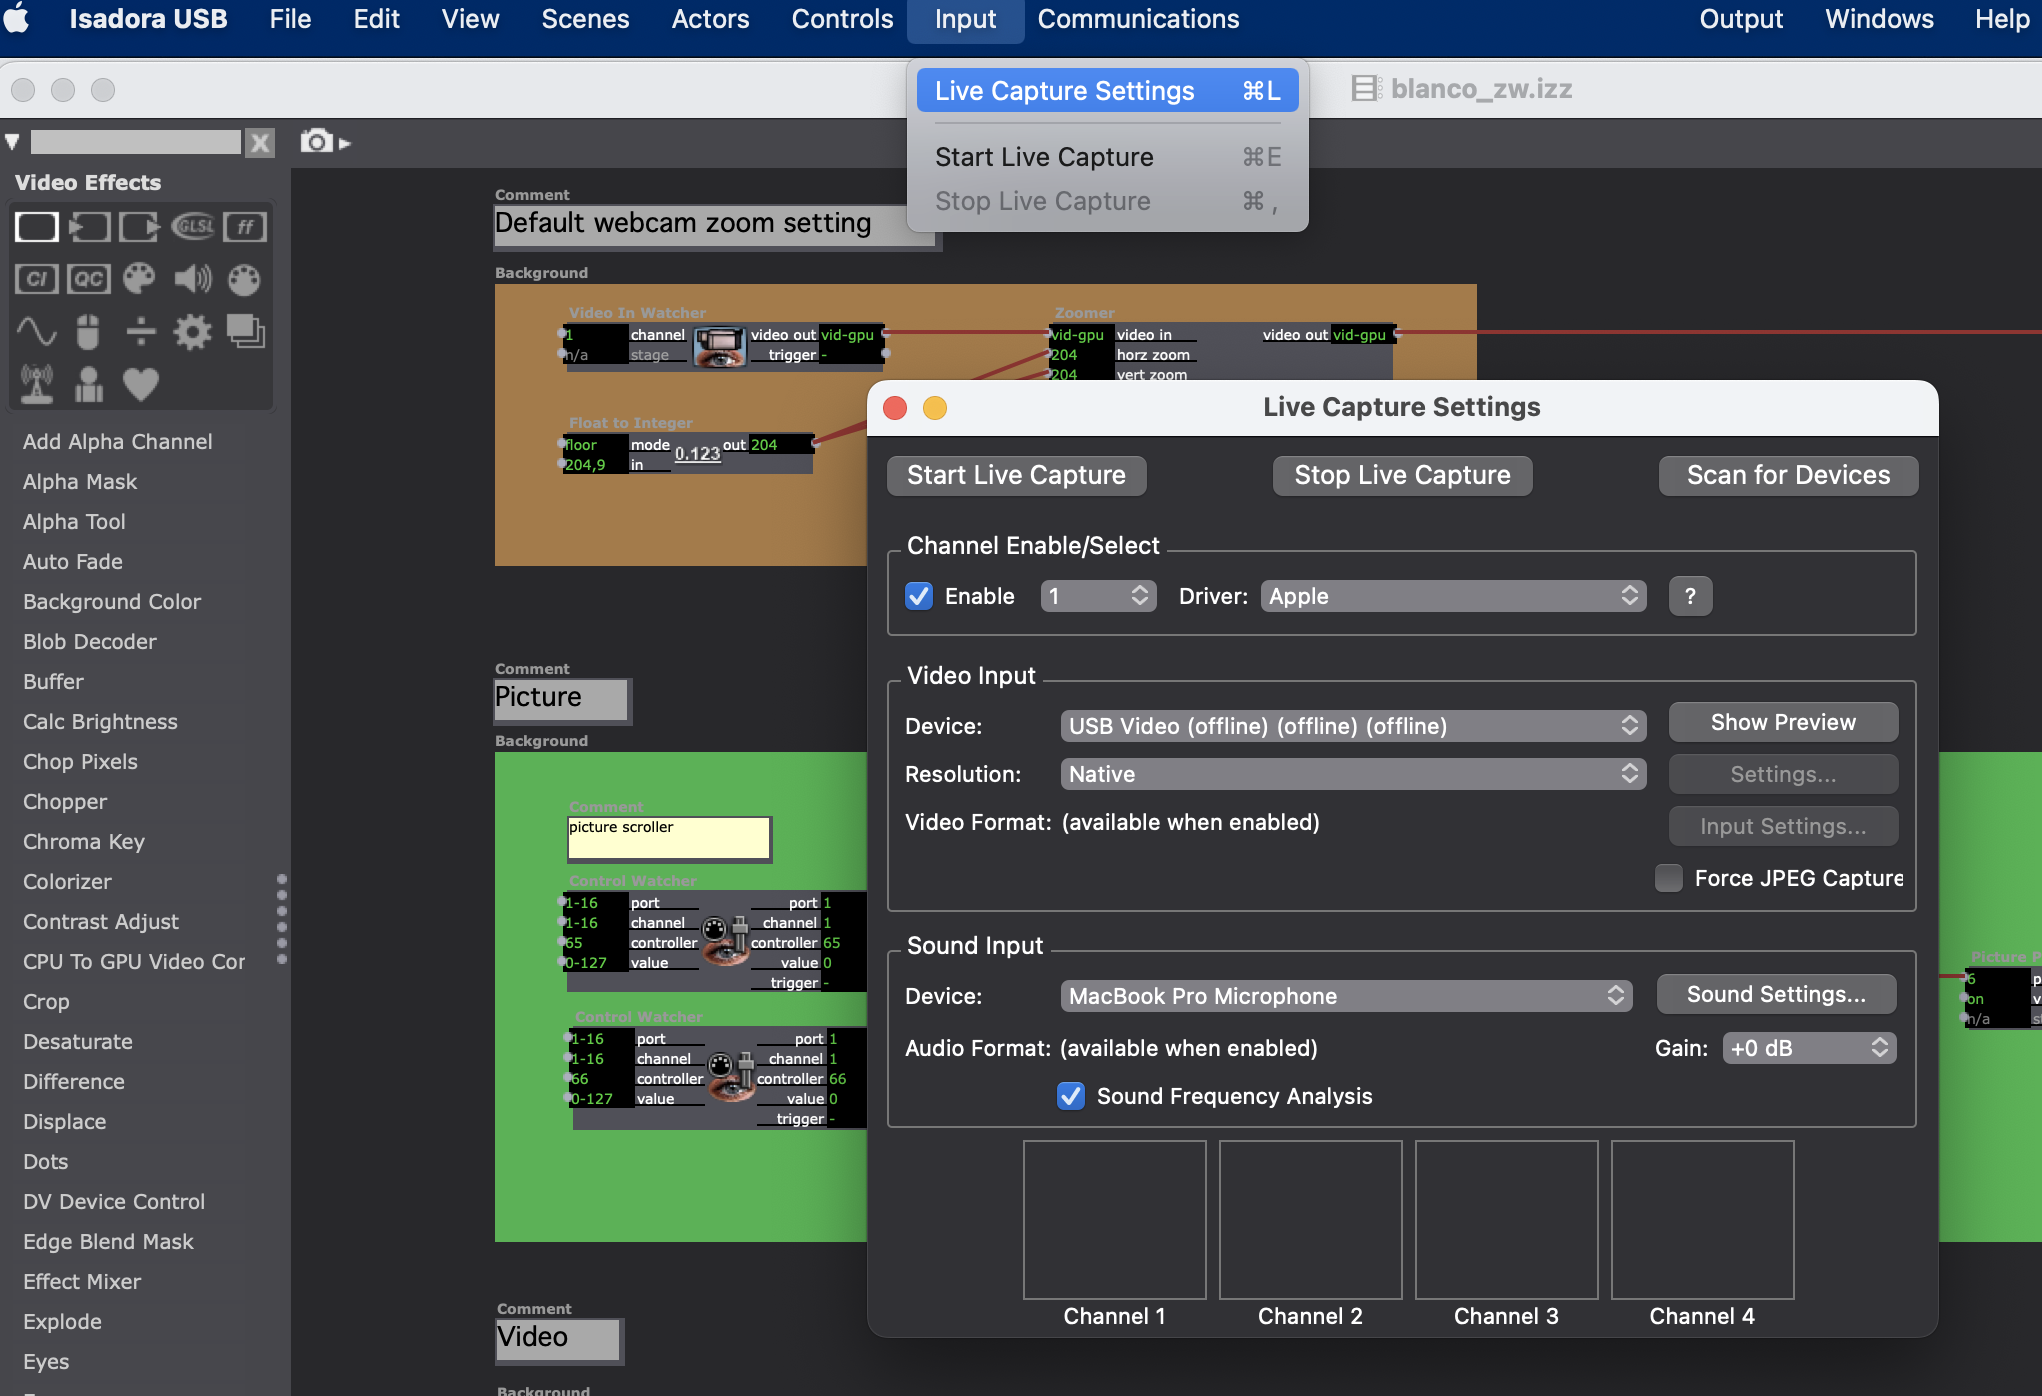
6 Select camera
Go to “input” in the menu bar and click “start live capture”, and select the Logitech C920 webcam in the video/ device dropdown menu
7 Fill the screens
Go to “Output” in the menu bar and click twice on “Force stage preview” (or shift + command + F)
8 Controlling the Logitech webcam
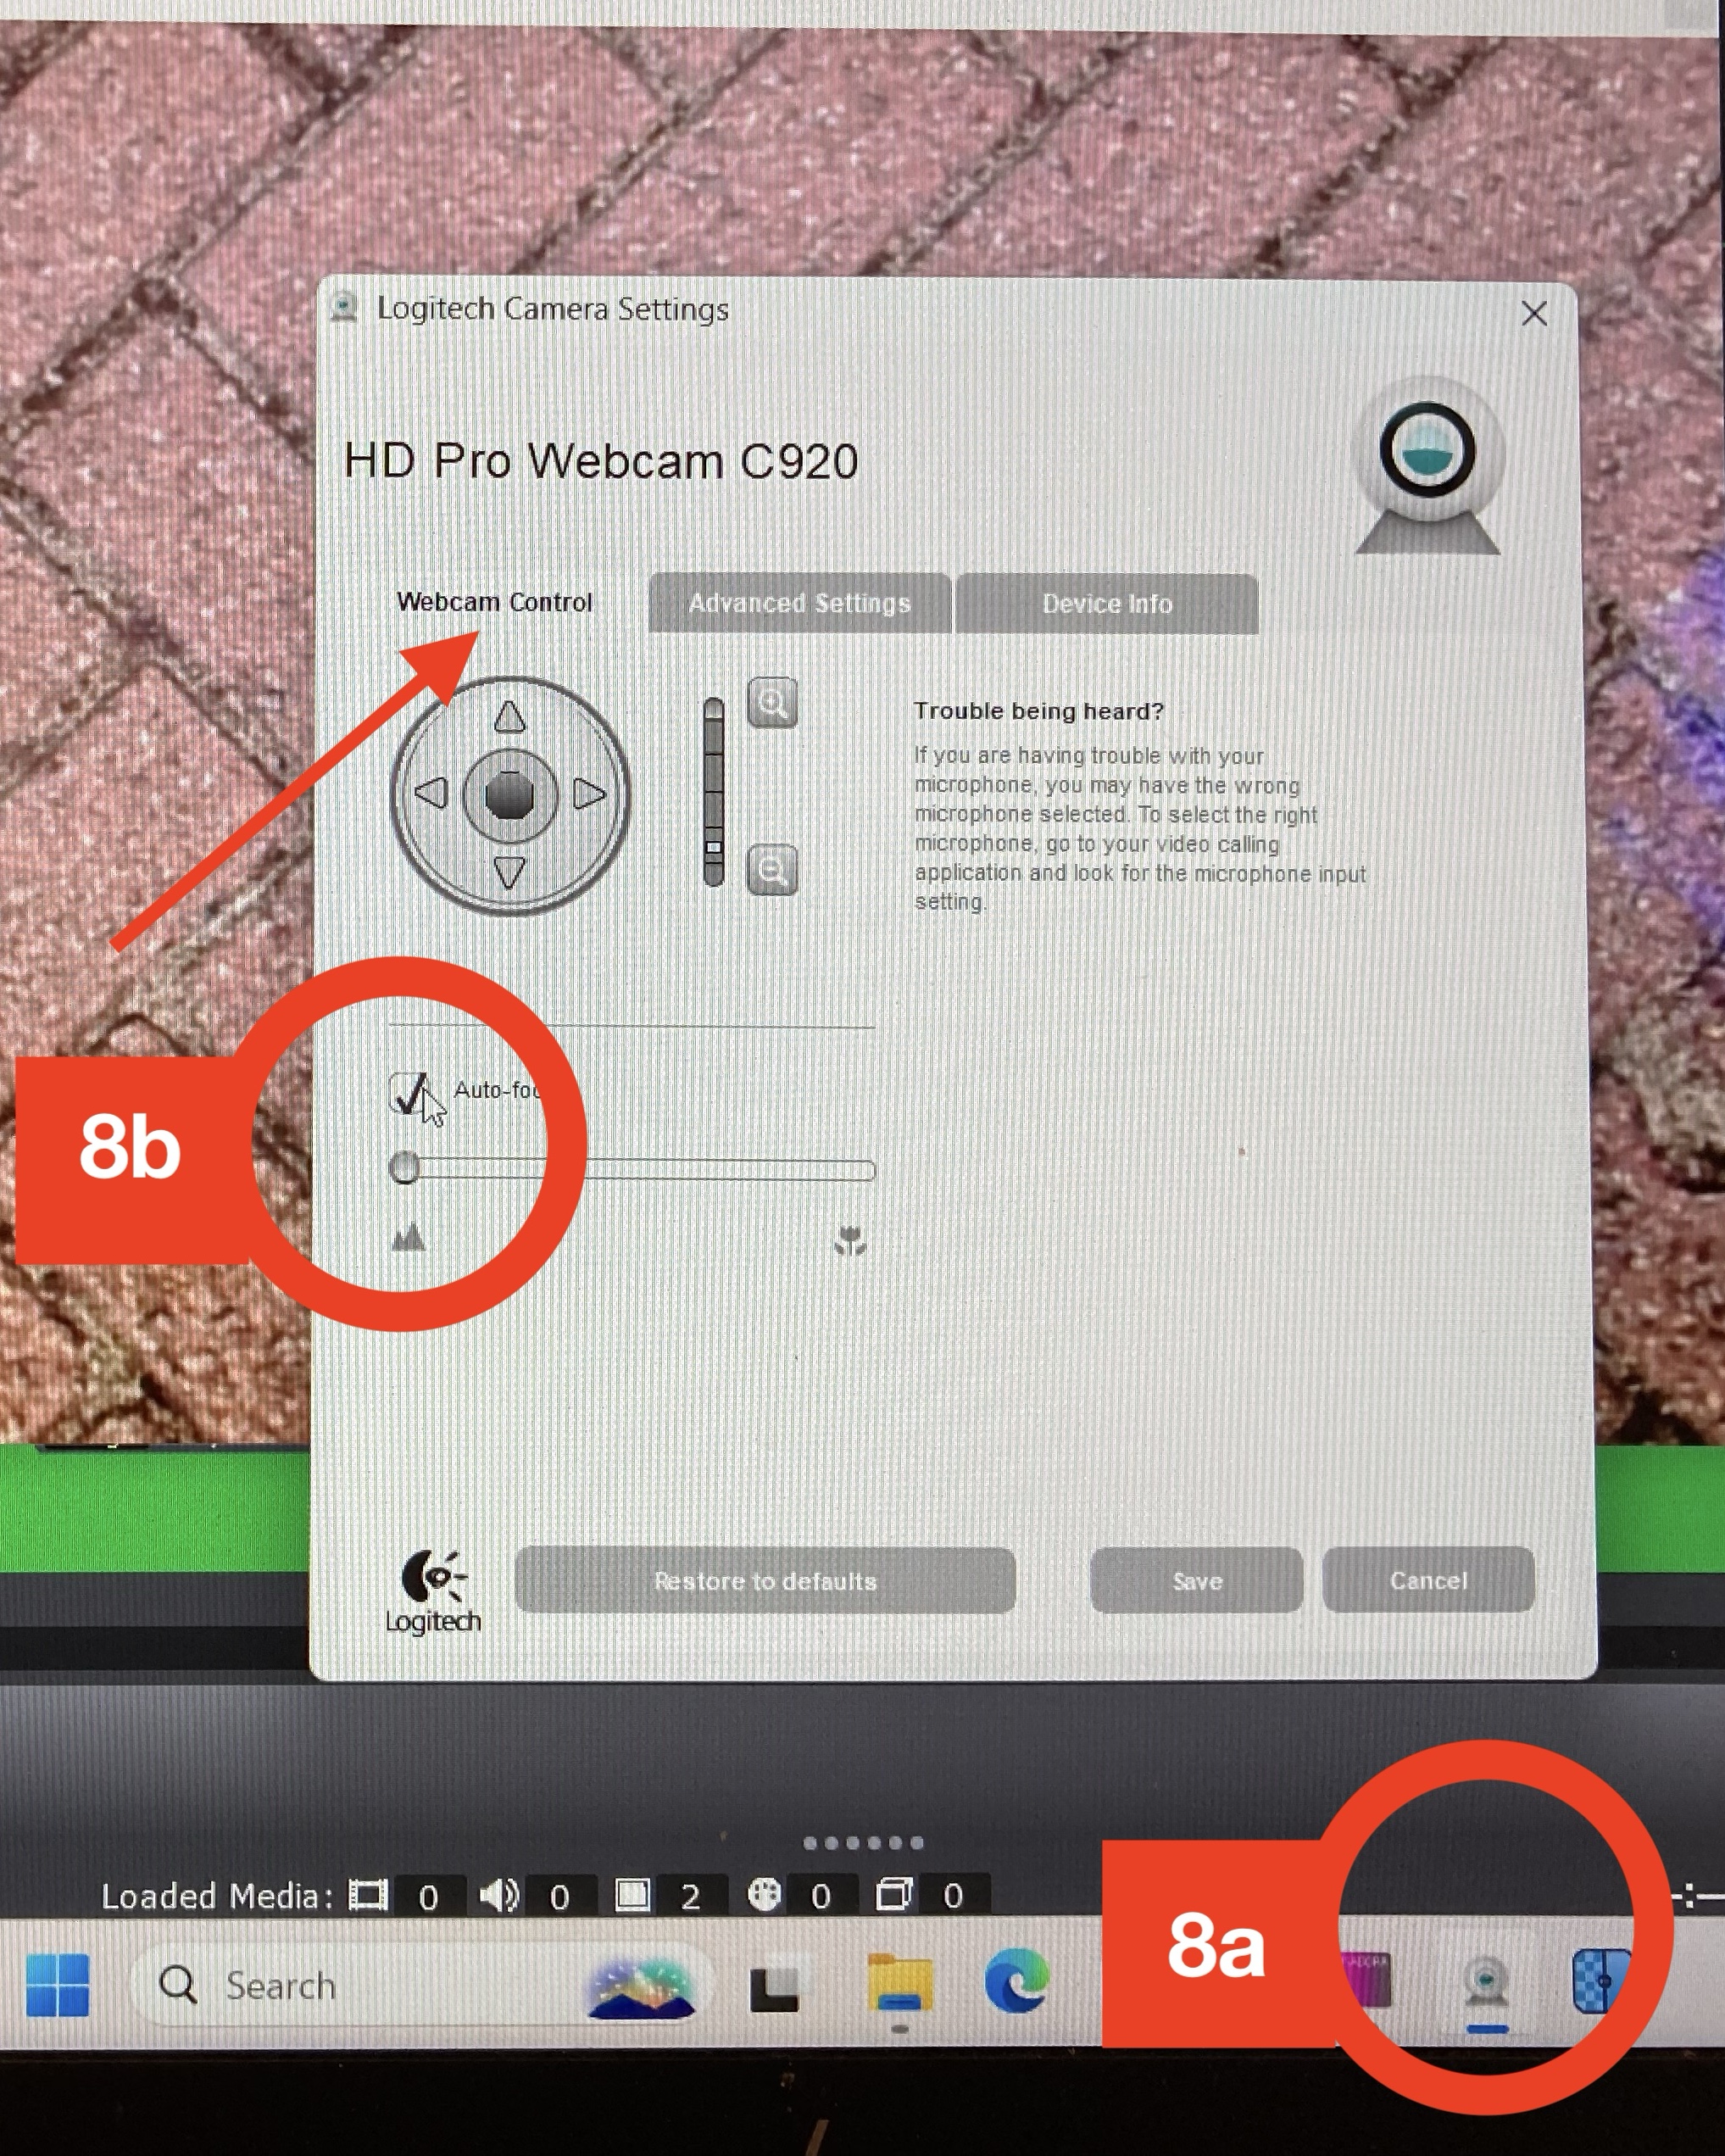
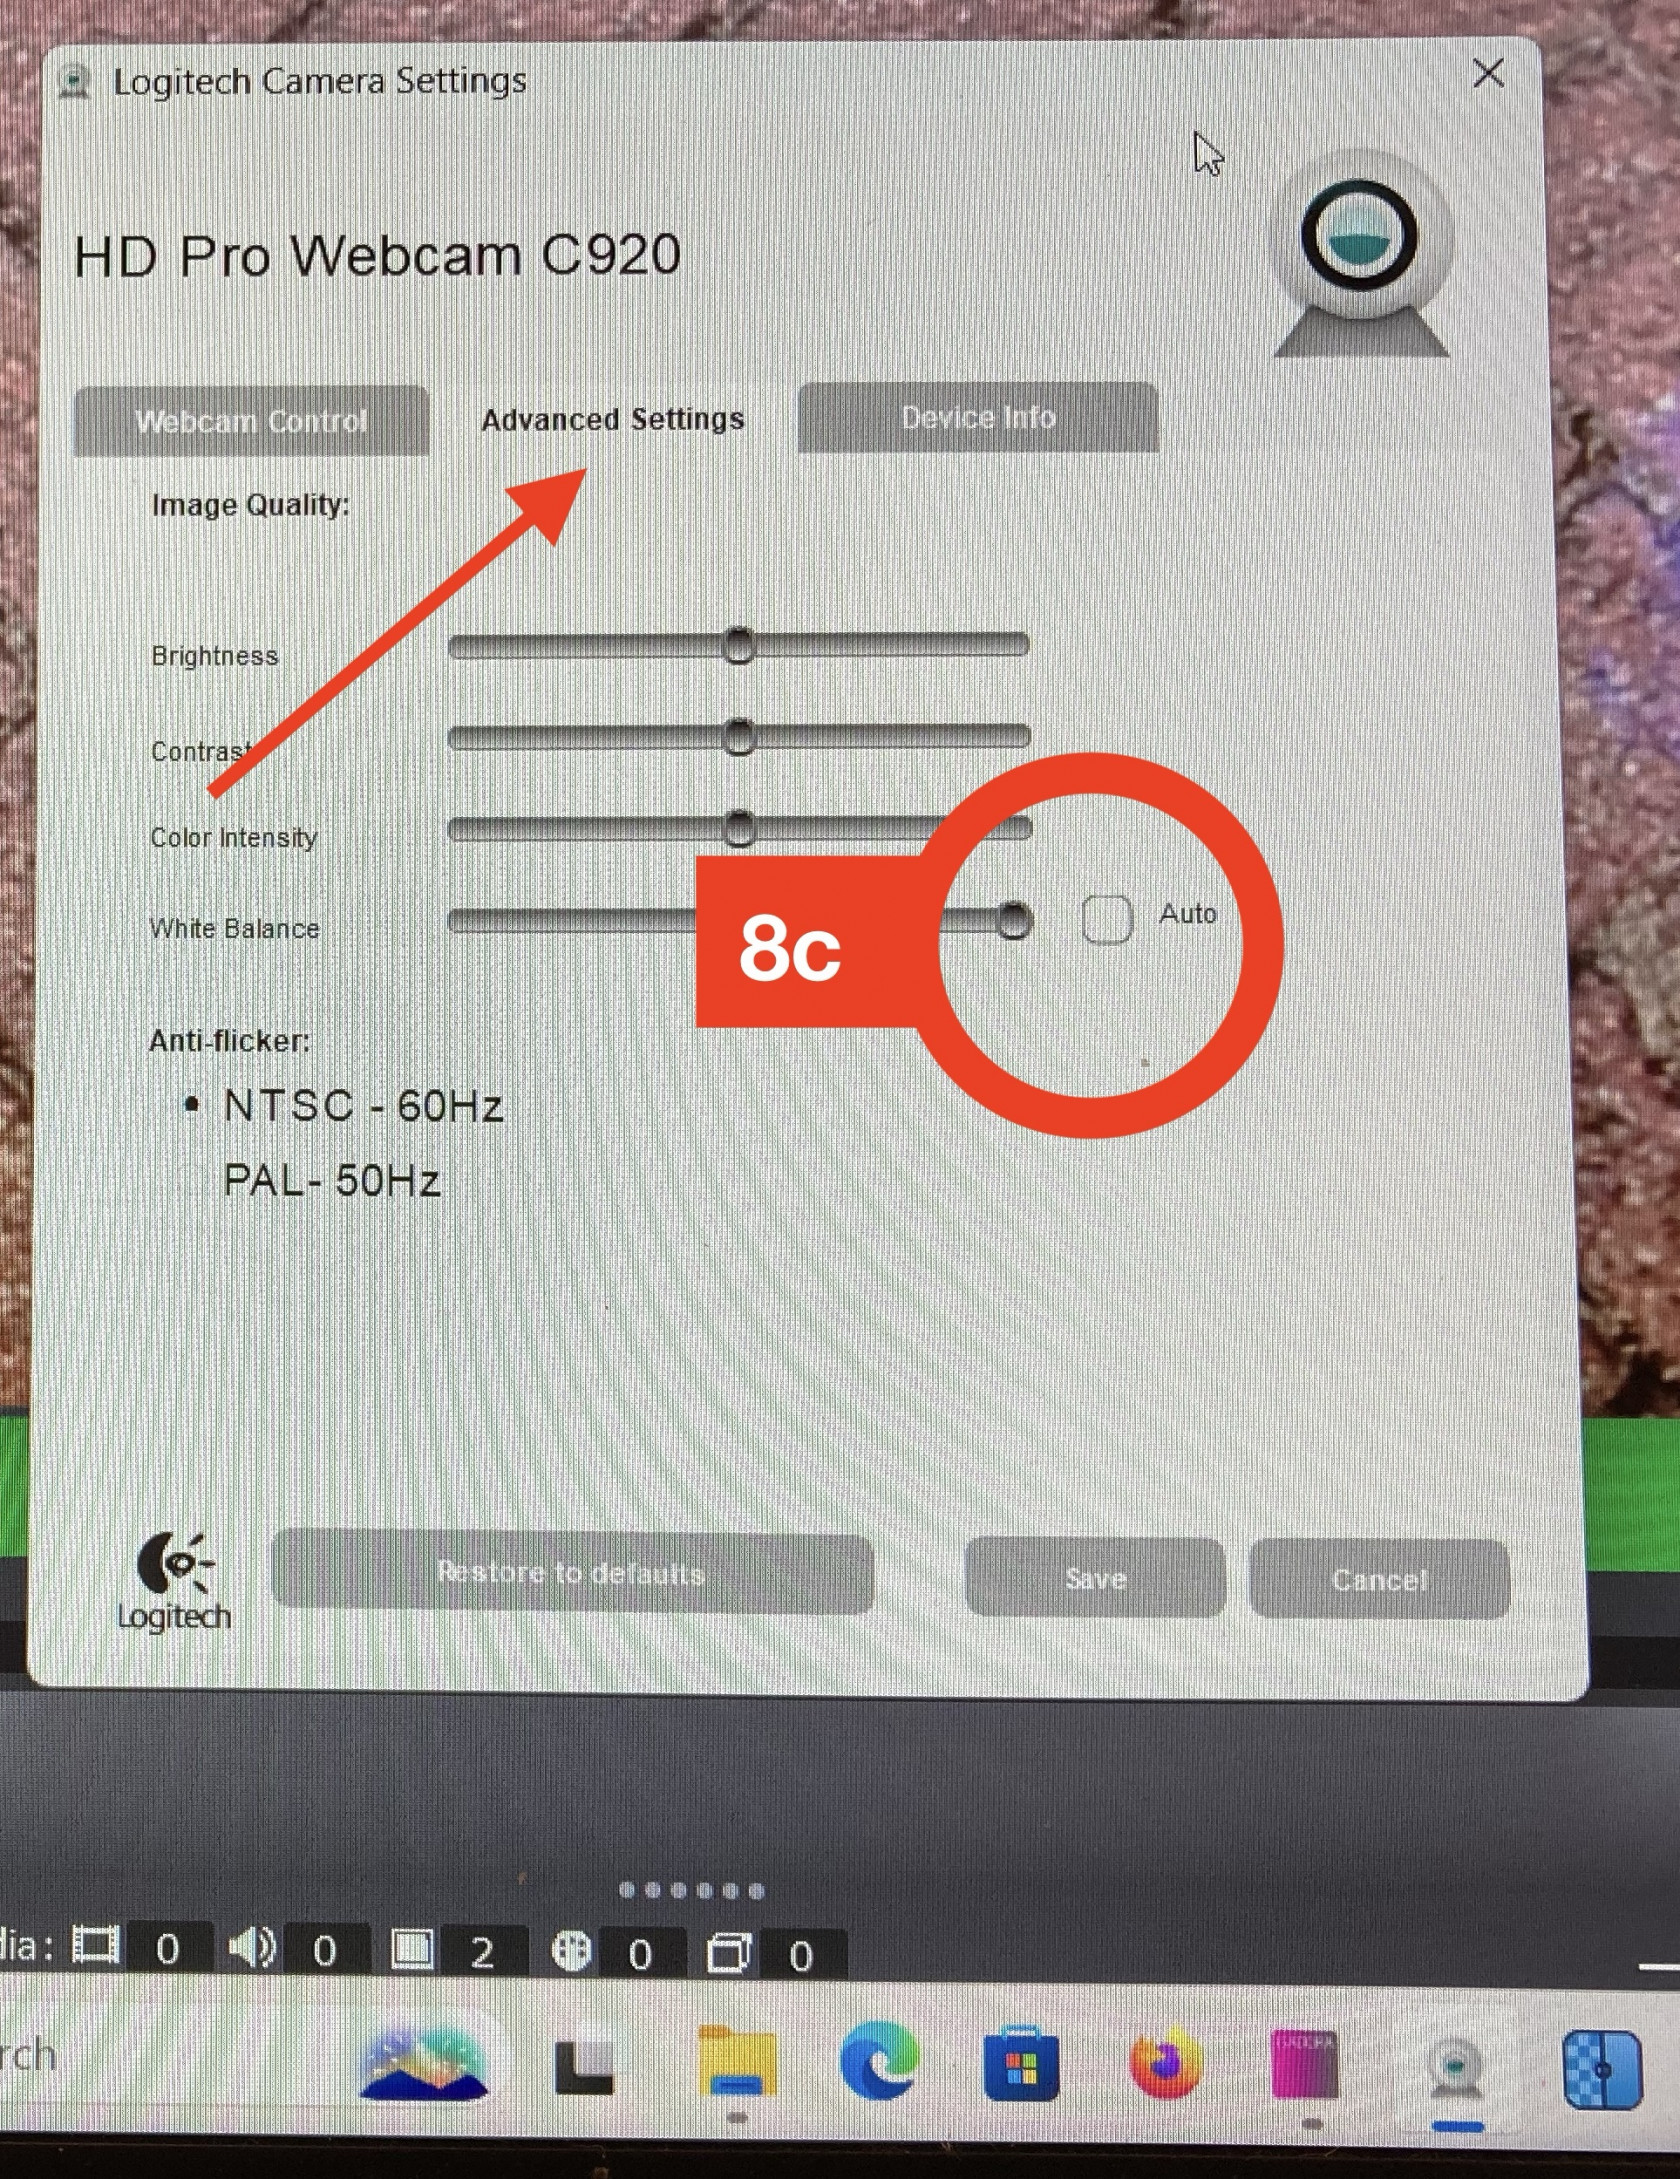
To prevent the camera from auto focussing and auto adjusting the white balance, you can run the control software (8a) and switch onoff the manualautomode override.(8b and 8c). Now you can mannually control the focus and white balance according to your needs.
9 Controller parameters
Now you can start adding materials to the multiplane cabinet and tweak and record with the controller following the hand out below.
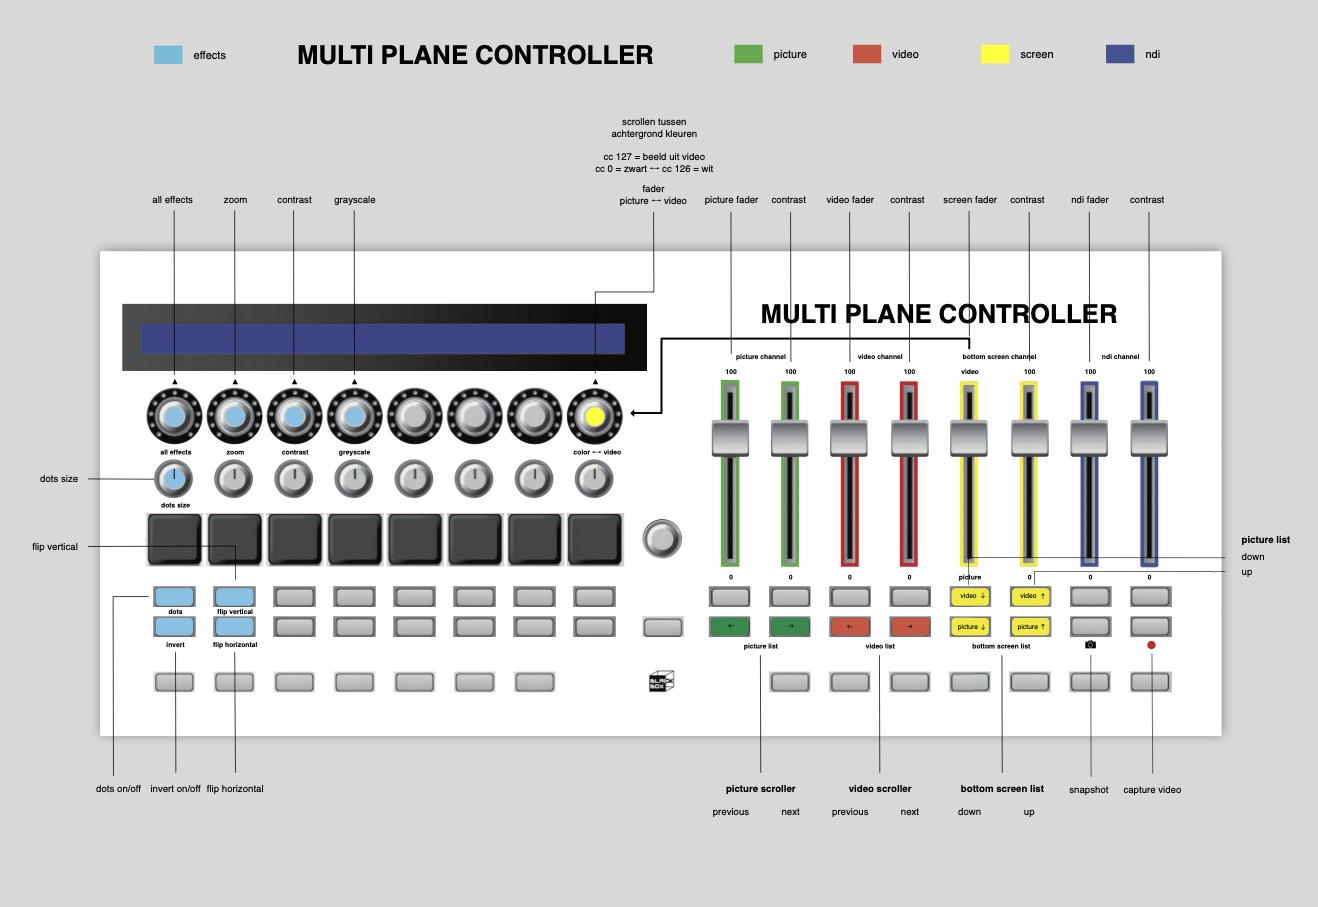
And now start creating!