
How to use the board
Board Layout
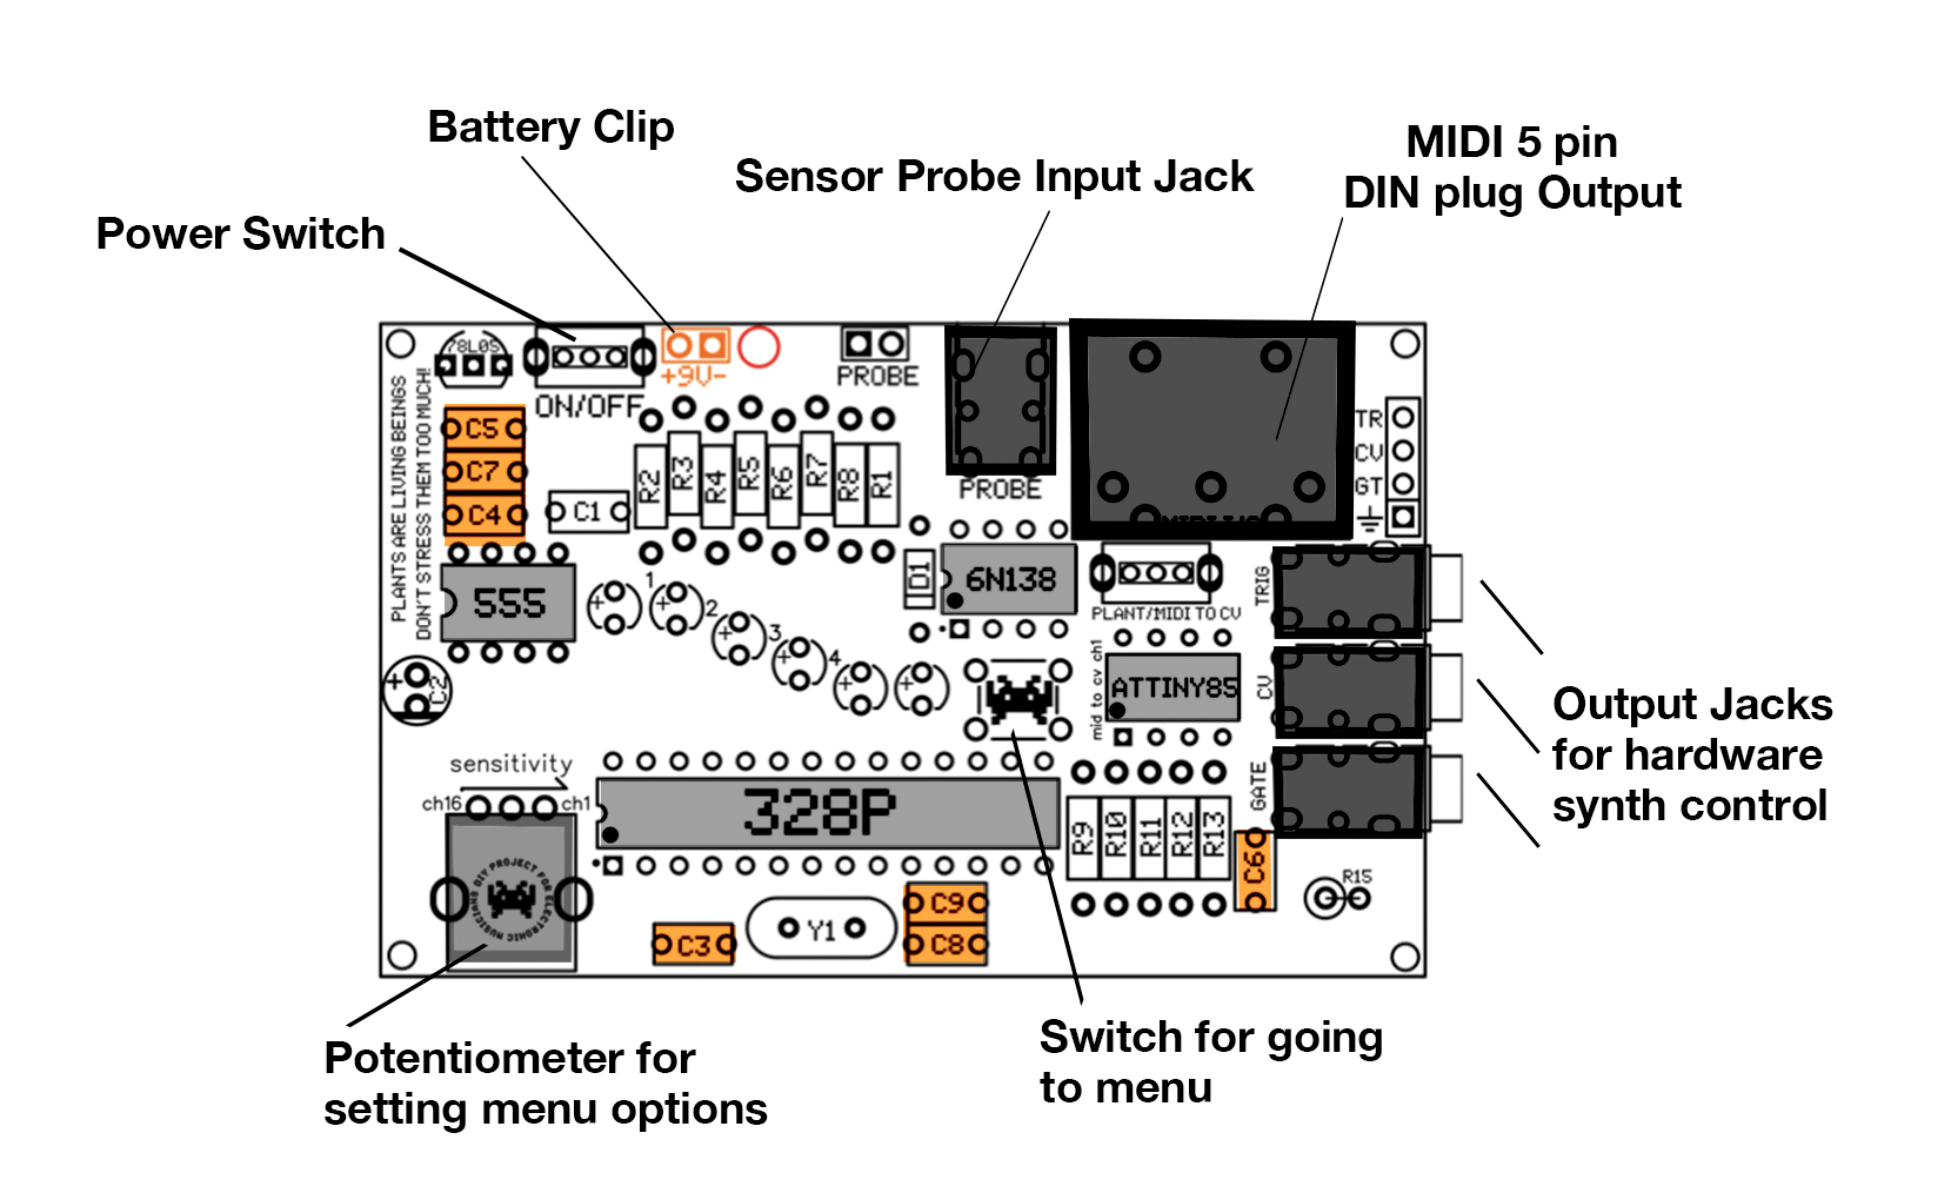
Connect the Board
Connect battery & Connect the USB-MIDI cable with the IN-midi side to the midi connector on the board. USB side in computer.
turn on the board
you don't need the electrodes to connect with plant, you can also use jumper wires, plug them in the holes [probe] next to the connection of the electrode cable. (board at Blackbox IBB has headers installed so its easier to use jumper wires)
Start Midi monitor to check the connection. Check your settings: Sources >
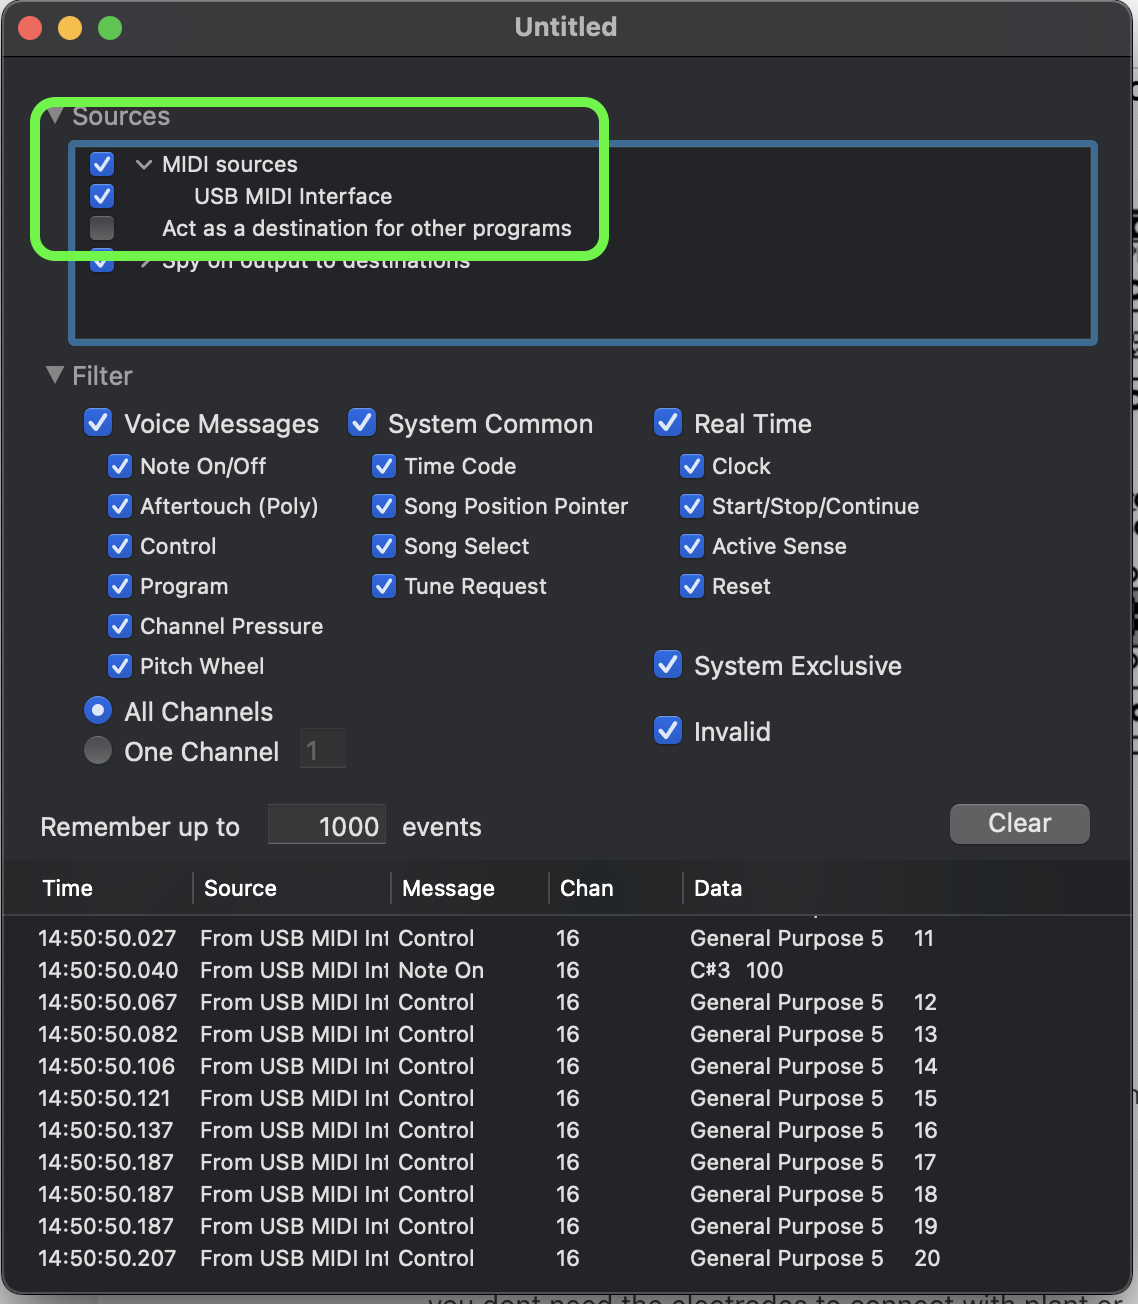
Touch both sides of the electrodes or jumper cables, you should see lights on the board moving and data flow in the bottom area of the midi monitor window.
Now you can start mapping your MIDI data to any midi software or device you want to use. For how 2's on that go to >>> [under construction]
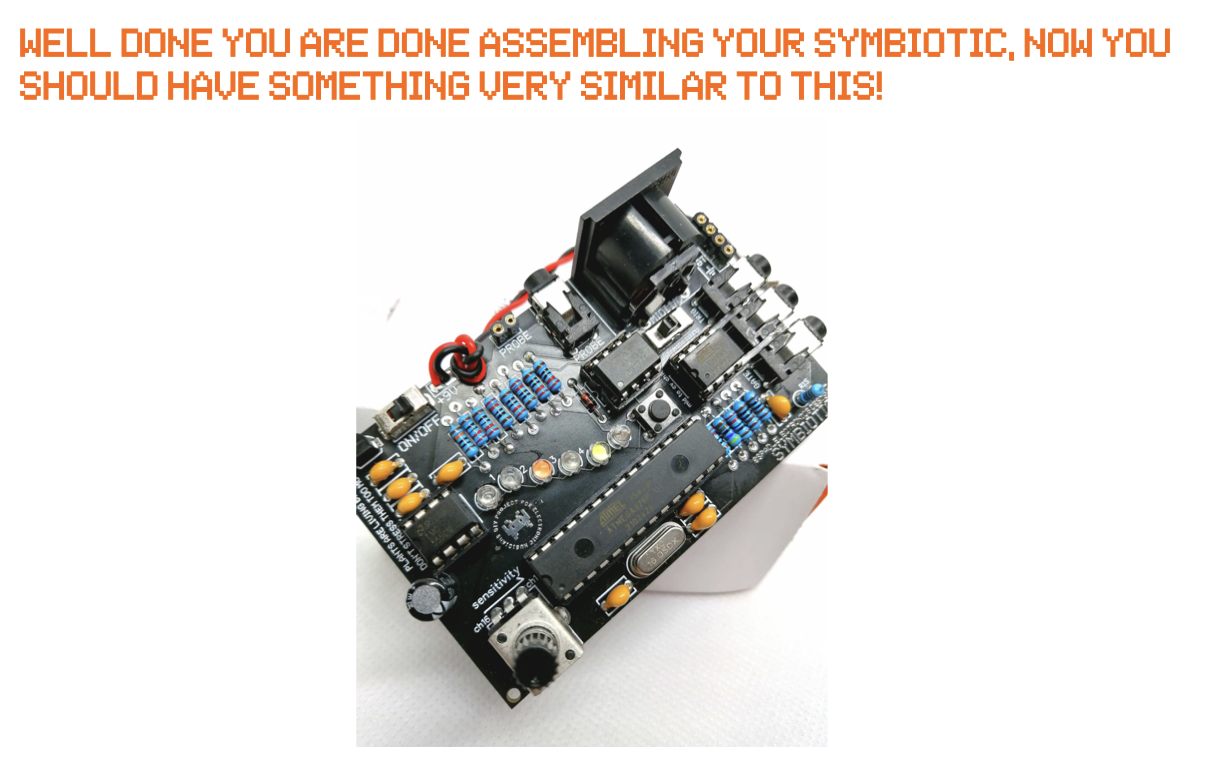
When you order a new board online and you need to assemble it:
When getting the DIY soldering kit, first follow the build and assembly instructions.
If the device is not working properly, check the try-to-fix-checklist in the document
- Check the polarity of polarized components such as capacitors, leds etc.
- 9v battery clip is wired correctly (red generally is +, black is -)
- Check if your 9v battery is charged!
- Check the solder points many times, can be a cold or not soldered properly