
Gelatin bioplastic recipes
Gelatin is made from collagen present in animal parts and comes in jelly, sheet or powder, which is the form we use in the recipes below. Gelatin is a spiral waste product from the meat industry, being repurposed for uses outside of that industry.
Material properties:
-
Water resistance: Gelatine bioplastics start dissolving after a couple of hours when submerged in room temperature water. It instantly melts when submerged in water of > 60C.
-
Heat resistance: Gelatine bioplastics aren't heat resistant and will start melting between 30-50C. When microwaved, the material dissolves quite quickly.
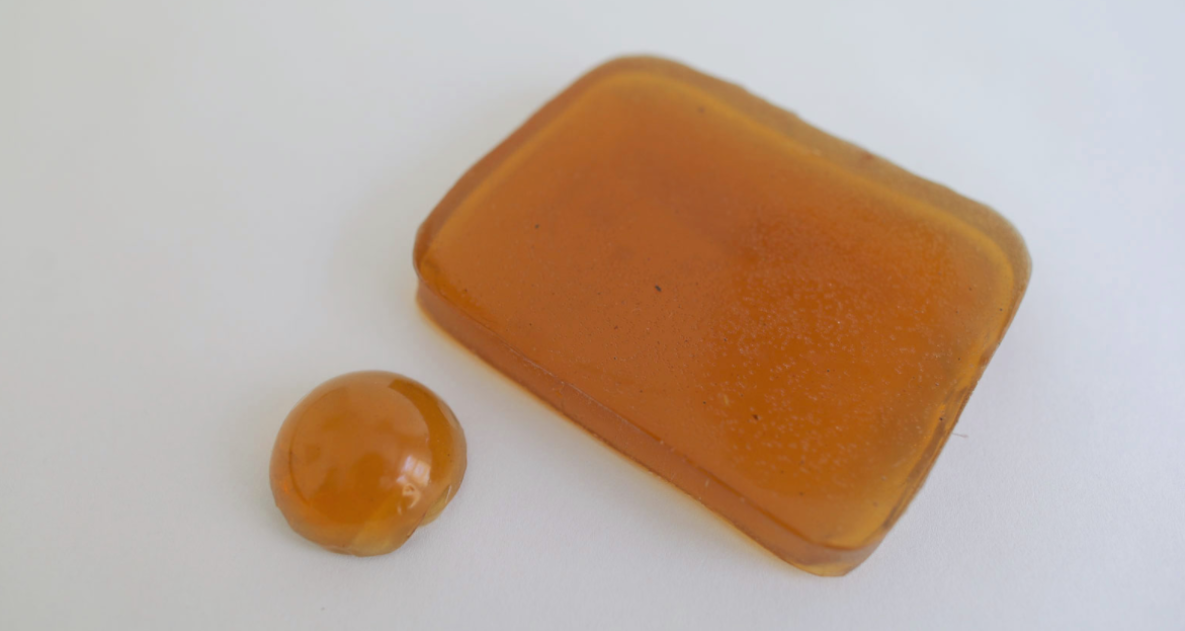
RECIPE #1: Basic gelatin bioplastic
This is the basic mix from which you can start playing around with more or less glycerine. It is also a great and fairly flexible recipe for composites (e.g. with textiles) and mixtures with powders or other dry elements. This recipe yields appr. 250 ml of material to be cast (depending on the amount of water that you let dissipate during the cooking process).
Image credit: Clara Davis.
Gelatine 48 gr
Glycerine 12 gr
Water 240 ml
Two drops of essential oil
Mix the gelatine with the cold water in your pot, and stir until dissolved. Warm up the mixture on your stove to a max of 80C.
Add your plasticizer and two drops of essential oil. The general rule is: the more glycerine, the more flexible the material, but do not exceed 1:1.
Simmer for 15 minutes while stirring regularly, then let the liquid cool for a couple minutes while stirring, until it gels a little but is still liquid. The mixture should be at least honey-like before casting. Remove any froth with a spoon, or absorb it using a coffee filter or kitchen paper (cartouche). TIP: Longer cooking time (up to an hour) allows more water to evaporate and will dramatically reduce shrinkage of your casted object. You will get a thicker liquid. To cast larger volumes and solids with this recipe, evaporate a lot of water, until it's very very thick. Sometimes it's worth reheating and melting scraps, they've already dissipated a lot of water and result in nice castings.
Optional: Add a filler and mix gently until it is evenly distributed throughout the liquid.
Slowly, and while keeping the flow in one place to avoid air bubbles, pour the mixture in your mould or on your chosen surface. Note: Don't cast hot bioplastic on acryllic that is thinner than 7mm, it will bend.
Drying / curing:
Let the material dry in a ventilated and dry room and de-mould when your plastic feels solid, but still cold to the touch - often after 24-48 hours. Keep ventilated and regularly turn your piece over until it is dry, so as to avoid mold formation with long drying times.
RECIPE #2: Bio Resin
This creates a hard, resin-like material. This recipe yields appr. 200 ml of material to be cast.
Image credit: Loes BogersBogers.
Gelatine 48 gr
Glycerine 8 gr
Water 240 ml
Two drops of essential oil
- Mix all the components at medium heat (60C) until smooth, then simmer at max 86C for 10-15 mins or more for less shrinkage, but be sure the liquid remains 'pourable'. It is also possible to boil the liquid at 100C for 5-10 mins. The process of boiling will change the polymer chains and make the cast material significantly harder, almost epoxy-like, and slightly more brittle. This recipe yields appr. 200 ml of material to be cast (depending on the amount of water that you let dissipate during the cooking process). Depending on the desired shape you have a few options;
1: For a thin, hard, 3d shape: Cast your bio-resin on a flat surface. De-mould your sheet of bioplastic when it is still flexible (often this is already possible after a few hours) and hang the sheet over some kind of mould or object. While drying it will slighty shrink and become hard in the shape you moulded it in. Keep ventilated until it is dry.
2: A hard solid shape: Cast in a shaped mould. Let the material dry in a ventilated and dry room and de-mould when your plastic feels solid, but still cold to the touch - often after 24-48 hours. Keep ventilated and regularly turn your piece over until it is dry.
RECIPE #3: Bio Silicone
This is the starting recipe for a silicone-like mixture, that is firm but flexible after drying and can be cast as a sheet or molded in a shape using a two-part mold. From here you can add even more glycerine to make the material more flexible, until 1:1 ratio, where you will only add a splash of water and slowly mix by heating. This recipe yields appr. 250 ml of material to be cast (depending on the amount of water that you let dissipate during the cooking process).
Image credit: Shirley NiemansNiemans.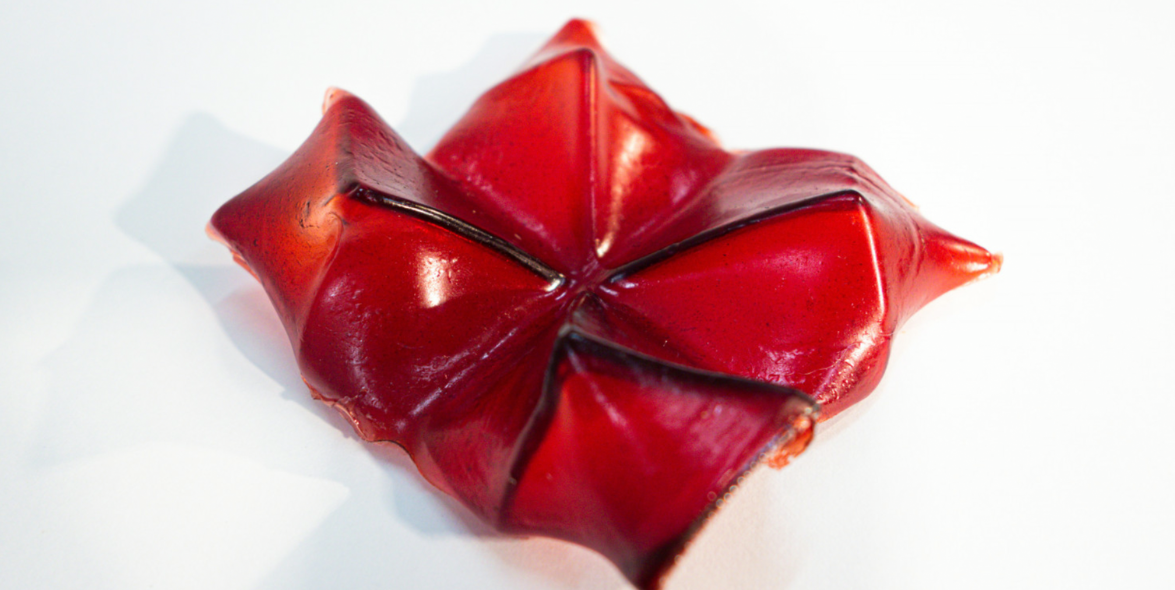
Gelatine 48 gr
Glycerine 24 gr
Water 240 ml
-
Two drops of essential oil
Mix the gelatine with the cold water in your pot, and stir until dissolved. Warm up the mixture on your stove to a max of 80C.
Add your plasticizer and two drops of essential oil. The general rule is: the more glycerine, the more flexible the material, but do not exceed 1:1.
Simmer for 15 minutes while stirring regularly, then let the liquid cool for a couple minutes while stirring, until it gels a little but is still liquid. The mixture should be at least honey-like before casting. Remove any froth with a spoon, or absorb it using a coffee filter or kitchen paper (cartouche). TIP: Longer cooking time (up to an hour) allows more water to evaporate and will dramatically reduce shrinkage of your casted object. You will get a thicker liquid. To cast larger volumes and solids with this recipe, evaporate a lot of water, until it's very very thick. Sometimes it's worth reheating and melting scraps, they've already dissipated a lot of water and result in nice castings.
Optional: Add a filler and mix gently until it is evenly distributed throughout the liquid.
Slowly, and while keeping the flow in one place to avoid air bubbles, pour the mixture in your mould or on your chosen surface. Note: Don't cast hot bioplastic on acryllic that is thinner than 7mm, it will bend.
Drying / curing:
Let the material dry in a ventilated and dry room and de-mould when your plastic feels solid, but still cold to the touch - often after 24-48 hours. Keep ventilated and regularly turn your piece over until it is dry, so as to avoid mold formation with long drying times.
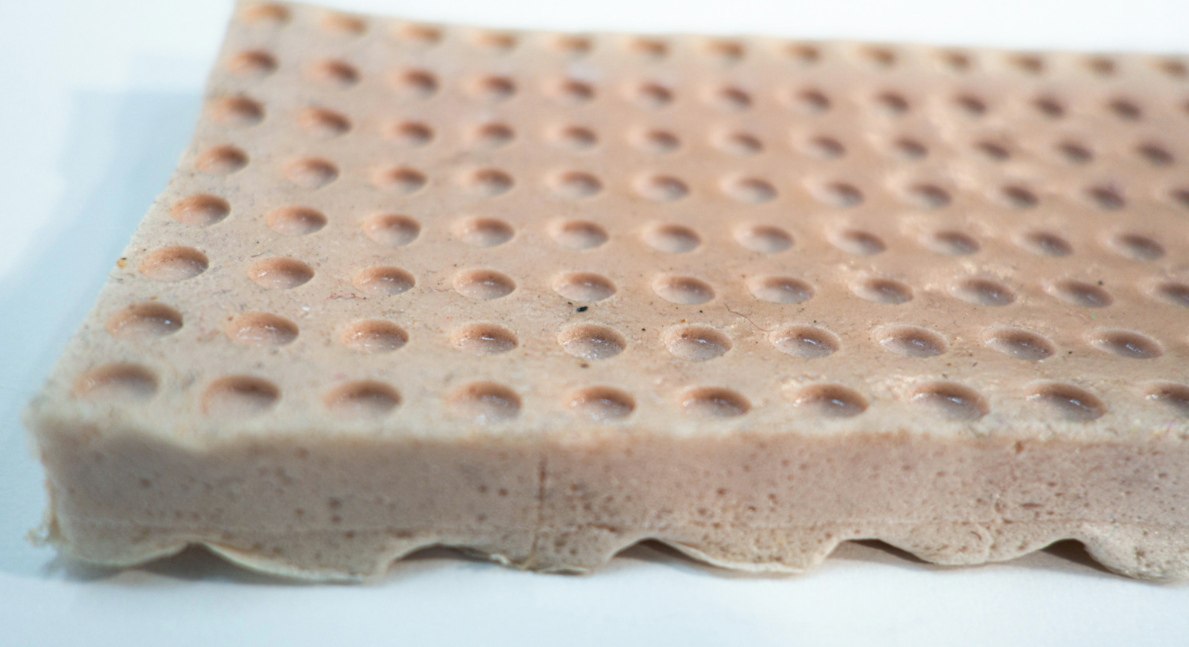
RECIPE #4: Bio foam
This recipe will result in a soft, flexible, foamy biomaterial. To create more or less flexibility, vary the amount of glycerine between 5 gr (brittle) and 60 gr (very flexible). Use a hand whisk or electric whisk to fiercely whip the air into the mixture before casting. Try out other frothing tools such as an electric milk foamer or even a regular straw to help you create and trap different-size air bubbles within the mixture.
Image credit: Shirley NiemansNiemans.
Gelatine 12 gr
Glycerine 12 gr
Water 150 ml/gr
Dishwashing soap (organic) or green soap 1 teaspoon (+/- 6 ml)
Two drops of essential oil
Mix the gelatine with the cold water in your pot, and stir until dissolved. Warm up the mixture on your stove to a max of 80C.
Add your plasticizer and two drops of essential oil.
Simmer and slowly stir the mixture between 60-80 degrees Celcius for 20 minutes or until it's thick like a syrup or honey, then add in the soap
- Whisk vigorously to create foam bubbles and simmer for another 2-5 minutes until the mixture thickens. !! While whipping the mixture, the added air will make it solidify quickly. Be sure to keep your pan on medium heat to keep the mixture soft. Reheat if needed to melt it down again.
- Stir slowly to let the bigger bubbles pop until you have a foam with small bubbles
- Cast onto a (textured) surface and spread out if necessary, or cast in a shallow mould. Casting foam goes best if you start casting in the center of the sheet / mould and allow the material to spread itself, keeping the pot still for even results.
- The material will shrink a lot so make the layer thicker than you want the end result to be.
- Let it dry for 48-72 hours at least before releasing. Keep ventilated.
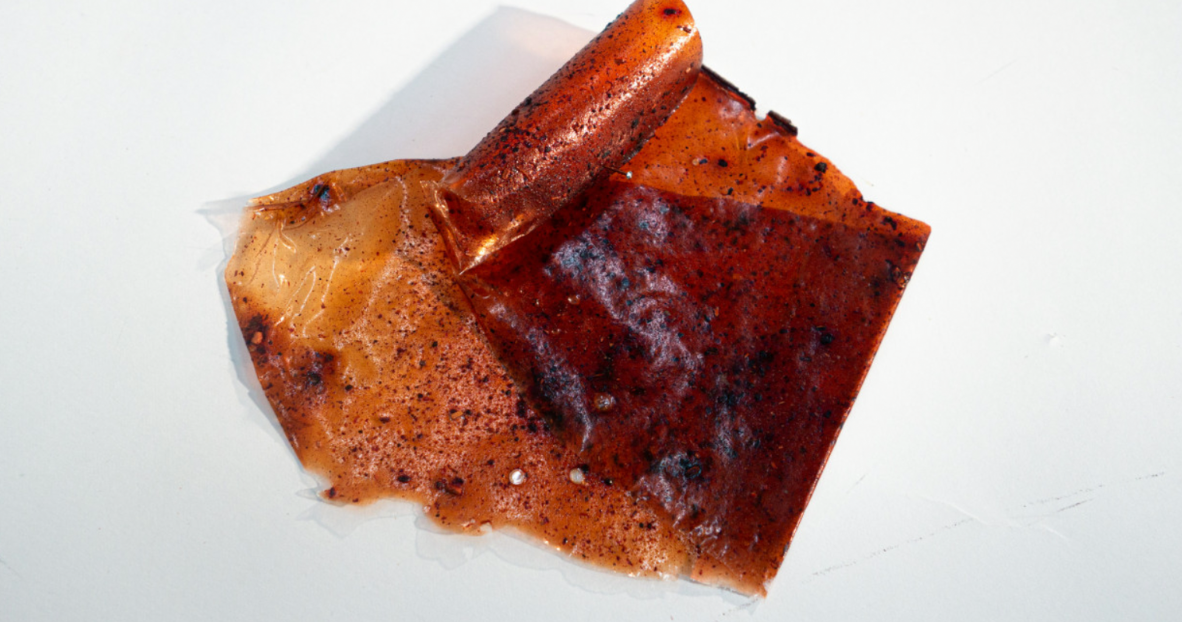
RECIPE #5: Bio foil (extra flexible)
Image credit: Shirley Niemans.
- Gelatine powder 24 gr
- Glycerine 18 gr
- Water 200 ml
- Two drops of essential oil
Drying / curing:
Let the material dry in a ventilated and dry room and de-mould when your plastic feels solid, but still cold to the touch - often after 24-48 hours. Keep ventilated and regularly turn your piece over until it is dry, so as to avoid mold formation with long drying times.
Sources
Lab Pastoe https://labpastoe.gitbook.io/lab-pastoe
Textile Academy: https://class.textile-academy.org/classes/2020-21/week06/#lecture-notes
Loes Bogers: https://class.textile-academy.org/2020/loes.bogers/projects/outcomes/24_core_recipes/
Anastasia Pistofidou: https://issuu.com/nat_arc/docs/bioplastic_cook_book_3/s/159731