
QLC+ control with Makey Makey
How to control QLC+ with a Makey Makey?
In QLC+, we can use key combinations, to trigger certain events in the light programme.
Makey Makey
Makey Makey: An Invention Kit for Everyone is an invention kit designed to connect everyday objects to computer keys. Using a circuit board, alligator clips, and a USB cable, the toy uses closed loop electrical signals to send the computer either a keyboard stroke or mouse click signal.
Find more about Makey Makey on: https://makeymakey.com
QLC+ Key Controls
First we are going to open our QLC+ light desk. To know how to open a template patch from any Blackbox environment, check the QLC+ general startup guide in Bookstack or via the reservation tool.
HKU Bookstack, control lights with QLC+
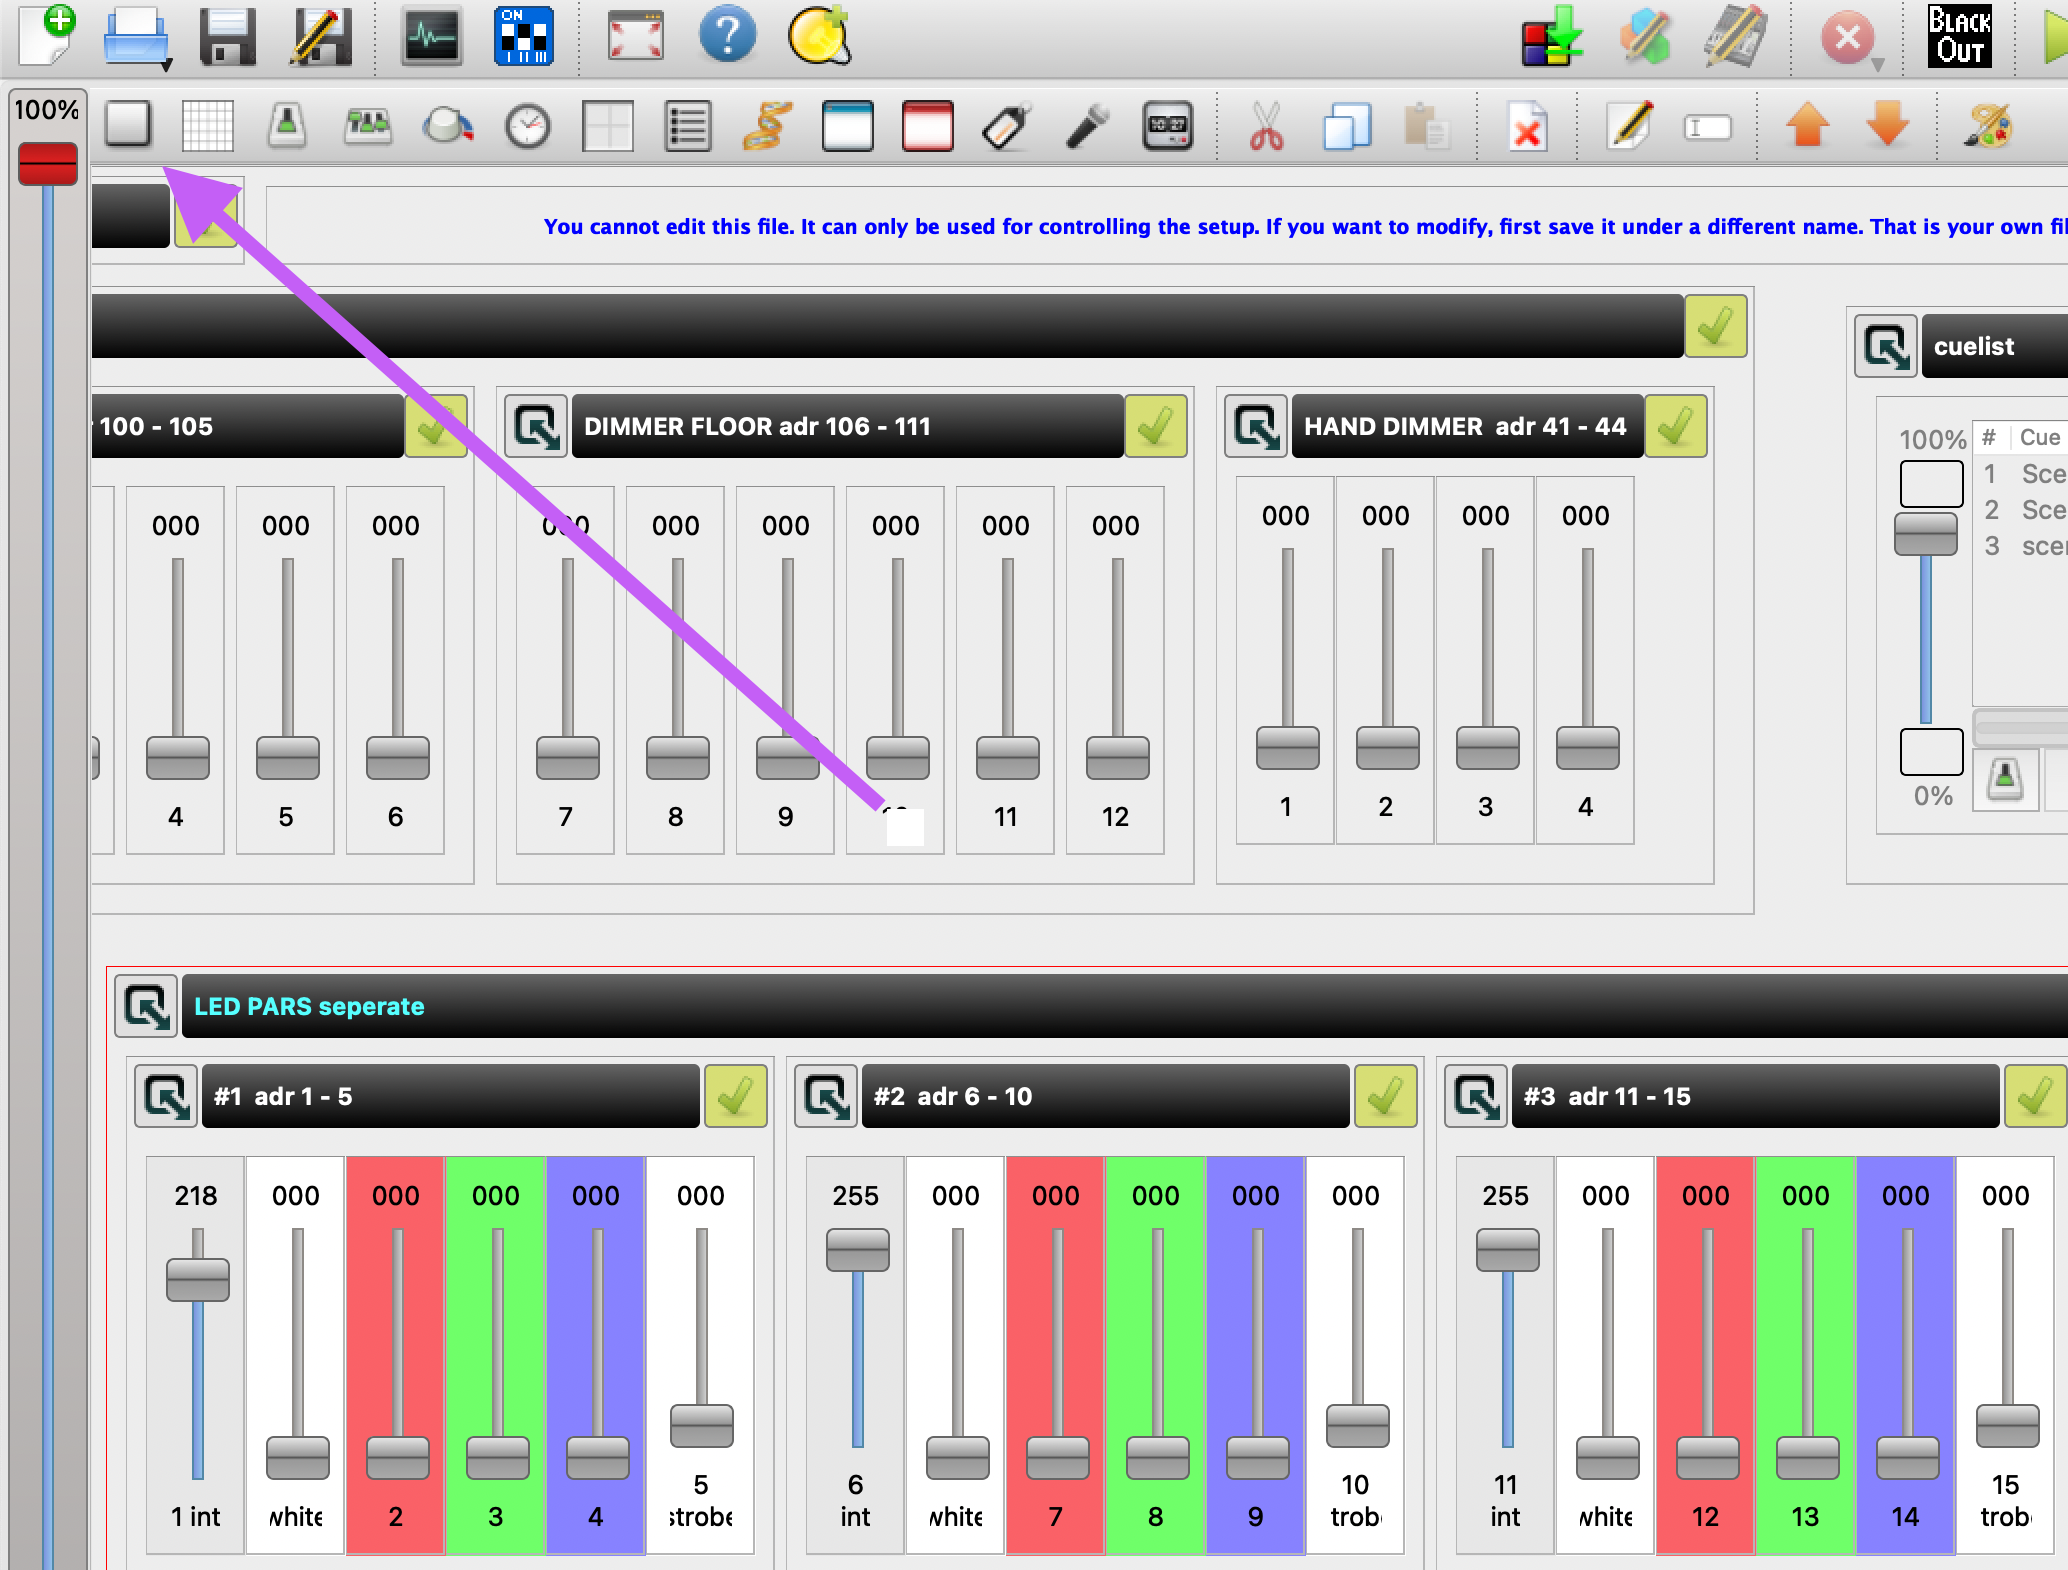
When we open the template file, we can add faders, buttons and other interface elements to trigger or start/stop certain lights or scenes that we want.
STEP 1: Add a button
STEP 2: Assign the button to a function
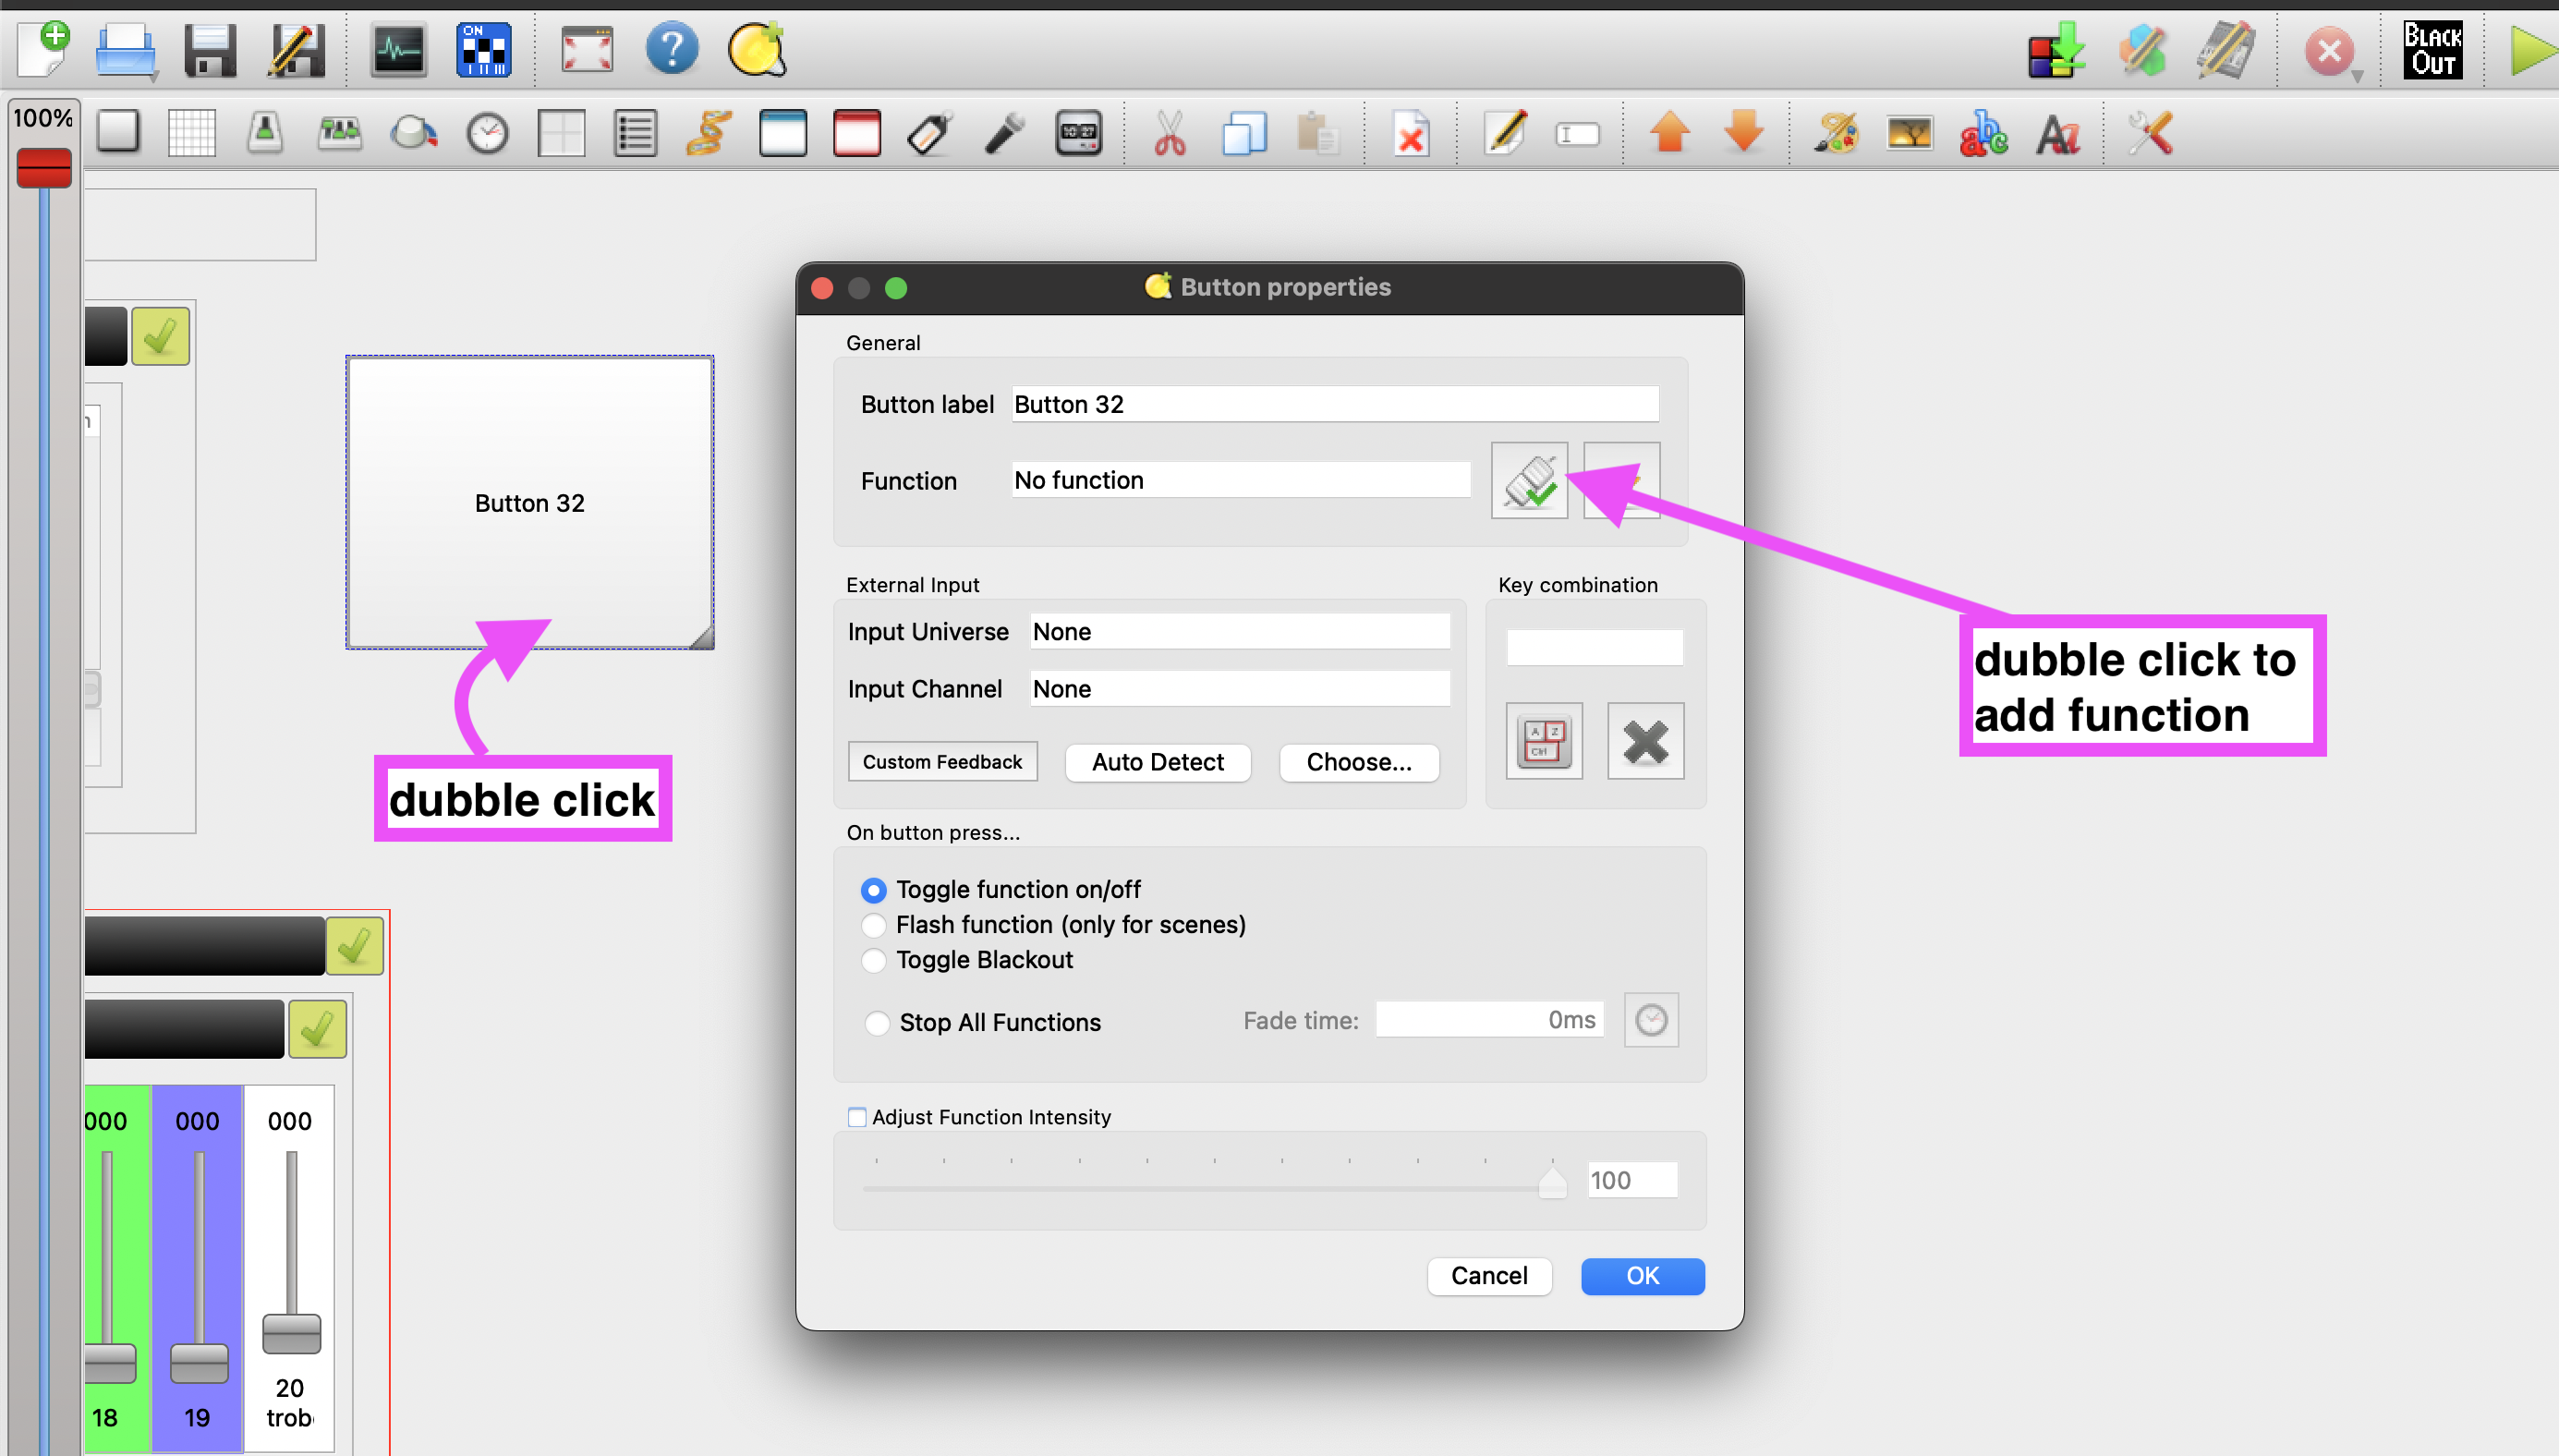
Let's choose a WHITE function, to make all the lamps turn on white when we press the button.

STEP 3: Control the Button by a keyboard function
After we have set a Function to the button, we are going to add a keyboard control. (can be one key or a combination of keys) For this we'll go to the right side of the Button Properties menu we were in when we added the function to the button, and double click on the keyboard Icon.
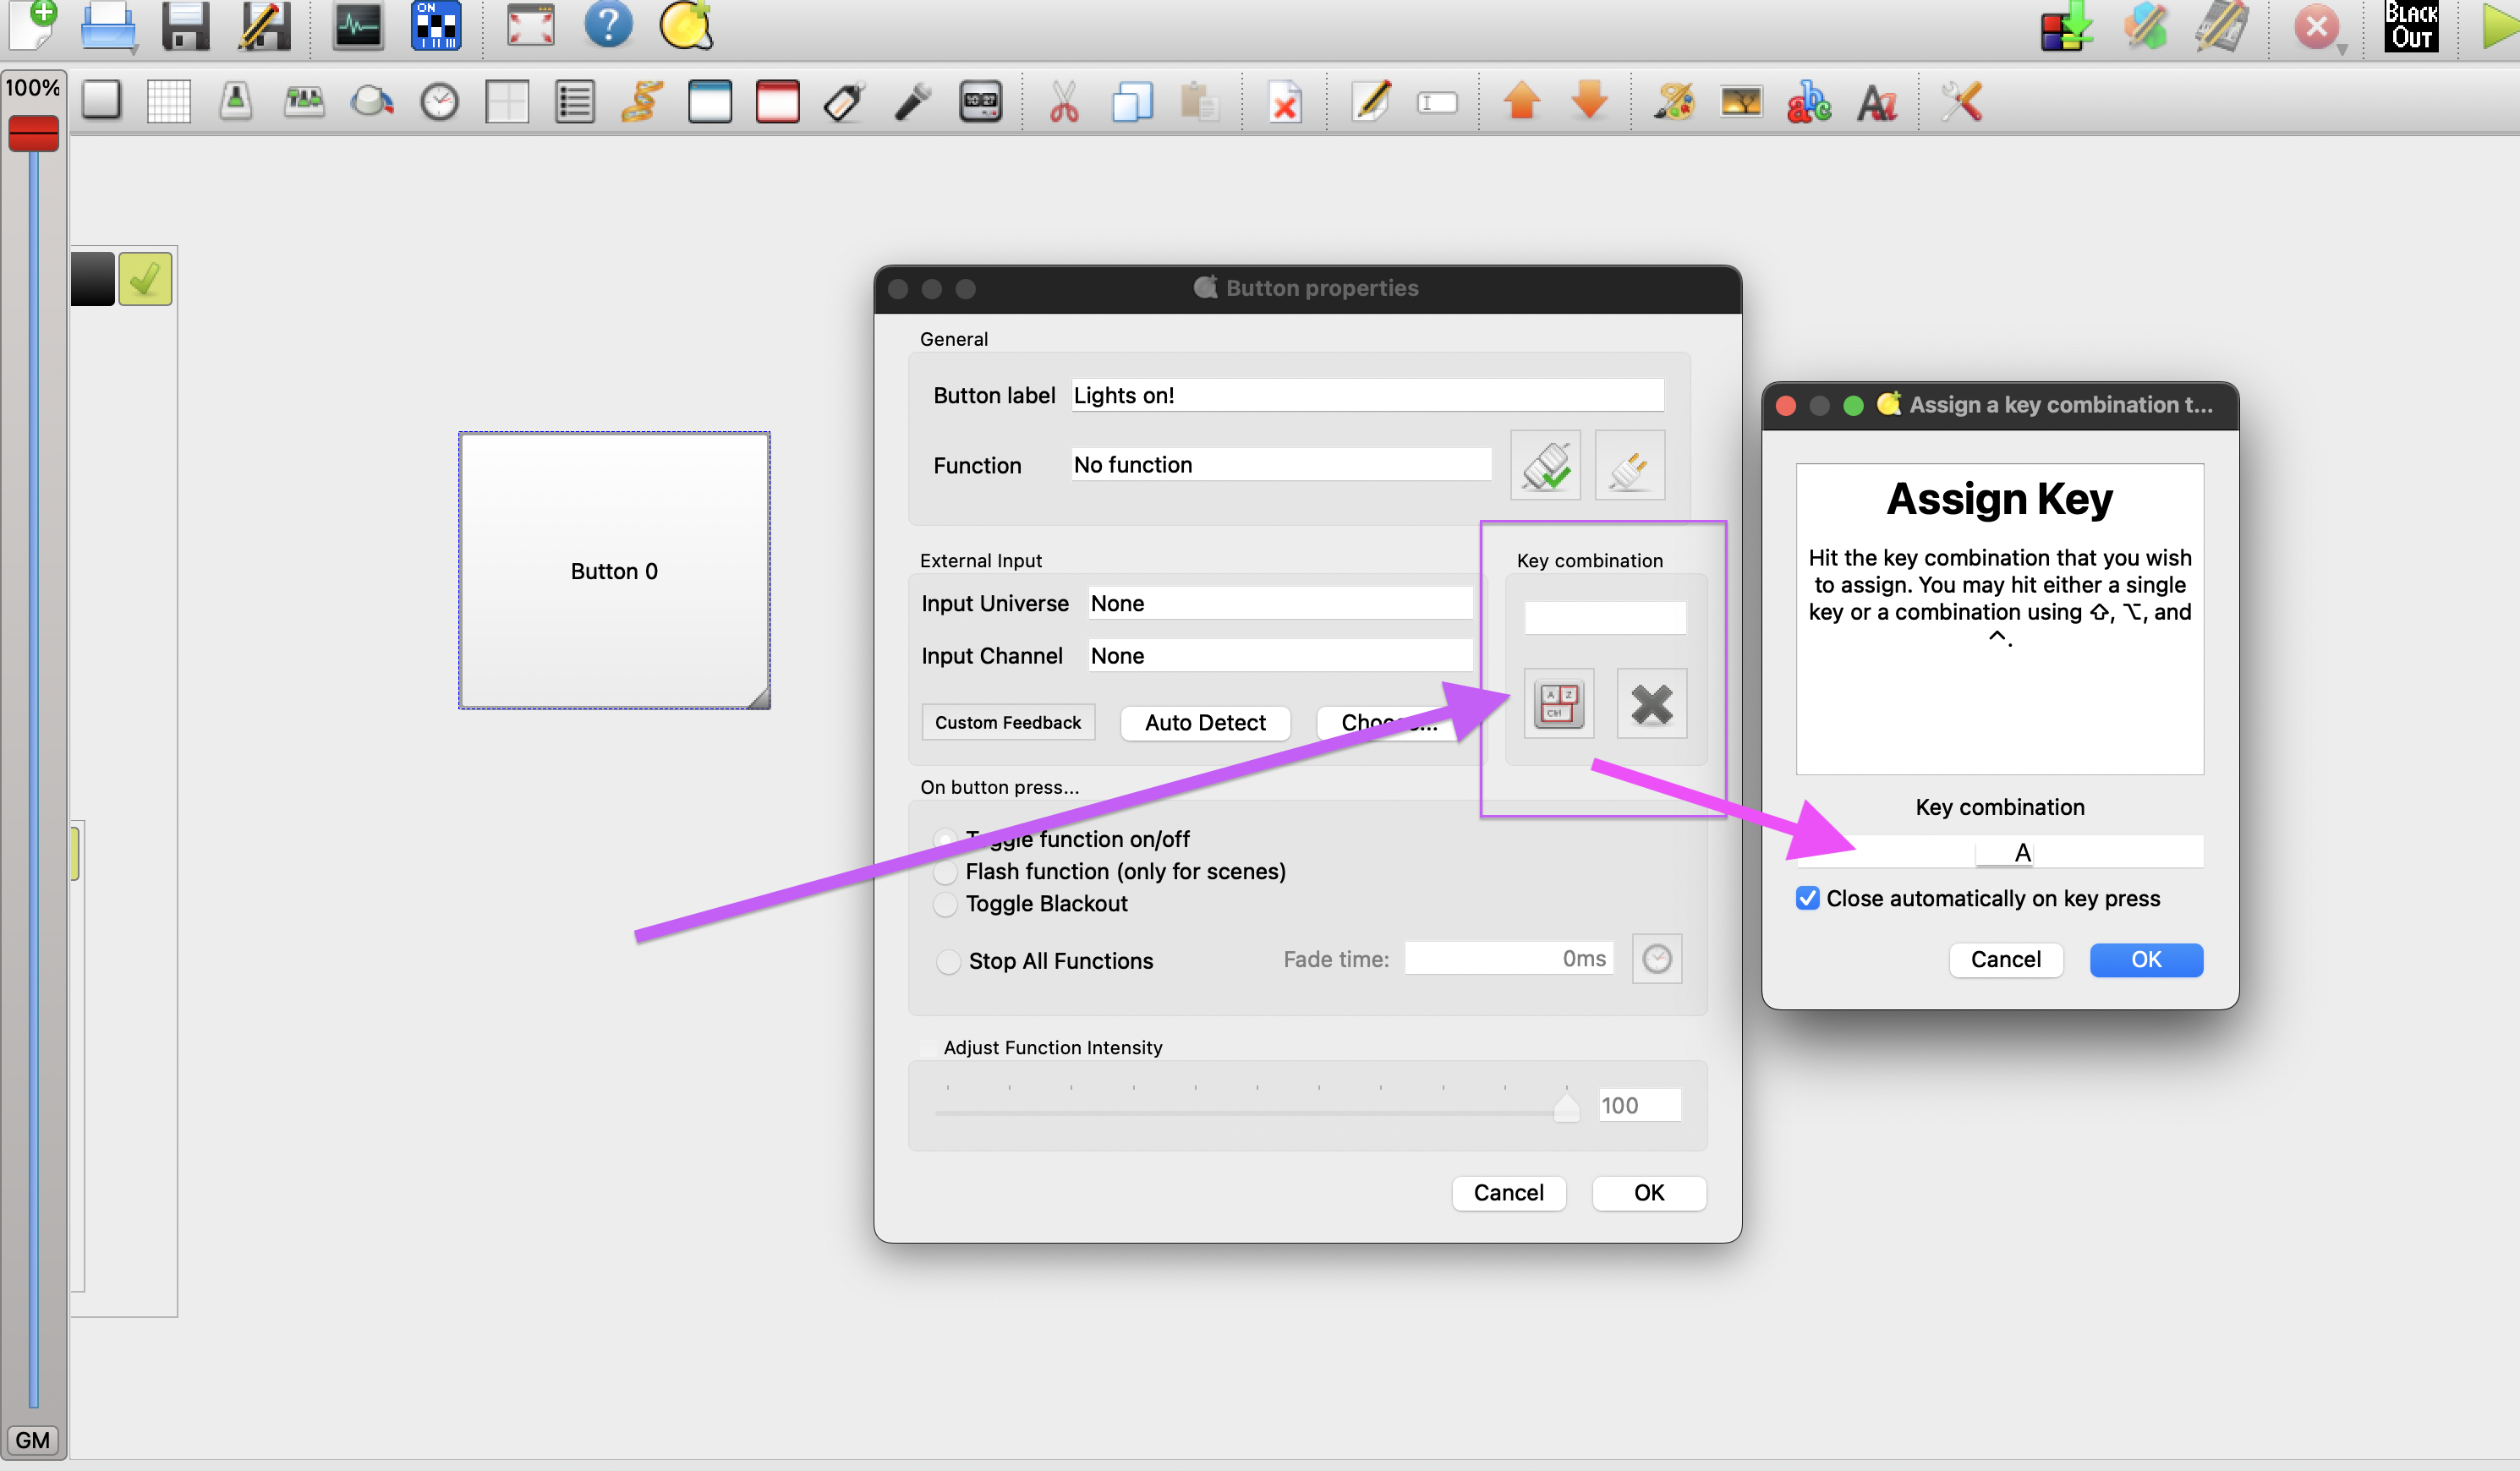
Use letters or functions that match with your Makey Makey board. By default there is the arrow keys, spacebar, mouse click and various letters such as W, A, S, D, F, G. If you want to use other letters with your Makey Makey, you can also re-map your Makey Makey board.
STEP 4: Toggle or Flash!?
Now you have matched and assigned Makey Makey keyboard letters/functions to the button! There is one more thing we can take into account, when controlling the button, which is how do we want the button to respons.
Toggle:
every time the button is pressed, it wil go from an OFF state to an ON (or the other way around), but it will stay there, until another button press. As a comparison, think about your standard light switch on the wall, when we press the light will go on, when we press again the light will go off. That's 2 presses.
Flash:
Flash is used to make the button go and execute the function we assigned it, only when we press and hold it. This is particularly handy when you want a certain effect of lights only to happen once, when the Makey Makey is triggered.
What's next?
so after you've successfully connected a keyboard letter to a button in QLC+ try experimenting with other ways of interacting with the light control desk and Makey Makey. You can also assign keypresses to other interface elements of QLC+ such as sliders, knobs and playing/stopping CUE lists with your own scenes.
More info on QLC you can find in the Manual: QLC+ Manual