
VL53L4CD Time of Flight Distance Sensor
The Adafruit VL53L4CD Time-of-Flight Distance Sensor is ideal for accurate distance measurements. The sensor delivers stable results from approximately 1.0 mm to 1300.0 mm with high repeatability. Thanks to its narrow measuring beam, it is ideal for robotics, obstacle detection, automatic measurements or interactive installations.
It has a STEMMA QT / Qwiic connector for easy plug-and-play connections without soldering.
1 Material:
2 Assembly
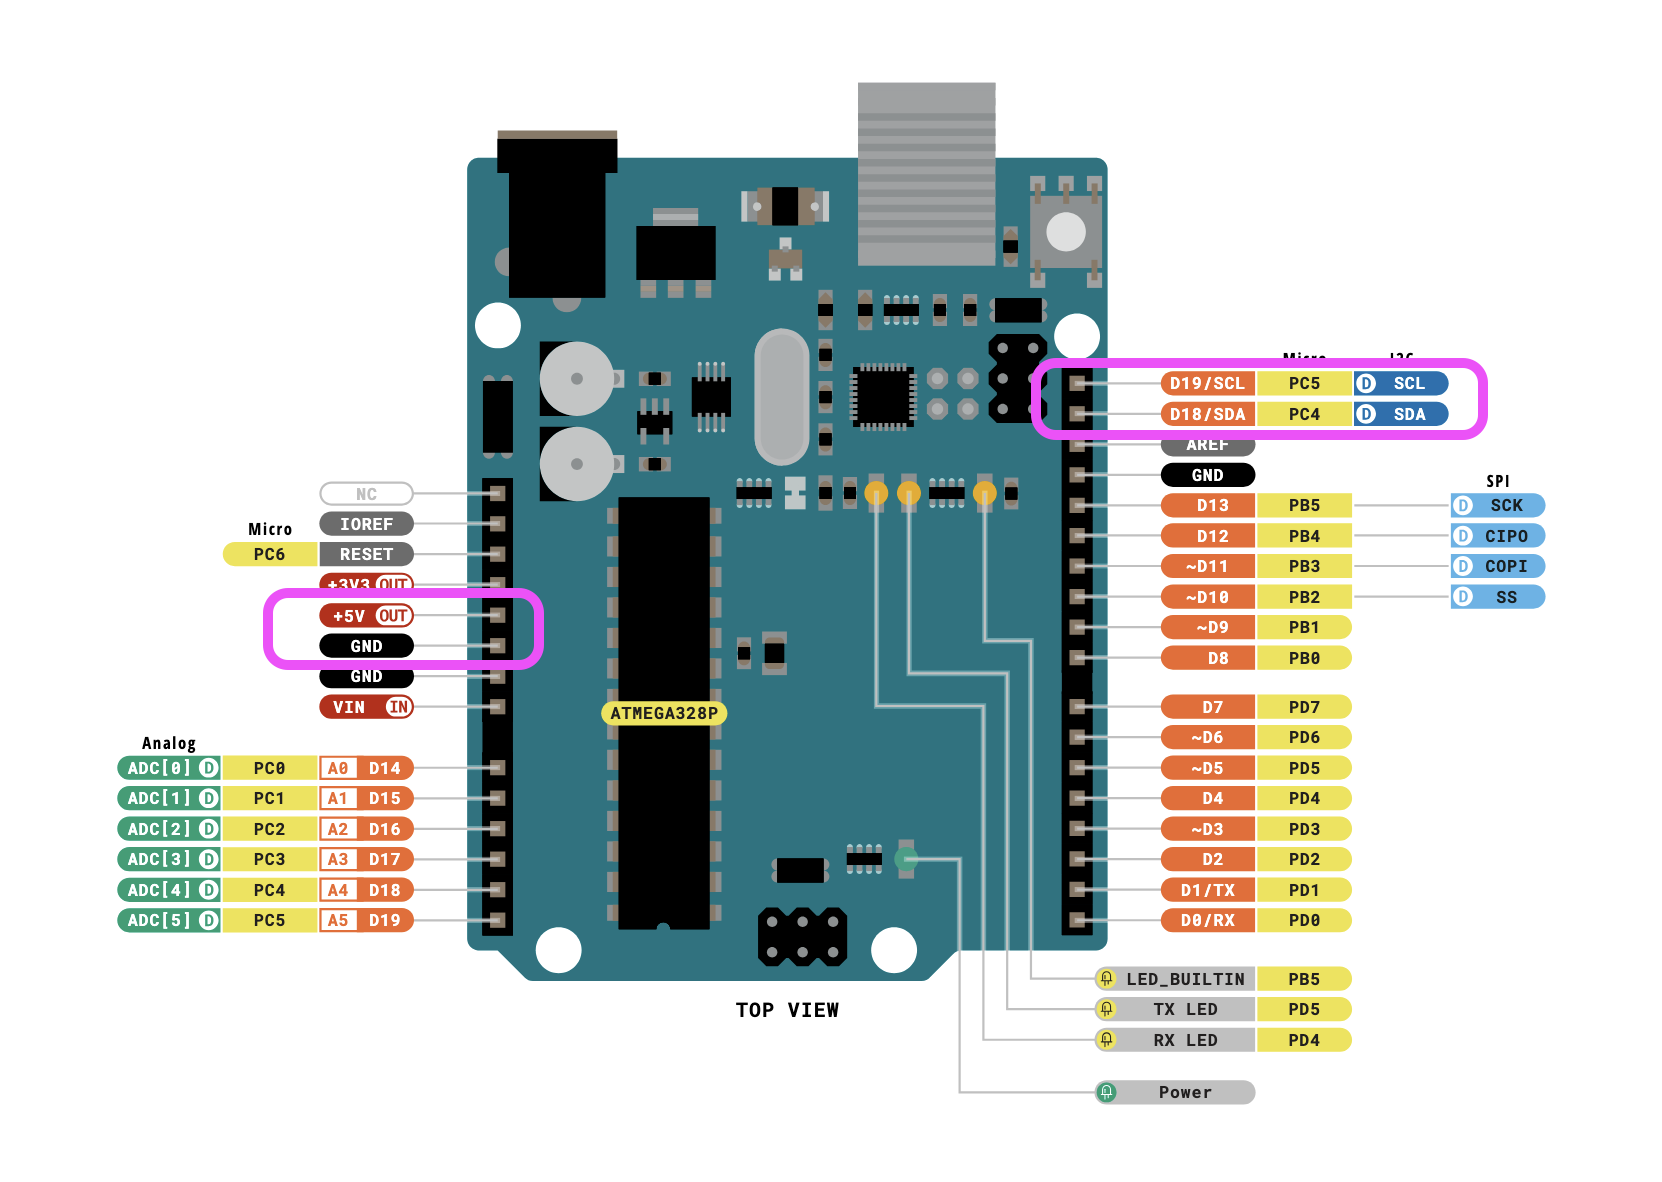
Wire using the STEMMA QT connector.
If you are using a 3V board, like an Adafruit Feather, wire the board's 3V pin to the VL53L4CD VIN.
- Board 5V to sensor VIN (red wire)
- Board GND to sensor GND (black wire)
- Board SCL to sensor SCL (yellow wire)
- Board SDA to sensor SDA (blue wire)
3 Software & code
In the Arduino software Click the Manage Libraries ... menu item (under Tools), search for VL53L4CD, and select the STM32duino VL53L4CD library. Install it.
The library comes with some example sketches, I used one of them and adjusted the code so the useless information like status, signal, tekst is removed. It now only outputs a stream of values.
Open a new arduino file ande replace the code with this:
5 Connect the arduino to your computer.
Connect Arduino to your computer & Upload the code.
If you do not know how to upload a Arduino sketch, please visit https://www.arduino.cc/en/Guide/Windows for Windows user or https://www.arduino.cc/en/Guide/MacOSX for Mac user.
Open the serial monitor by clicking the Magnifying glass in the top right corner of the window.
You might need to change the Baud rate to: 115200 before you get good results. Do this in the top right of the serial monitor field.
You should now see a stream of data measuring the distance to the object in front of the sensor. Hold your hand in front of the sensor and move it.
For connecting with Isadora read this
You can borrow this sensor for testing at the Blackbox location IBB. Contact: blackbox.ibb-pastoe@hku.nl