Motion Capture & Motion Tracking
MoCap, short for motion capture, is a technique used to digitally record movement. In art, it's a powerful tool that allows creators to translate physical gestures into digital data that can be used across many digital art forms. Mocap can be recorded or used in realtime in contemporary art, performance, and installation work.
Motion Tracking is used to follow the movement of a specific object, body part, or point — often in real time — but not necessarily capturing full-body motion or saving a performance.
In short:
MoCap is about capturing a performance.
Motion tracking is about responding to movement.
- Which Mocap/Tracking do I choose for what?
- Various types of Motion Tracking, a comparison
- Various types of MoCap, a comparison
- Using Motive and GazeboOSC for realtime OSC messages
- Rokoko
- Vive Tracking
- Optitrack Motion capture
- Motion capture & Unity
- Camera (&AI) based Mocap
Which Mocap/Tracking do I choose for what?
| Optical | Inertial | AI/Camera-based | Kinect | Vive Trackers | Vive Ultimate |
| Capture & Tracking | Capture & Tracking | Tracking | Tracking | Tracking | Tracking |
| Optical; multicam & markers | Inertial, IMUs (gyros + accelerometers) | Markerless, AI + RGB/depth cameras or webcam | RGB + depth sensor | Hybrid with external IR | Hybrid inside-out tracking |
| Film, dance, precise animation | Performance capture | Web/mobile art, interaction, low-budget, prototyping | Installations, skeleton-based interaction |
Room-scale performance, VR puppetry (objects) | Vr Avatar Puppetry, Untethered mocap, portable installations |
Various types of Motion Tracking, a comparison
Kinect & depth camera's |
Vive Ultimate |
AI-based Motion Capture |
|
Depth-sensing / markerless camera-based mocap
How it works:
Strengths:
Limitations:
In art, Kinect is great for:
|
Inside-out inertial tracking with onboard cameras and IMUs
How it works:
Strengths:
Limitations:
In art, Vive Ultimate is great for:
|
How it works:
Pros:
Cons:
|
Various types of MoCap, a comparison
MoCap, short for motion capture, is a technique used to digitally record movement. In art, it's a tool that allows creators to translate physical gestures into digital data that can be used to generate or manipulate digital work.
What is MoCap?
Motion capture often involves placing sensors or markers on a person’s body (or using camera-based systems) to track movement in 3D space. This data is then sent to software that interprets the motion and applies it to a digital avatar, 3D model, or visual system.
Examples of use:
-
Live performance & dance: people wearing mocap suits can control visuals, sound or avatars in real time, turning their movement into an interactive experience.
-
Digital puppetry: Use MoCap to animate virtual characters that mirror their movements, creating storytelling pieces or interactive experiences.
-
Film & animation: MoCap can be used to create detailed, lifelike animation without manual keyframing.
-
Interactive installations: Viewers’ movements can be captured and visualized, making them part of the artwork.
-
Experimental art & research: MoCap enables artists to explore themes like embodiment, identity, or data aesthetics by abstracting or transforming movement.
Why artists use it
-
Expressiveness: It captures the nuance of real human motion.
-
Efficiency: Complex animations can be recorded rather than animated by hand.
-
Interactivity: MoCap allows for responsive, real-time work—art that moves because you move.
-
Hybrid creation: It bridges physical and digital realms, letting artists craft performances or immersive visuals that live in both.
There are various types of Mocap:
Optical Motion Capture |
Inertial Motion Capture |
|
How it works:
Variants:
Pros:
Cons:
|
How it works:
Variants:
Pros:
Cons:
|
Some systems combine optical + inertial tracking (e.g., combining Xsens suit with camera tracking or facial capture or Rokoko, iphone & Coil ), giving the best of both worlds—especially for virtual production and advanced installations.
Using Motive and GazeboOSC for realtime OSC messages
The following tutorial explains the use of Motive with Gazebo for sending real-time Mocap data to other applications.
1. Preparing Motive
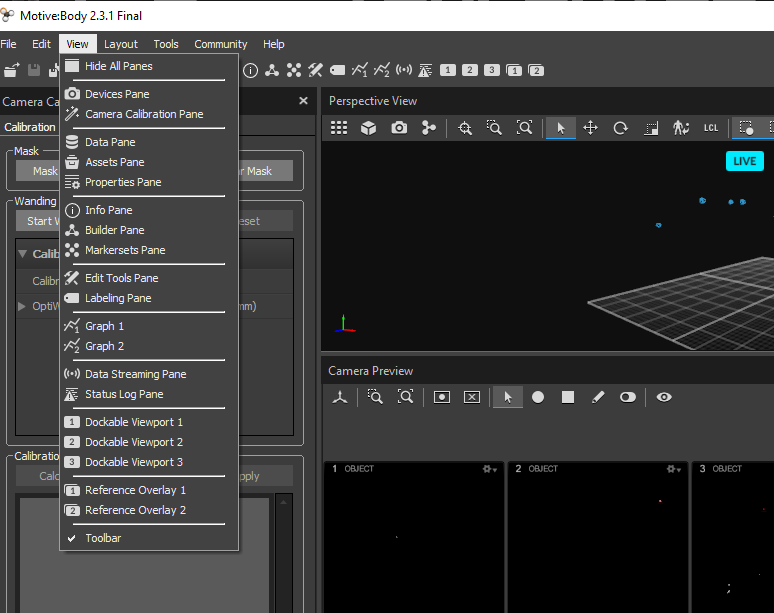
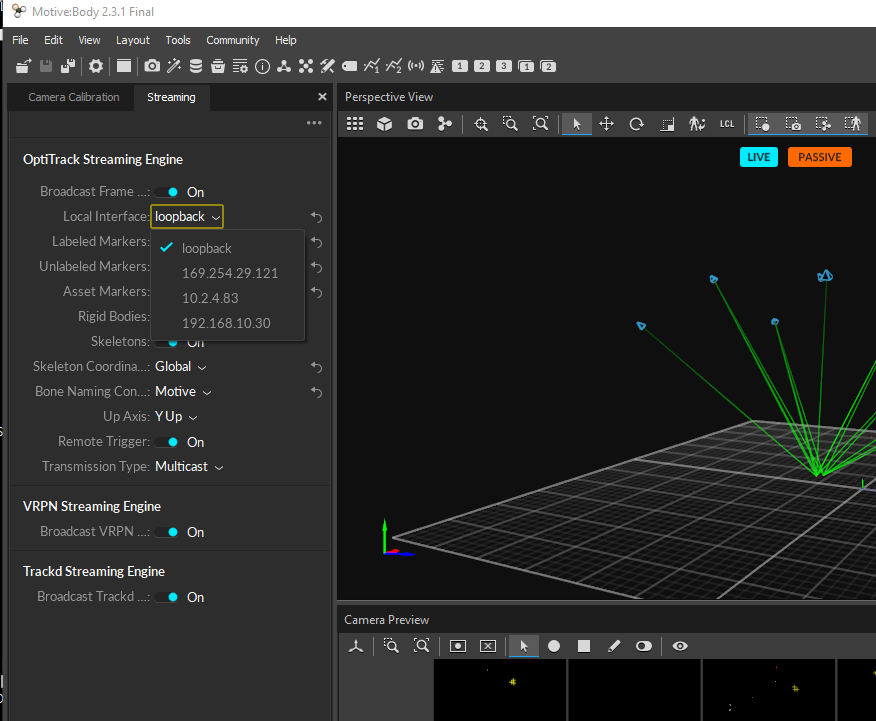
To prepare Motive for sending internal NatNet data to Gazebo, go to the 'data streaming' pane in Motive and set the streaming destination to "Loopback" for streaming data wireless through 'Streaming Vlan' (ask your nearest blackbox manager for more info) or select a network switch for wired connection (The switch in the blackbox workshop at location Oudenoord is by default set to 192.168.10.30). The NatNet data can now be received in GazeboOSC (see pictures below)
2. Setting-up Gazebosc
In Gazebosc you need to build a patch to convert Natnet data to OSC (see picture). Use the following actors by right clicking in the Gazebo workspace;
- NatNet: this actor reads the NatNet data which is streamed from Motive. Fill in the IP adres with the corresponding network interface number and push reset
- NatNet2OSC: this converts the NatNet data stream from Motive to OSC data.
- OSC Output: this actor sends out the OSC data to its destination. Fill in the destination IP adres and port number determined by the software who receives the OSC data.
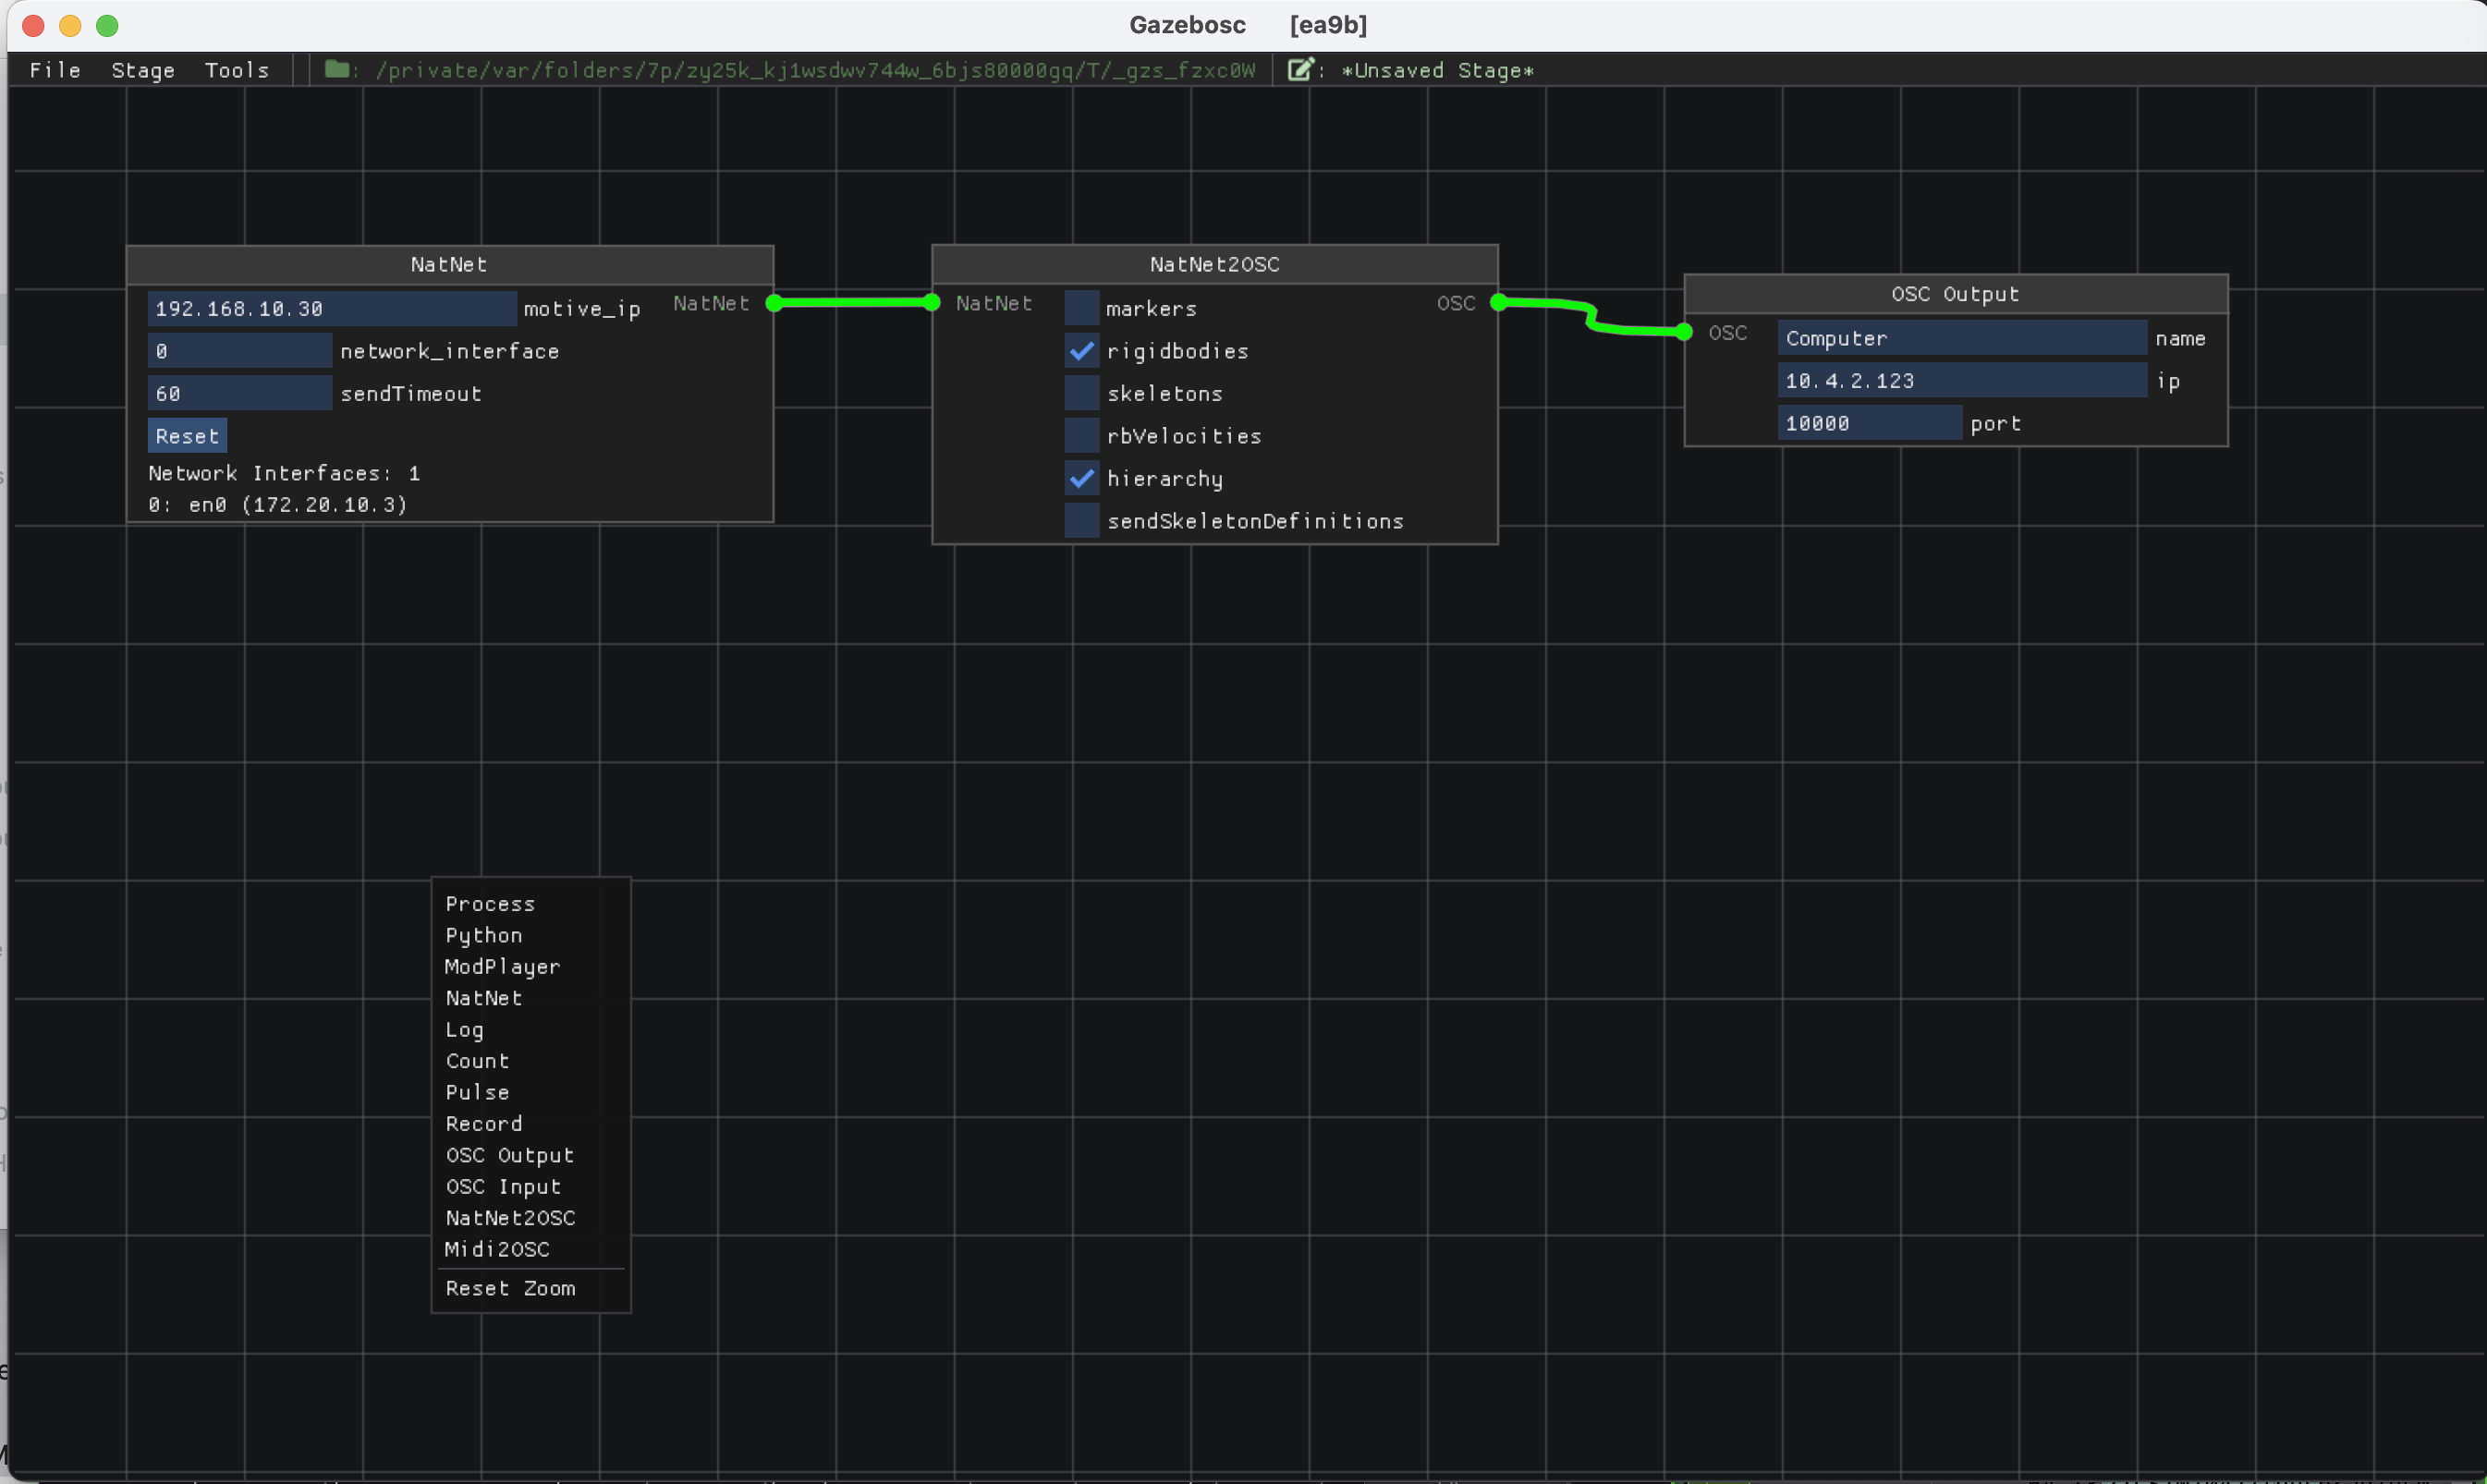
Once the correct connection is established between Motive and Gazebo the patch cords connecting the actors should colour green, an indication that data is streaming through Gazebo. To monitor the OSC data from GazeboOSC, or other OSC, data you can download the free OSC and MIDI monitoring application Protokol.
The following example shows GazeboOSC distributing OSC data from ZigSim to different destinations.
A further explanation about Gazebo and it's use can be found at: https://bookstack.hku.nl/books/gazebosc
Rokoko
What is the Rokoko Suit?
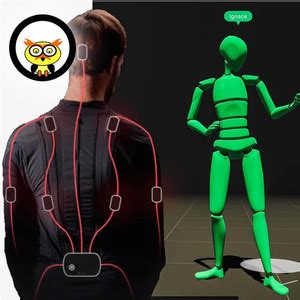
The Rokoko SmartSuit Pro is a wireless motion capture suit that tracks full-body movement in real time. It's made up of sensors placed around the body, allowing you to capture the motion of a performer and translate it into digital animations.
What Can You Use It For?
The suit is designed for both recording and live-streaming motion data. This makes it ideal for:
-
Animation – drive 3D characters in games, films, or visual effects
-
Performance – use live body movement to control digital avatars or visuals (real-time)
-
Virtual production – blend real-time motion with virtual environments
-
Research & art – explore movement, embodiment, choreography, or interaction in new ways
It connects to the Rokoko Studio software, where you can see the motion data live, record takes, and export it to tools like Blender, Unity, Unreal Engine, or TouchDesigner.
How to Rokoko
important: NEVER firmware-update any part of the suit without prior contact with the Blackbox!
The Rokoko SmartSuit Pro is a wireless motion capture suit that tracks full-body movement in real time. It's made up of sensors placed around the body, allowing you to capture the motion of a performer and translate it into digital animations..
What do you need to use it?
- Rokoko suit (textile & sensors, check the Blackbox)
- powerbank
- advised: standalone router (remember: in HKU you can never plug a router into the LAN network, standalone use only!!!)
- computer (preferably with utp to the router & wifi for internet*)
- optional: Rokoko Gloves
- Rokoko studio software (windows & mac): https://www.rokoko.com/products/studio/download
How to setup (steps)

- Open Rokoko studio
- Create a Rokoko ID (in the studio, but directs youto the browser)
- Create a Project & Scene
- Create an Avatar, with your sizes (rough estimates can work measuring is better)
- Connect the Smartsuit to the computer. Use the provided USB-C cable & connect to the sensor on the back of the suit.
-
Select the second icon to connect to your device (smartsuit)
(If the suit does not appear, check your firewalls)
- Setup the wifi (preferably for the dedicated Router Specs**. )
Use the 5ghz option if available. - Connect the powerbank & disconnect the Usb-pc cable
- Connect the actor profile to the device
- Wear the smartsuit (this step can be done earlier if you are working together)
- When using the gloves follow steps 5-9 again for each glove. Although the powerbanks we use has 3 outputs, it is preferred to use separate powerbanks for the gloves.

How to record mocap (steps)
- Callibrate
- Record
- Clean data
- Export
How to live streaming
For real-time data streaming you need a license/paid seat.
Info & prices: https://www.rokoko.com/pricing (set it to per month instead of anual> 28,- euro per month)
Loophole: Try it out for free: https://support.rokoko.com/hc/en-us/articles/4410424273169-How-can-I-access-the-free-7-day-trial-of-Studio-Plus-or-Pro
For this you need to set up a team (https://support.rokoko.com/hc/en-us/articles/4410409137297-Creating-a-Rokoko-Team-and-Selecting-a-Subscription-Plan)
** The HKU Rokoko's MacAdress has been added to streaming Vlan so the suit also works in all of HKU & connects to your computer if you place it in streaming Vlan too. Connect with your local Blackbox Employee for help with this ;)
HubLights:
The sensors light up blue/green before turning off. When your Smartsuit Pro II sensors are in a normal state they will not be lit when powered on. The only lights that will be on during use will be that of the HUB.

| Power LED |
What does it mean? |
|---|---|
| RED | There is a problem communicating with some of the sensors(possibly a broken wire or sensor) |
| YELLOW | Failed Redpine initialization |
| GREEN | The power is on! The Smartsuit Pro should be detected in Rokoko Studio in the Device Manager |
| OFF |
Smartsuit is not connected to a battery |
| WIFI LED | What does it mean? |
|---|---|
| RED |
A failure has occurred while trying to connect to the network. Please double check your WiFi settings(network/password/IP/Firewall etc) and reach out to support@rokoko.com if further assistance is required. This colour is normal if you have changed computer or network or if this is the first time connecting your Smartsuit Pro to your network |
| BLINKING GREEN |
The Smartsuit Pro's Wifi function initializes. The Smartsuit Pro is also searching for WiFi |
|
GREEN |
The system is working properly and connected to an access point in the 5GHz band |
|
BLUE |
The system is working properly and connected to an access point in the 2.4GHz band |
|
YELLOW |
The system is working properly and connected to an access point in the Dual band mode |
|
BLINKING PURPLE |
The Smartsuit Pro's Hotspot is being initialized |
|
PURPLE |
The device is being connected to the PC via the Hub Hotspot |
Issues & Troubleshooting
- Suit not appearing in manager?
- check your firewalls
- disableantivirus software
-
No legs?
-
If part of the sensors stop working: Disconnect Batterypack, wait 30 secs & reconnect to wifi
-
-
Hub light off or red?
-
Check the charging cable and port.
-
If the hub still doesn’t respond, try a hard reset by holding the power button for 10+ seconds.
-
-
Magnet interference?
-
Avoid standing near large metal objects or electronics during calibration. (see if the sensors are green in the software)
-
useful links:
- video tutorials Rokoko: https://www.youtube.com/@RokokoMotion/playlists &
https://www.rokoko.com/academy/tutorials
- compatible software & plugins for realtime intergration: https://www.rokoko.com/integrations
- * https://support.apple.com/en-gb/guide/mac-help/mchlp2711/mac prioritise the order of connection-service on mac
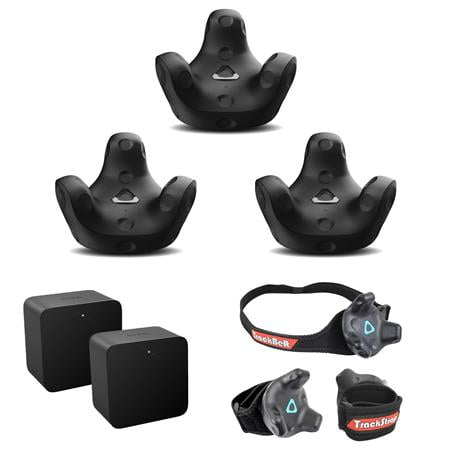
Vive Tracking
Vive Trackers are small motion-tracking devices designed to bring real-world objects into virtual environments. While they are commonly used in VR setups to track body movements or props, they can also function as standalone tracking devices in software like TouchDesigner. Each tracker sends precise position and rotation data, making them useful for interactive installations, motion capture, and experimental media projects. By integrating them into creative software, we can map real-world movement onto digital visuals, audio, or other interactive elements.
Vive Trackers
What Are Vive Trackers?
Vive Trackers are small motion-tracking devices designed to bring real-world objects into virtual environments. While they are commonly used in VR setups to track body movements or props, they can also function as standalone tracking devices in software like TouchDesigner. Each tracker sends precise position and rotation data, making them useful for interactive installations, motion capture, and experimental media projects. By integrating them into creative software, we can map real-world movement onto digital visuals, audio, or other interactive elements.
Setting Up Vive Trackers with a Vive Pro & SteamVR
To use Vive Trackers standalone (without VR controllers), follow these steps:
1. Hardware Setup
A. Prepare Your Equipment
-
Vive Pro Headset (even if unused, SteamVR requires it to be connected)
-
Vive Trackers (paired via dongles or directly with the headset)
-
Base Stations (for tracking)
-
USB Dongles ( when using multiple trackers )
B. Position the Base Stations
-
Mount at least two base stations (2.0 recommended) above head height at opposite corners of your space, at a maximum of 5 meters apart.
-
Ensure they are powered and have a clear view of the area.
2. Install & Launch SteamVR
-
Install Steam and SteamVR if not already installed.
-
Connect the Vive Pro headset to ensure SteamVR initializes correctly.
3. Pair the Vive Trackers
-
Turn on each tracker by pressing the power button until the light turns blue.
-
Open SteamVR and go to Devices > Pair Controller (works for Trackers too).
-
Select "Vive Tracker" and follow the instructions.
-
If using a USB dongle, plug it into your PC and ensure the tracker is paired to it. Place the extension cradles at 45 cm from the computer for stable tracking.
-
Once paired, the tracker’s LED will turn green.
4. Configure the Trackers in SteamVR
-
Open SteamVR > Devices > Manage Vive Trackers
-
Set each tracker's role (e.g., “Held in Hand” or “Disabled” if using it just for positional data).
-
If needed, attach them to an object or a strap (e.g., for body tracking). This can be done with a camera-mount, ¼-inch screw size.
5. Use in TouchDesigner
-
Open TouchDesigner and use the OpenVR CHOP and set it to 'trackers' to read positional and rotational data.
-
Trackers send position (XYZ) and rotation (quaternion or Euler angles).
-
You can map this data to visuals, interactive elements, or other media.
6. Use in other software
- Use GazeboOsc to pick up the Tracker signals & send them to other software (e.g. Isadora) that can handle OSC.
Troubleshooting
- Check if the tracker has a uninterrupted line of vision with the base stations & headset.
-
If a tracker is not detected, reset it by holding the power button for 10 seconds.
-
Ensure no reflective surfaces interfere with the base stations.
-
Restart SteamVR if tracking is unstable.
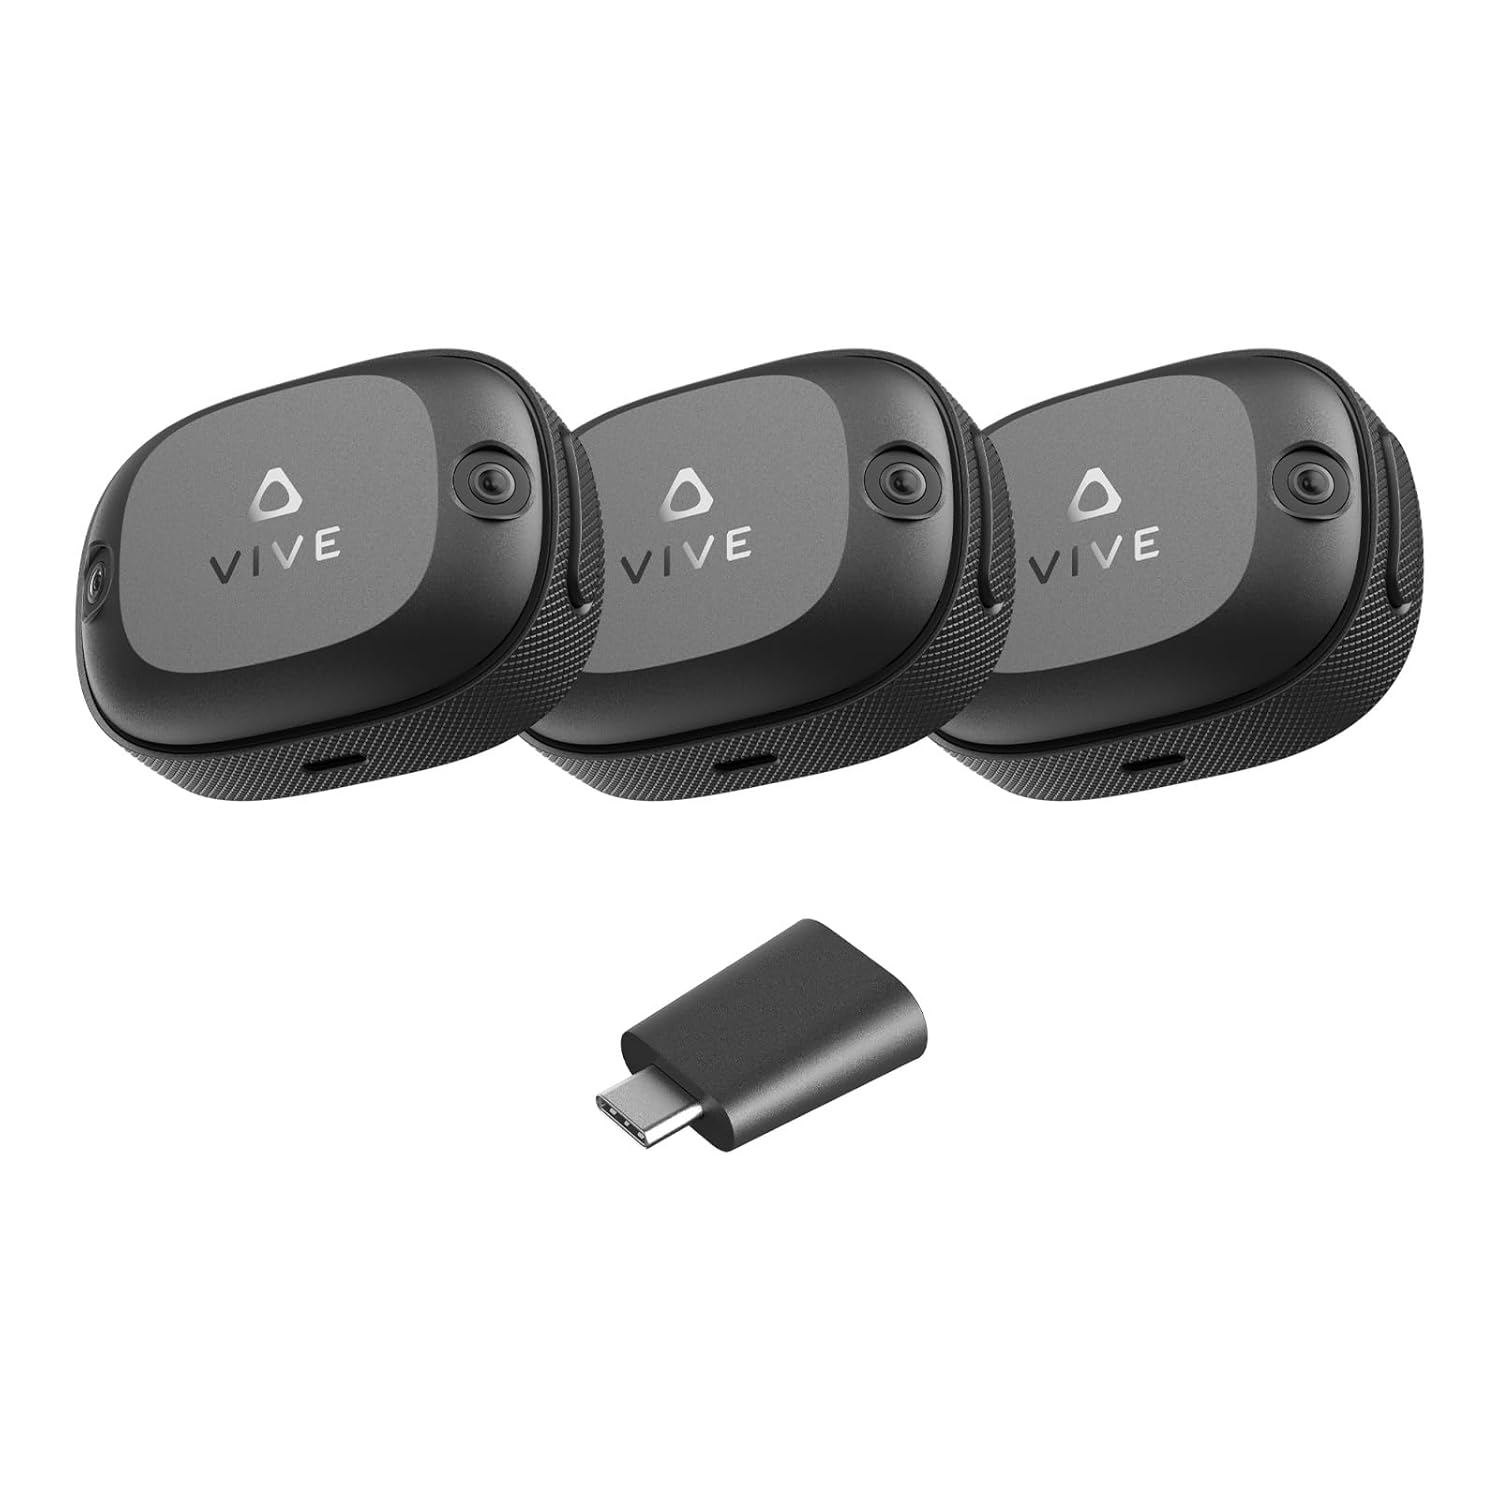
Vive Ultimate Trackers
What Are Vive Ultimate Trackers?
The Vive Ultimate Tracker is HTC’s next-generation tracking device designed to improve motion tracking in VR and standalone applications. Unlike the regular Vive Tracker, which relies on external base stations, the Ultimate Tracker features inside-out tracking, meaning it uses built-in cameras to track its position without needing external sensors.
This makes the Ultimate Tracker more portable and flexible, as it doesn’t require a dedicated tracking area or base stations.
Comparison: Ultimate Tracker vs. Regular Vive Tracker
When to Use Each?
1. Hardware Setup
A. What You Need
B. Charging & Powering On
2. Connect to Vive Wireless Hub
-
Install & Open the Vive Wireless Hub Software
-
Download & install Vive Hub from HTC’s official site.
-
Launch Vive Hub on your Windows PC.
-
-
Pair the Ultimate Tracker (link for steps on the Vive website, link)
- Connect the USBDongle to your computer at least 45 cm away for decent tracking.
-
Open Vive Hub and go to the settings, choose Vive Ultimate Trackers
-
Check for firmware update & do them if necessary (app explains the steps) .
-
Pair New: Follow the on screen instructions to pair each Ultimate Tracker.
-
Tracker Mapping
-
click on Tracker setup & follow the steps on screen>
-
3. Open SteamVR
-
Once trackers are mapped in Vive Hub, launch SteamVR.
-
SteamVR should now detect the Ultimate Trackers automatically.
-
You can check and adjust tracking roles under Devices > Manage Vive Trackers in SteamVR.
4. Use in TouchDesigner
-
Open TouchDesigner and use the OpenVrChop & set it to Trackers to receive position & rotation data.
-
Map the data to visuals, interactions, or animations as needed.
5. Use in other software
- Use GazeboOsc to pick up the Tracker signals & send them to other software (e.g. Isadora) that can handle OSC.
Troubleshooting
-
If SteamVR doesn’t detect trackers, temporarily turn on the headset or restart SteamVR and Vive Hub.
-
Ensure the tracker is properly mapped in Vive Hub before launching SteamVR.
-
Reset a tracker by holding the power button for 10 seconds.
- When tracking is lost, return it to the zero point of the callibration
- Since the Ultimate Tracker uses inside-out tracking, ensure there are enough visual markers and light in the environment for stable tracking. Dark furniture may cause tracking issues.
Optitrack Motion capture
General Info
- Optitrack main site: https://optitrack.com/
- Optitrack wiki: https://docs.optitrack.com/
Example projects
- What Is? - Motion Capture
- I Learned Hollywood Motion Capture
- Roger Gihlemoen: 4 year old in MOCAP suit / MOCAP Reel / 3 year old in mocap suit
- Forms Memo AKten 2011 vimoe movie: here
Motion capture & Unity
The OptiTrack Unity3D Plugin allows you to stream real-time Rigid Body, Skeleton, and HMD tracking data from Motive into Unity. Using the streamed data, objects and characters in the scene can be animated.
All the information and plugins you need can be found here: https://docs.optitrack.com/plugins/optitrack-unity-plugin
Mind also these settings which are not so clear through the website stated above:
Settings for Motive & Unity
Connect both pc's with HKU netwerk Wifi or ethernet
Put mocap & Unity pc in SVlan: ask blackbox employe to help, Restart connectios to make sure.
Ip range should be 10.3.4.xx (not 10.3.40.xx) (3rd number is location based, 4 = IBB)
Disconnect all firewalls on both pc's! (Mocap pc is already disconnected)
Motive > view > Datastreaming Pane > Local interface: ip adres from wifi or ethernet verbinding
Transmission type: Unicast
Open Unity file
client optitrack (asset/game obj) connection settings:
Server adress: adres from mocap pc
local address: Unity pc
In Unity adjust Rigid Body ID, > Motive:
Assets > properties > Streaming ID
Camera (&AI) based Mocap
AI- and webcam-based motion capture is a form of markerless motion capture: instead of using suits with sensors or reflective markers, the system analyzes video images from one or more cameras and estimates the position of the human body using computer vision and machine learning. It can often run using ordinary webcams, smartphones, or consumer cameras.
How AI-Based Mocap Works
1. Video Capture
A webcam, smartphone, DSLR, or multiple cameras record a performer moving through space.
Depending on the system:
- Single-camera systems estimate movement from one viewpoint.
- Multi-camera systems reconstruct the body more accurately in 3D.
2. Pose Estimation
AI models analyze each video frame and detect key body points such as:
- head
- shoulders
- elbows
- wrists
- hips
- knees
- ankles
These points are often called landmarks or keypoints. The AI has been trained on massive datasets of human movement, allowing it to recognize body posture even under imperfect lighting or partial occlusion.
3. Skeleton Reconstruction
The detected points are connected into a digital skeleton or “rig.”
The software estimates:
- body pose
- joint rotation
- movement speed
- orientation in 3D space
Advanced systems may also track:
- fingers
- face
- eye direction
- hand gestures
4. Retargeting
The motion data is transferred (“retargeted”) onto:
- 3D avatars
- virtual characters
- particle systems
- lighting systems
- sound engines
- projections
- robots or kinetic sculptures
This allows live movement to control digital media from recordings or in real time.
Example Tools:
MediaPipe |
Open Pose |
FreeMoCap |
|
MediaPipe is an open-source framework developed by Google for real-time AI perception. It includes models for:
MediaPipe is widely used because it:
MediaPipe is often connected to:
|
One of the foundational open-source AI pose estimation systems developed by Carnegie Mellon University. Widely used in:
It can track:
|
FreeMoCapis an open-source motion capture system focused on accessible, research-based full-body capture. Unlike simple webcam pose estimation,
It combines tools such as:
The system triangulates body positions from multiple camera angles to reconstruct motion in 3D space more accurately than a single webcam setup. |
Move.ai |
DeepMotion
|
Rokoko Vision |
|
Uses AI and multiple cameras or phones for high-quality markerless mocap without suits. Often used in:
Mostly processed capture, some live workflows emerging |
Allows users to upload ordinary video footage and generate motion capture animation automatically using AI. Useful for:
Free version tracks up to 2 people, not realtime |
Originally known for inertial mocap suits, but now also supports AI webcam-based tracking. Popular in:
Free for up to 15 seconds |