# Isadora
Isadora by Troikatronix is a visual programming environment which is mainly used for prototyping interactive set-ups used for theatre, performance, visuals and interactive installations.
# Installation instruction Isadora 4 USB Key Version with USB key license
To be able to save your work in Isadora, the HKU lending and the Blackboxes have USB keys. Below is an instruction:
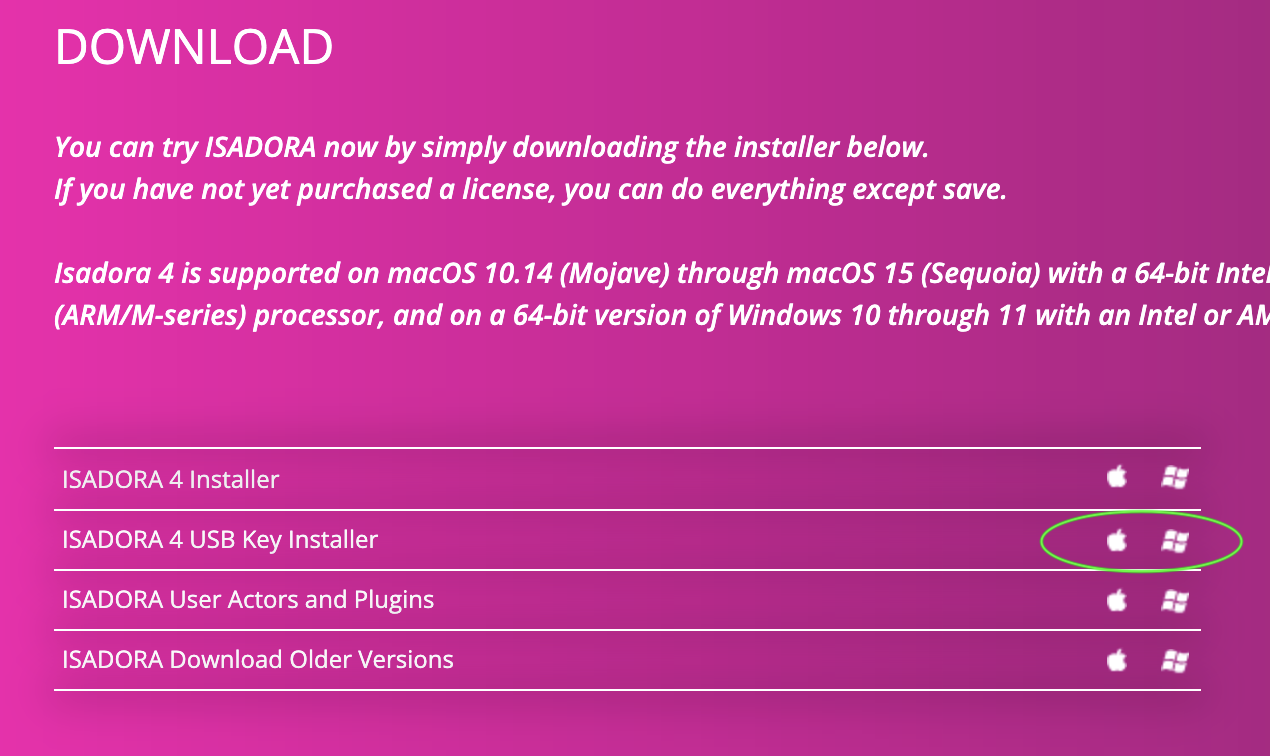
Download the “Isadora 4 USB key Version” for Windows or MacOS at
**1**.[ https://troikatronix.com/get-it/ ](https://troikatronix.com/get-it/)under the Downloads heading.
[](https://bookstack.hku.nl/uploads/images/gallery/2025-04/screenshot-2025-04-15-at-10-15-14.png)
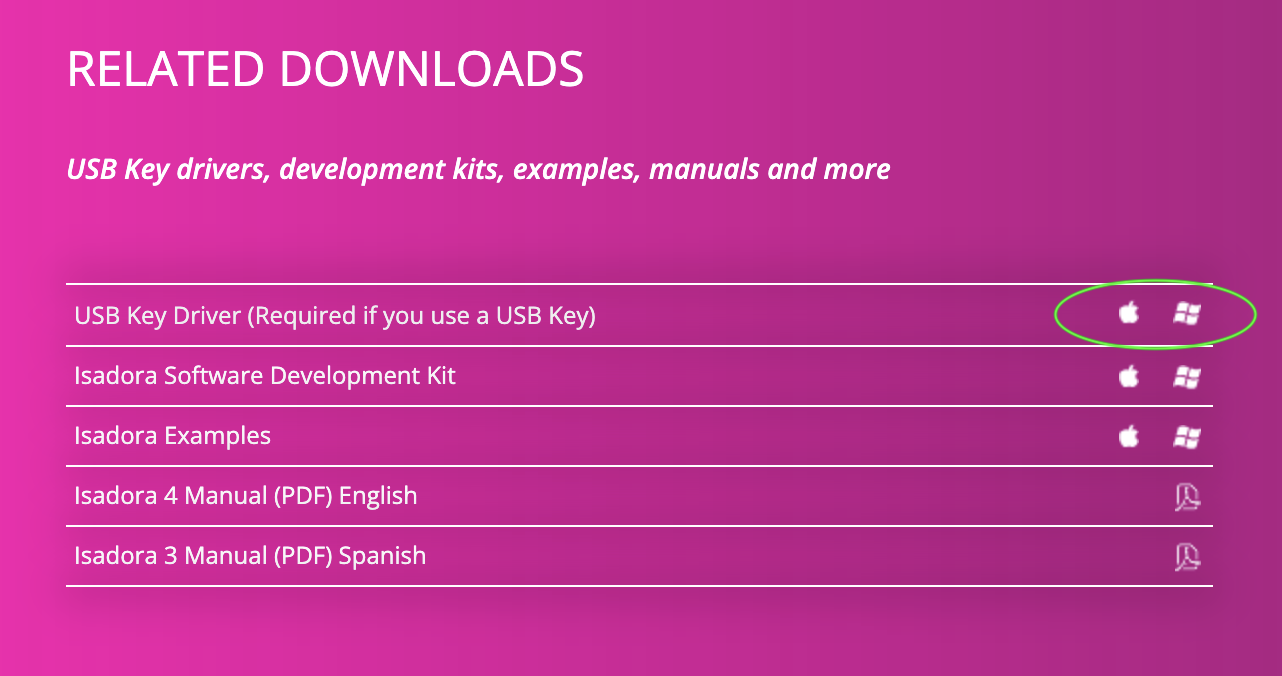
**2**. Under the heading “Related Downloads” click on “USB key Version” for Windows or MacOS. Another page appears.
[](https://bookstack.hku.nl/uploads/images/gallery/2025-04/jGvscreenshot-2025-04-15-at-10-17-12.png)
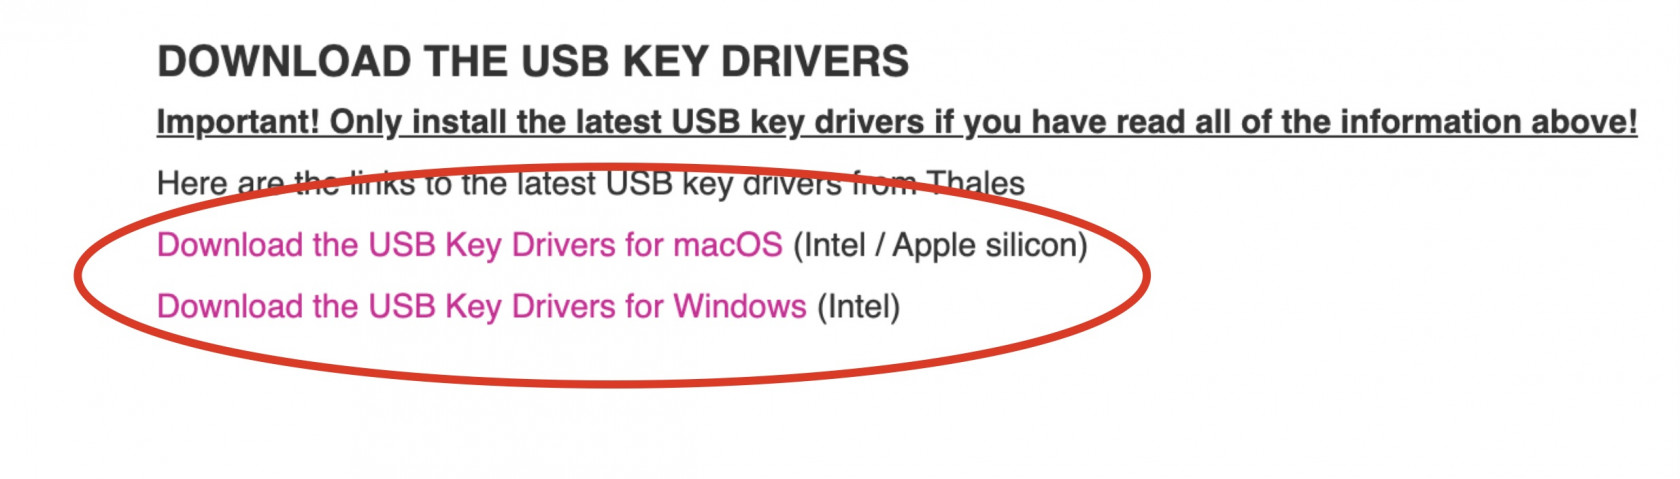
**3**. Scroll to the bottom of the page and click on the correct USB key driver download link for your platform (Windows or MacOS). You will be redirected to the THALES website.
[](https://bookstack.hku.nl/uploads/images/gallery/2023-03/screenshot-2023-03-28-at-15-20-17.jpeg)
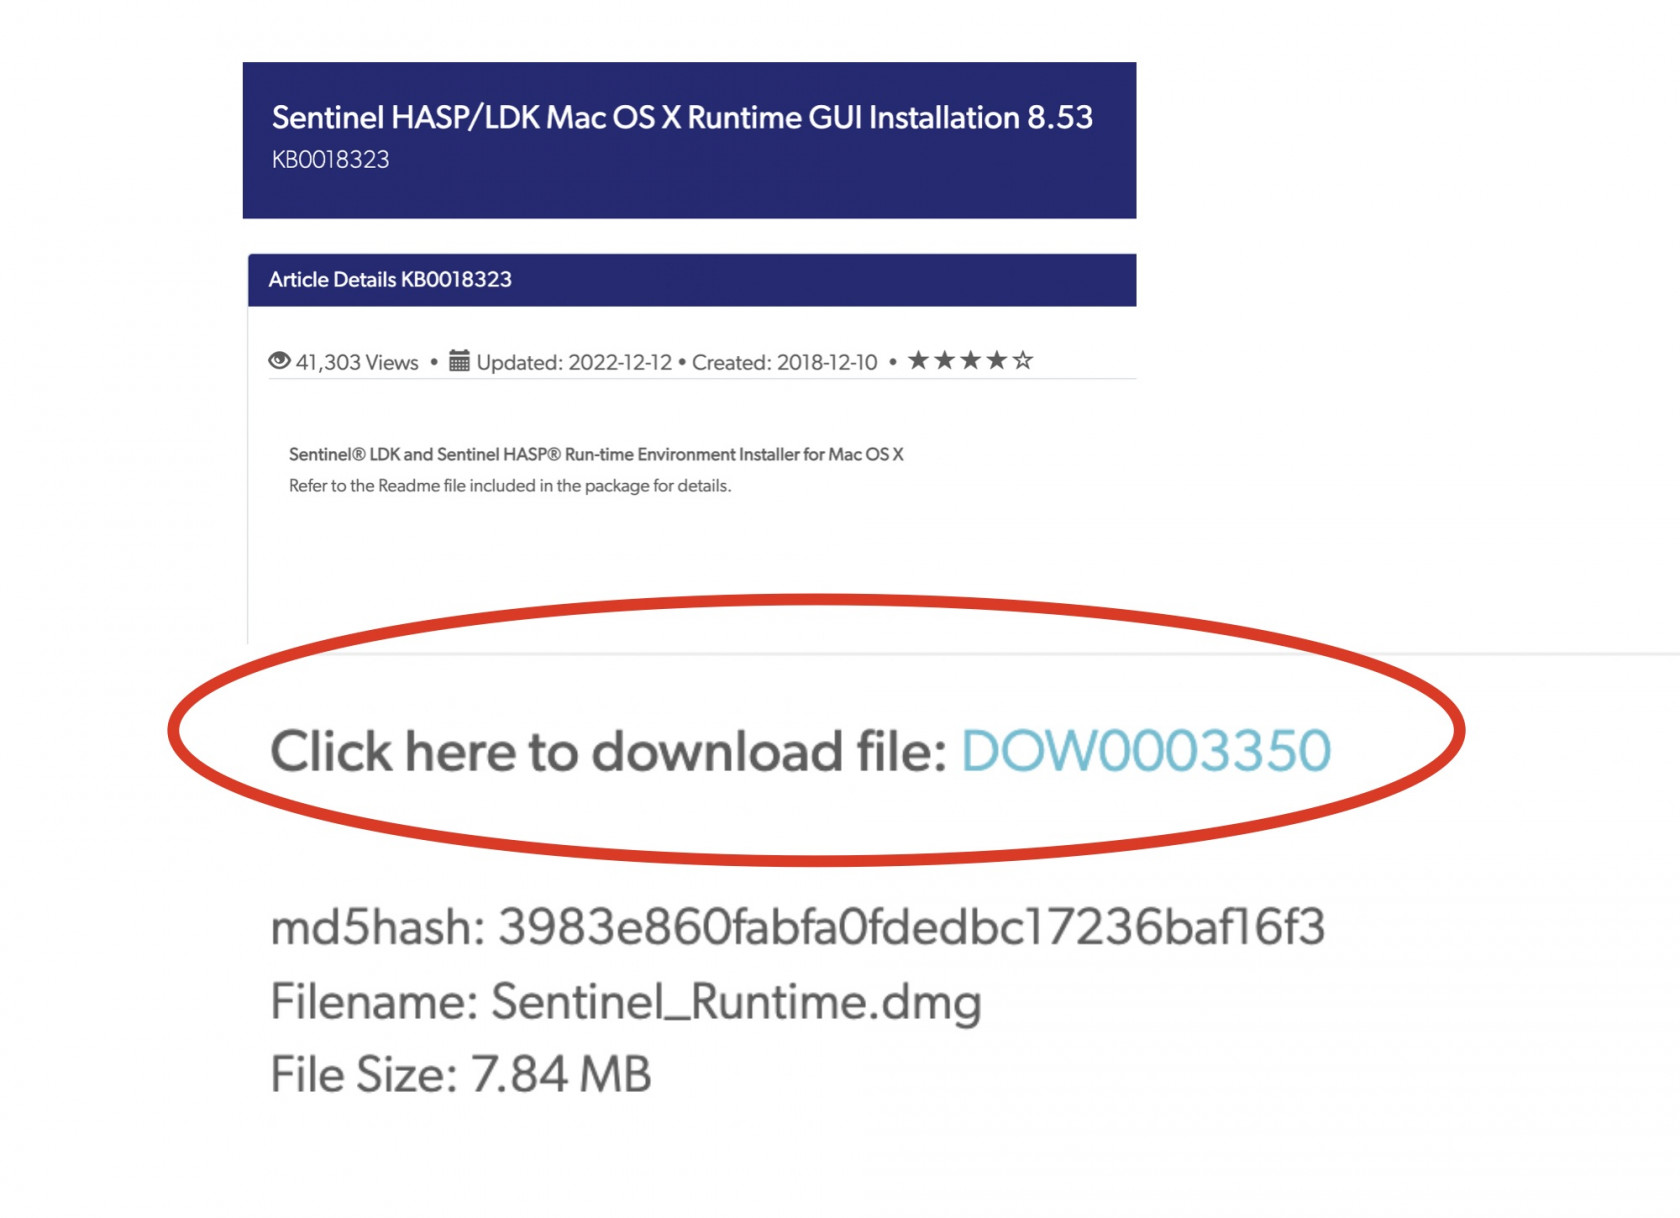
**4**. Click on the “Sentinel® LDK and Sentinel HASP® Run-time Environment Installer GUI” download link.
[](https://bookstack.hku.nl/uploads/images/gallery/2023-03/screenshot-2023-03-28-at-15-20-32.jpeg)
**5**. A pop-up screen appears with the “End User License Agreement”. Scroll down and click “I accept”
[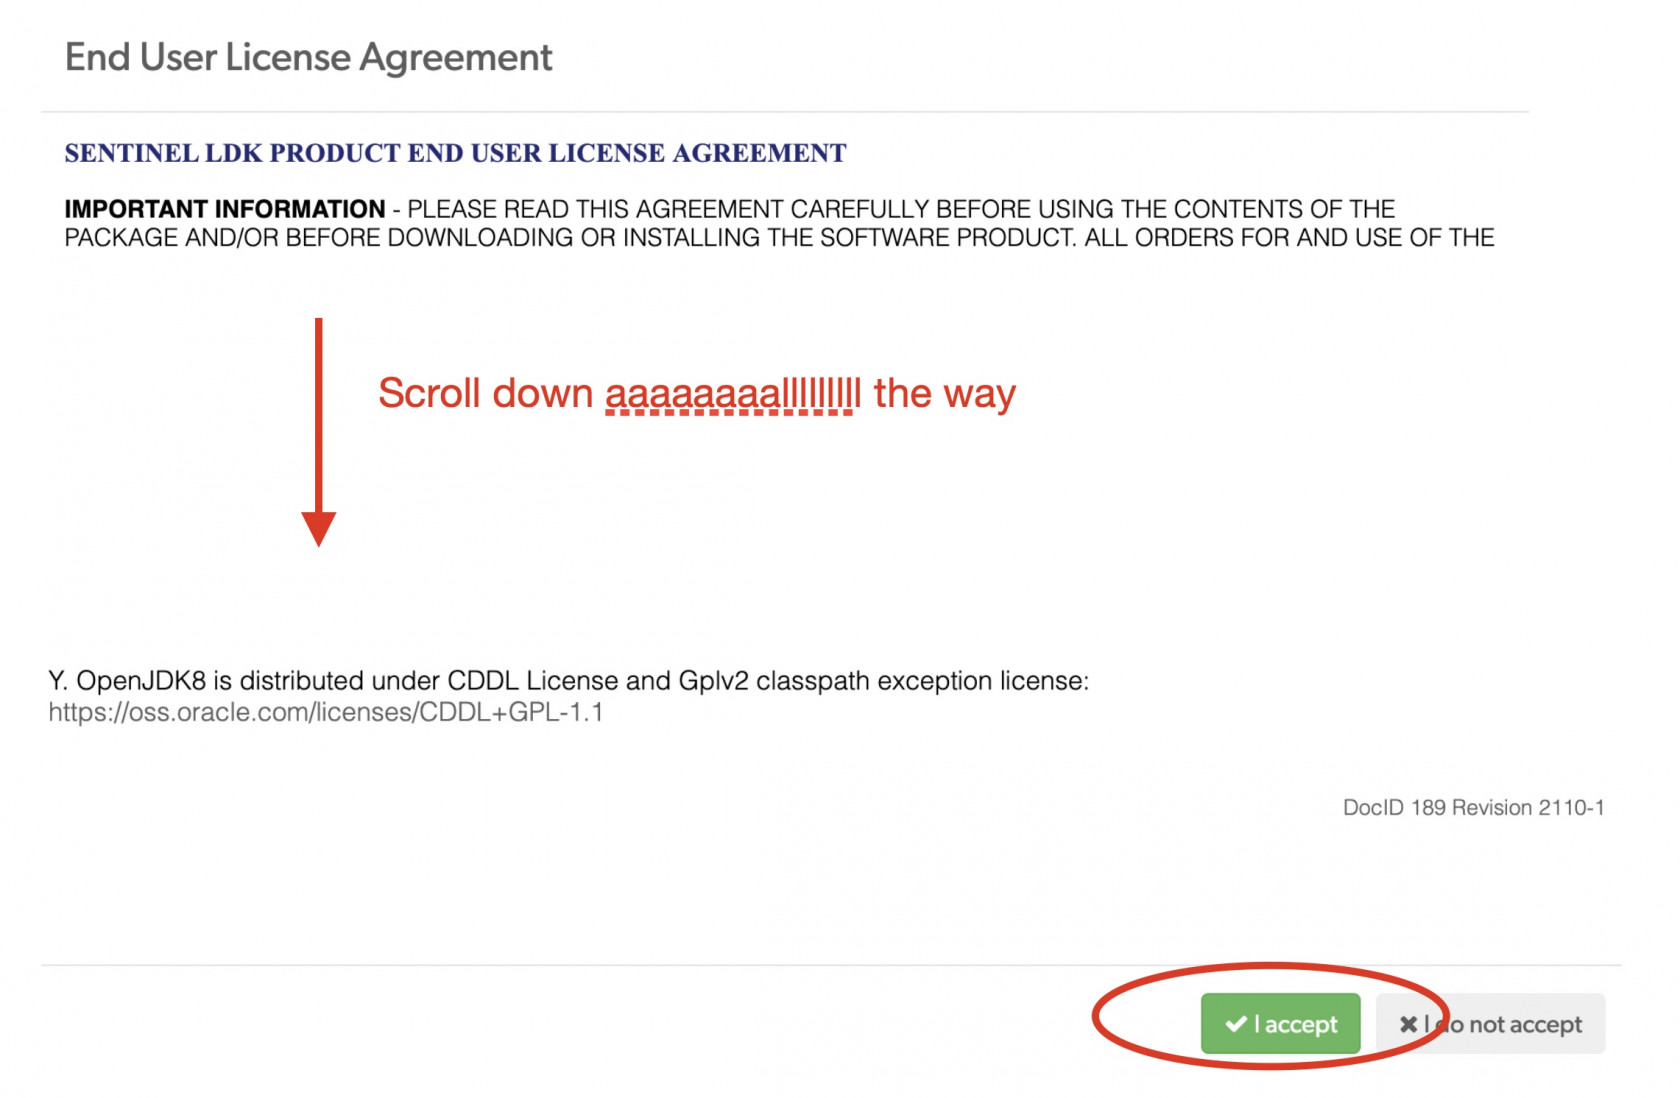](https://bookstack.hku.nl/uploads/images/gallery/2023-03/screenshot-2023-03-28-at-15-20-59.jpeg)
**6**. Install the Sentinel USB key for Windows or MacOS.
**7**. Install “Isadora 4 USB Key Version."
**8**. Insert the physical Isadora USB Key into the USB port and boot up Isadora (you can do this at a later time if you do not currently have access to a USB Key).
**9.** If it's your first time booting up Isadora, you may have to give Isadora some permissions, like acces to microphone and webcam. Click accept on these prompts (if you wish to use these as a sensor for example).
If you wish to work with projection mapping, it is important to turn off 'Displays have separate spaces'. For Mac, you can find it under System settings -> Desktop & Dock -> Displays have separate spaces (scroll all the way down). Turn it off.
You may have to restart your computer to let these changes go into effect
**[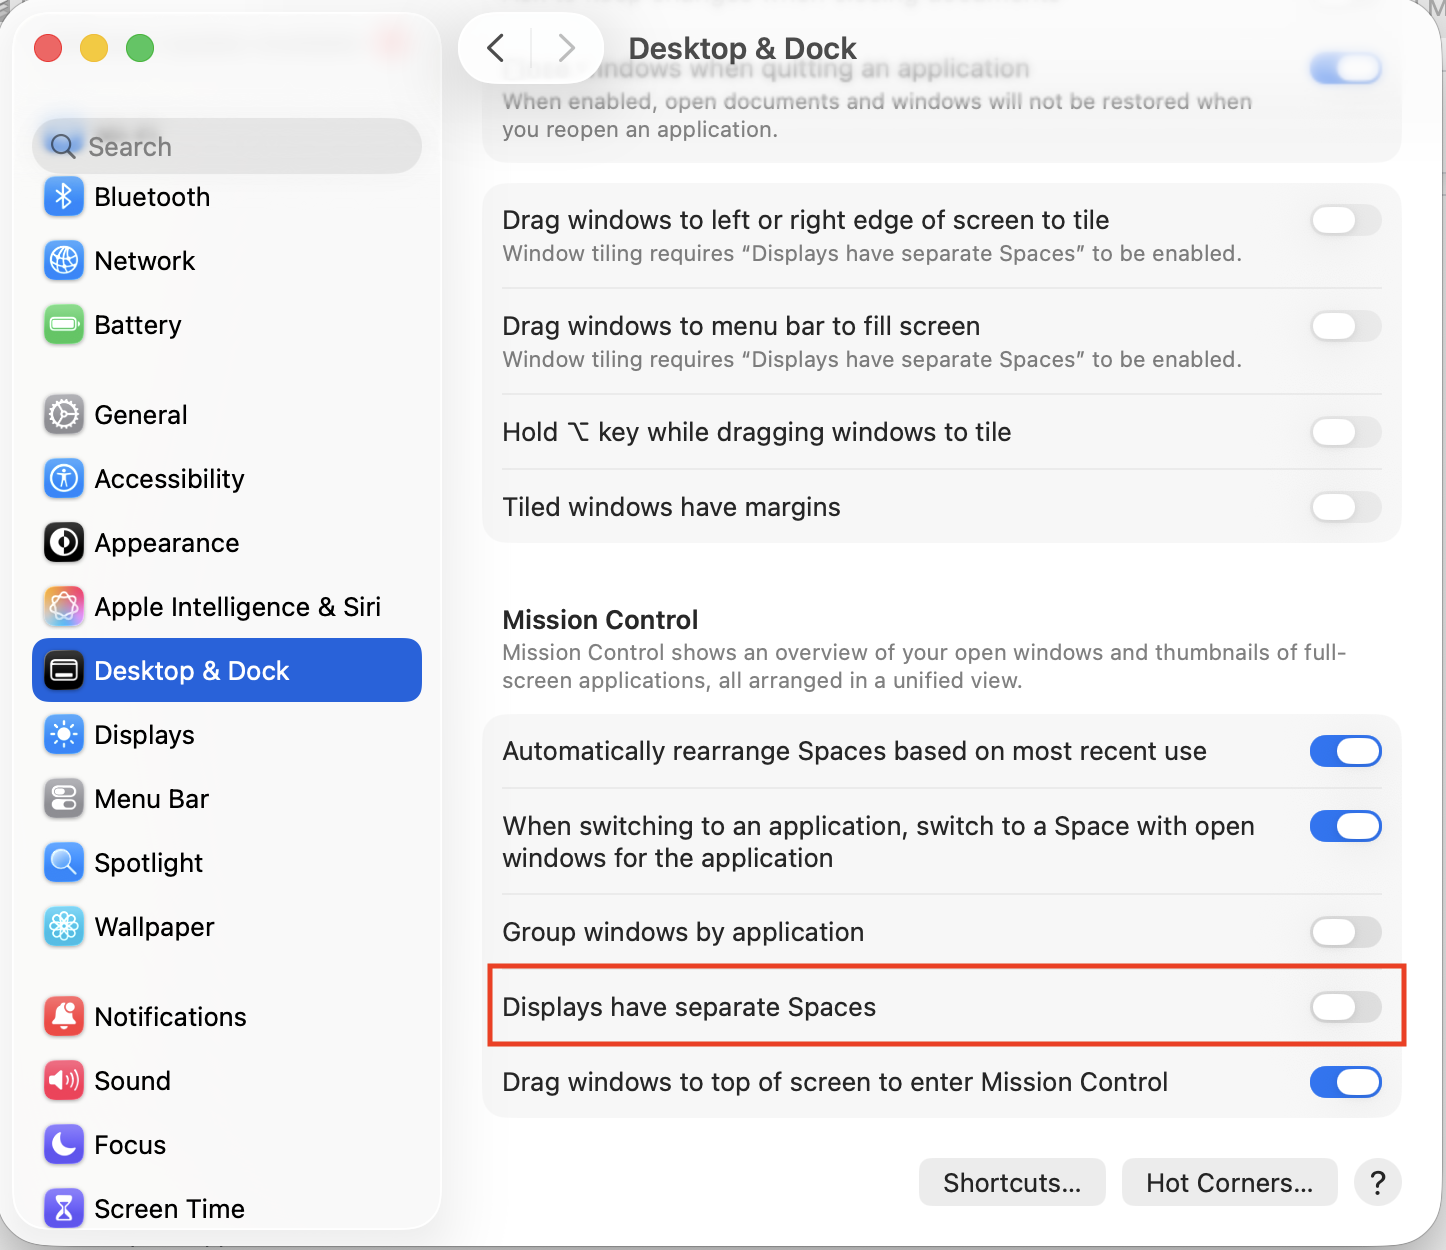](https://bookstack.hku.nl/uploads/images/gallery/2026-02/screenshot-2026-02-24-at-12-27-26.png)**
**10**. In the Isadora menu bar, go to Help -> Register
[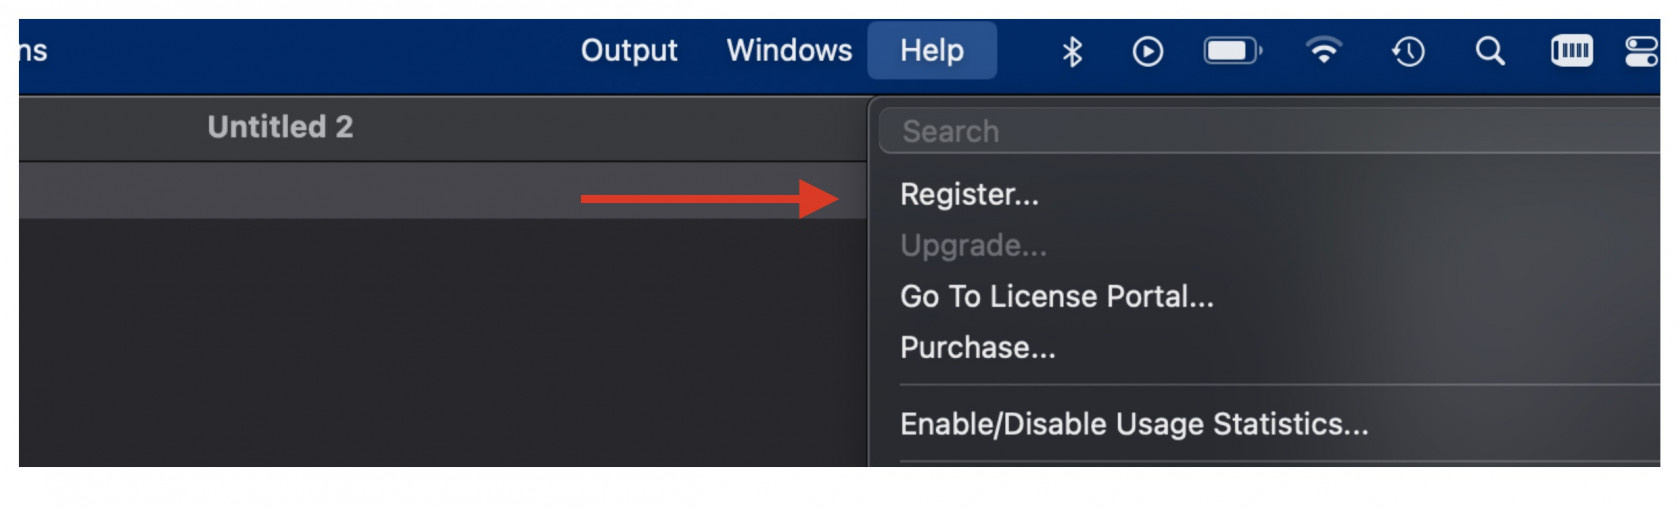](https://bookstack.hku.nl/uploads/images/gallery/2023-03/screenshot-2023-03-28-at-15-21-15.jpeg)
**11**. Copy the code that you receive from a teacher or workshop employee or can find in the lending environment and paste it in the empty registration field.
[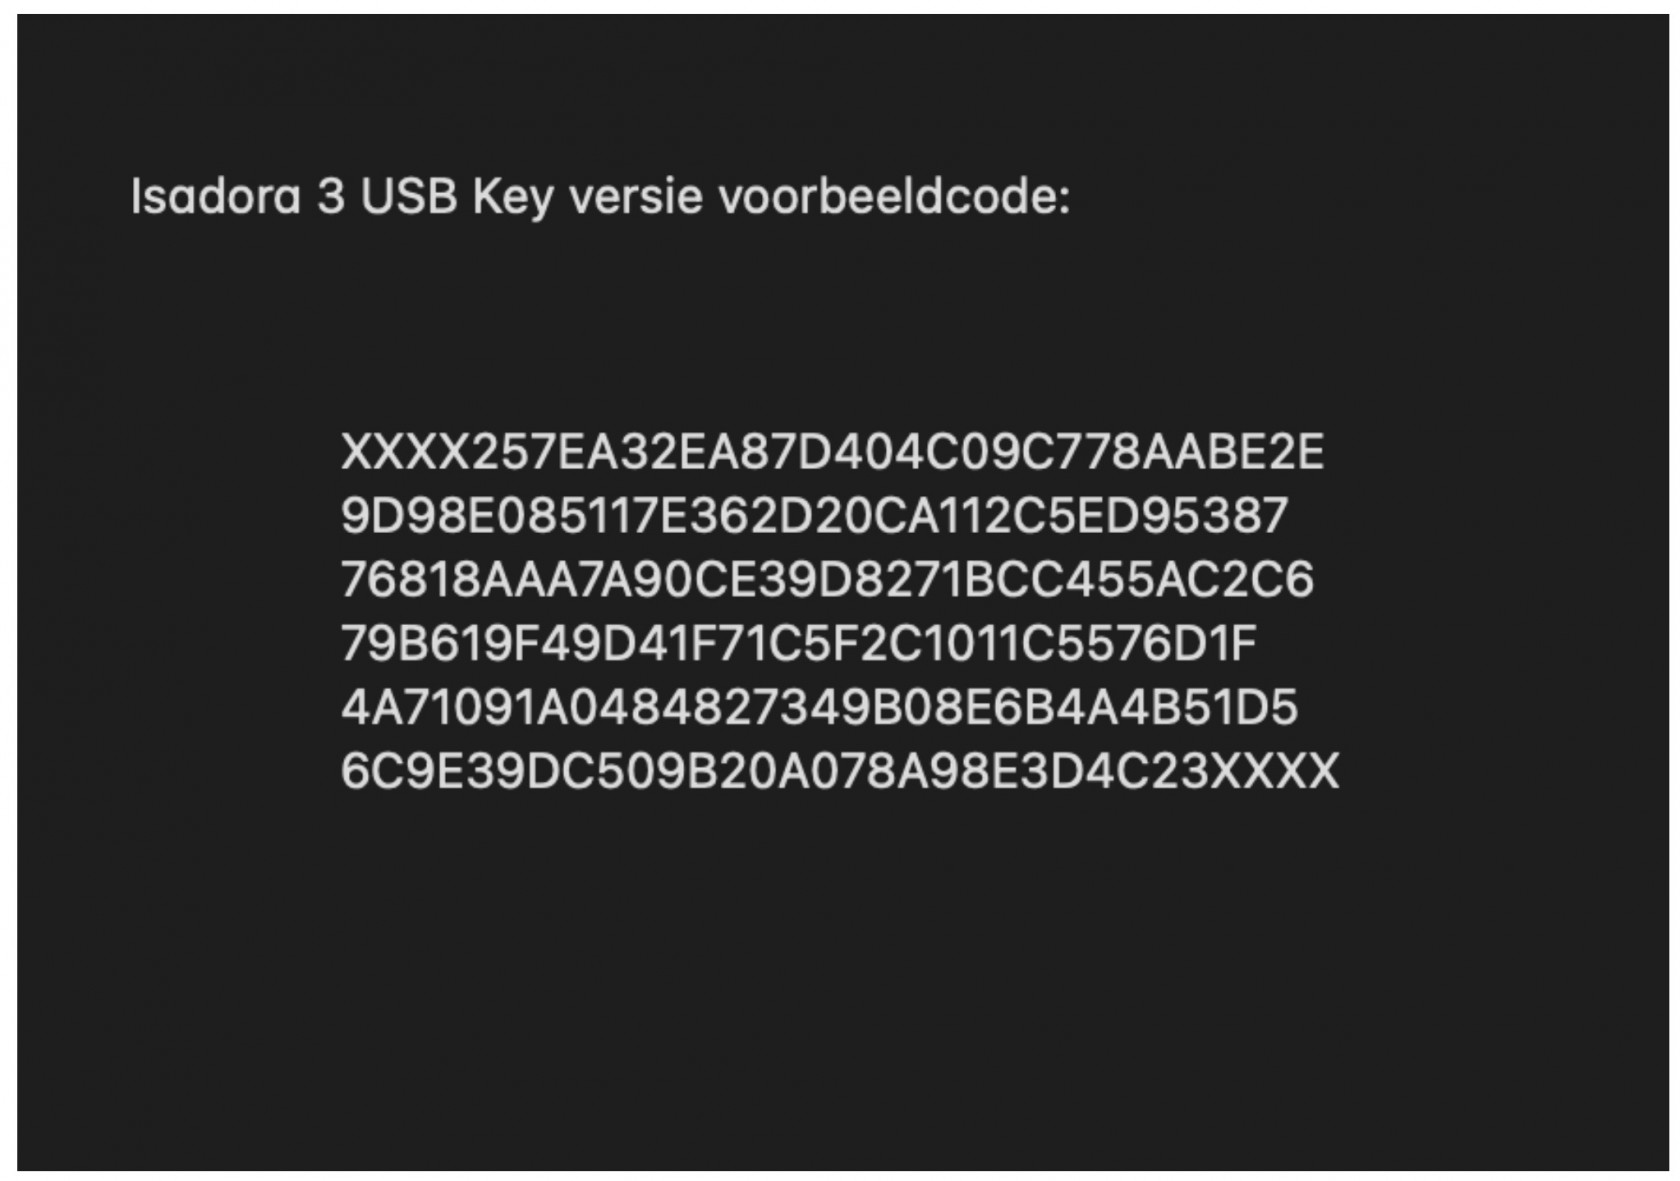](https://bookstack.hku.nl/uploads/images/gallery/2023-03/screenshot-2023-03-28-at-15-21-28.jpeg)
**12**. You can now save Isadora patches with the USB key. Have fun!
Note!: If you use a USB (C) adapter, make sure that it stays in place properly. Connection to isadora and the dongle will be disconnected if the adapter moves or becomes loose. Then you cannot save your patch. So save your work regularly.
Note2: if you are on an ARM Mac, running plugins like for the Kinect, Isadora may flash a popup that you need to r[un Isadora ](https://beebom.com/force-apps-to-run-with-rosetta-m1-mac/)
[with Rosetta mode; here's how](https://beebom.com/force-apps-to-run-with-rosetta-m1-mac/)
# Knowledge subjects
In this chapter you will find pages diving deeper in a number of different subjects you will come across when learning and working with Isadora.
# Video Effects general
[](https://bookstack.hku.nl/uploads/images/gallery/2023-08/screenshot-2023-08-30-at-11-20-47.png)
## Tutorial
- [Isadora 101 #10: Introduction to video effects](https://www.youtube.com/watch?v=qmHaoC2irXE)
- [Isadora 101 #14 Layering and compositing](https://www.youtube.com/watch?v=OezcVUvon_0)
### About Video Effects
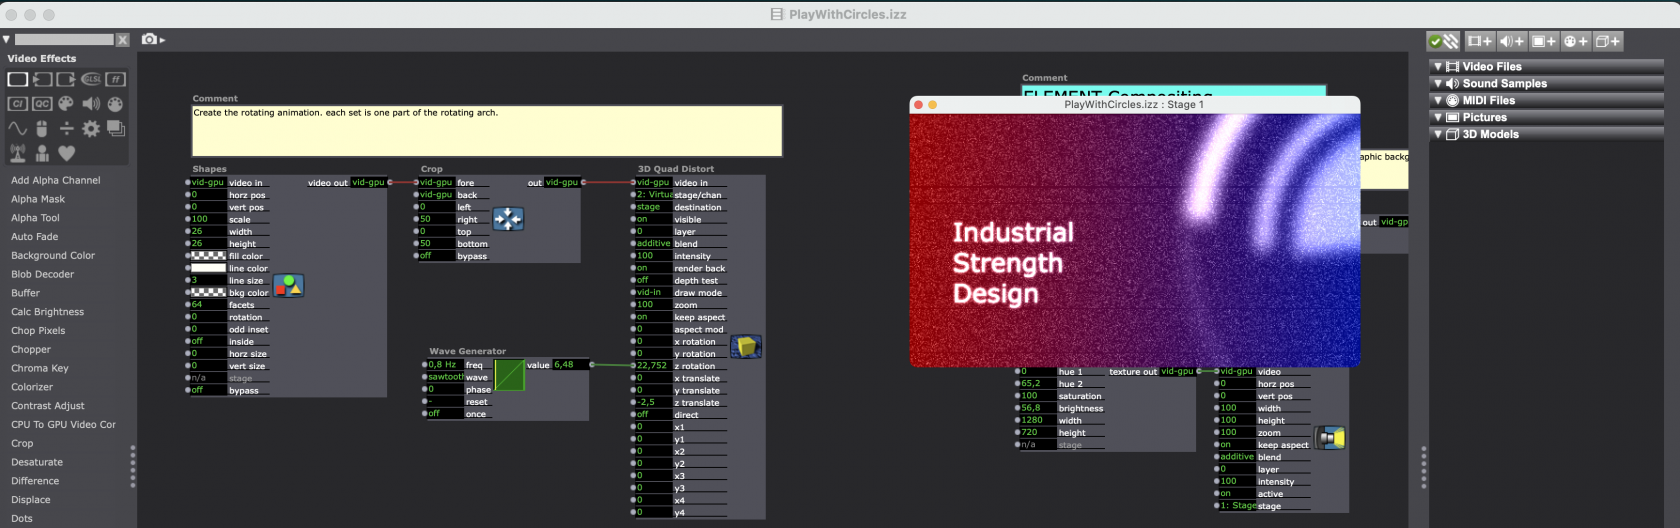
Isadora has many already buit-in video effect with which you can experiment. Do not be afraid to play with the different parameters and experiment as much as possible. At the Isadora site in the "Addons" section you can find many moore effects. Also the forum of the Isadora site is a good source for tips&tricks.
## Tips&Tricks
- Play with the different parameters and combine different video effects for unexpected results.
- Try to use effects in different sequences to create other effects
- Every video effects actor has an "bypass" input that you can turn ON to not use the effect this way you cna better see what does what.
- Make yourself familiar with what all the actors do to better get an overview of what is possible
## Assignment
Make a tryptich using your own chosen theme.
Use a single movieclip and create a composition using different video effects and movie players. Choose one clip form Pexels as inspiration.
# Layering and Masking
[](https://bookstack.hku.nl/uploads/images/gallery/2023-08/hq720.jpeg)
## Tutorials
- [Learn Isadora](https://www.youtube.com/watch?v=oopM7kzfDRg)
- [Isadora 101 #14 Layering](https://www.youtube.com/watch?v=OezcVUvon_0)
- [Isadora 101 #15 Compositing](https://www.youtube.com/watch?v=YdPLHcTZZwk)
## What is this?
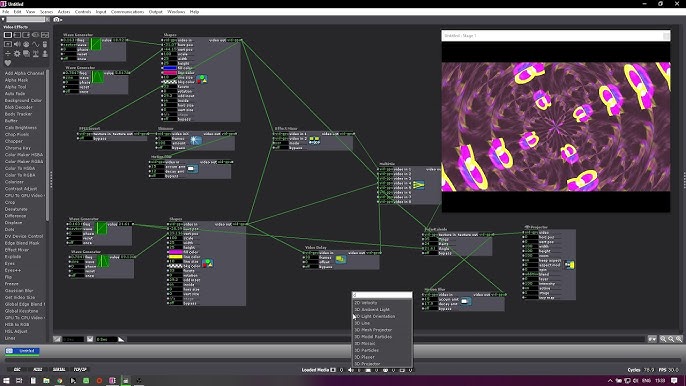
Just like in image editing programs such as Photoshop you can work in Isadora with layering and blend modes. Depending on where the actors are on the scene they will be renderd in different layers. You can also set the layers manually. And in th eprojector you can set the blending options.
## Practice Assignment
Create a composition of different movies using the layers and blending modes. Use the underwater world as theme.
# Generative Visuals
[](https://bookstack.hku.nl/uploads/images/gallery/2023-08/screenshot-2023-08-30-at-11-35-14.png)
## Tutorials
- [Wave Generators](https://www.youtube.com/watch?v=nzbPTz3Arh8)
- [Scaling Values](https://www.youtube.com/watch?v=WuPpy461cIo)
- [Example fromm colleague](https://www.youtube.com/watch?v=Rg0XxVdkrXA)
- [Isadora Guru #2 Generative](https://www.youtube.com/watch?v=ELAMomZnn7c)
- [Isadora Guru #7 Generative with 3D ropes](https://www.youtube.com/watch?v=ChbyApuBEPg)
- [Isadora 1001 #9 Using th eGenerators Actors](https://www.youtube.com/watch?v=qnfsiLS0UXM)
### Generative Visuals
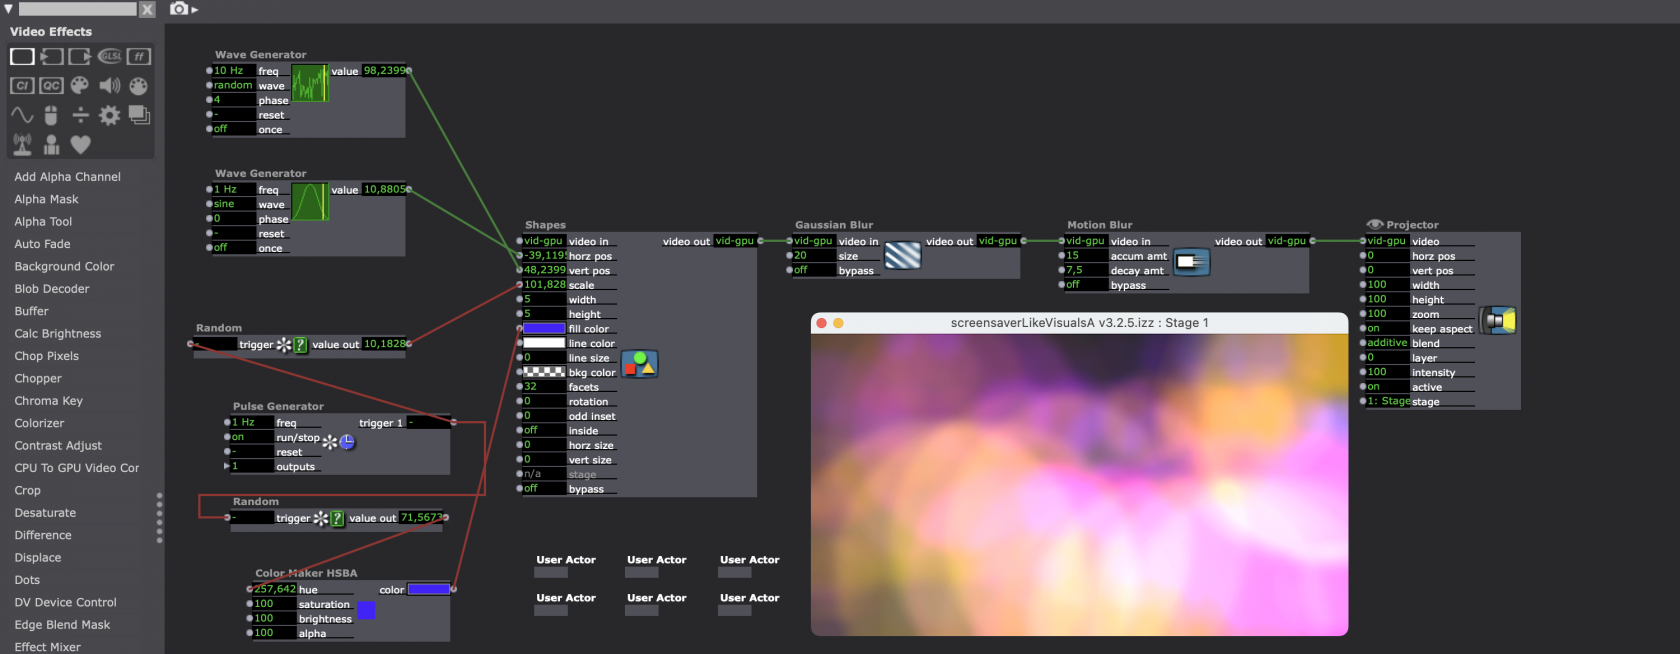
Whithing Isadora are already a lot of actors that can help you to generate visuals without using images or movies. Some of these actors are: Shapes actor, Lines actor, 3D ropes, Particles, Live drawing Actor. The generator actors also play an important role to generate numbers in diferent sequences and intervals.
## Tips & Tricks
- Do not underestimete the power en versatility of the shapes actor. It can take any shape or form
- For the more advanced users the combination with the Javascript actor opens up another world of generative possibilities.
- Do not forget to experiment with Video Effects. Motion blur can also often be your friend.
- Using live sounds input with the sound frequency bands actor can help make sound reactive visuals
## Practice Assignment
Make a small VJ patch that reacts to a favourite piece of music. Try to capture the atmosphere of the music in the visuals you create (disco, techno, lounge, country, blues).
# Particles
[](https://bookstack.hku.nl/uploads/images/gallery/2023-08/screenshot-2023-08-30-at-11-51-14.png)
## Tutorials
- [examples of 3D Particles](https://vimeo.com/516035442)
- [3D particles tutorial](https://community.troikatronix.com/topic/5434/3d-particles-tutorial)
- [Intro into Particle system](https://support.troikatronix.com/support/solutions/articles/13000075026-guru-session-1-stage-setup-editor-and-basic-particle-systems)
- [Particles rand tex map example](https://www.youtube.com/watch?v=80AYrNbyIl8&t=935s)
- [Free Particles patch](https://community.troikatronix.com/topic/7295/free-particles-patch)
- [Particles Example File](https://troikatronix.com/add-ons/mouse-control-of-3d-particles/)
- [Particle with words Example File](https://troikatronix.com/add-ons/sentence-clouds-paragraph-trails/)
- [Particle Example file Repel/Attach](https://community.troikatronix.com/topic/7165/sample-patch-repel-particles/3)
## Tips & Tricks
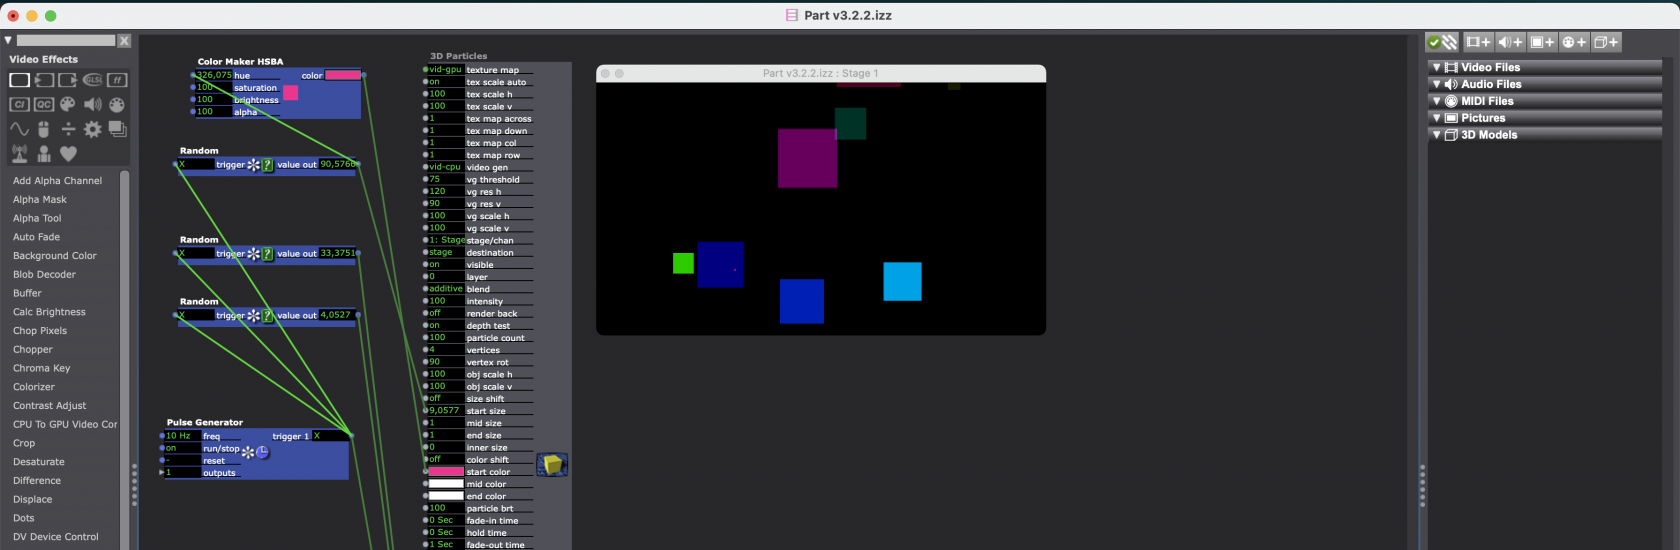
- There is a 3D particles actor and a 3D model particles actor. The first is for 2D particles and the second is for 3D particles
- When working with particles you are working in 3D space so begin with adding the 3D stage orientation and set the "z translate" to -10 or something similar otherwise you will not see the particles because you are own top of the particles.
- Do not forget to play with the particle count and location/velocity to really see them move.
## Practice Assignment
Make it snow with an appropriate soundtrack. Bonus points for interactivity or special effects.
# Text
[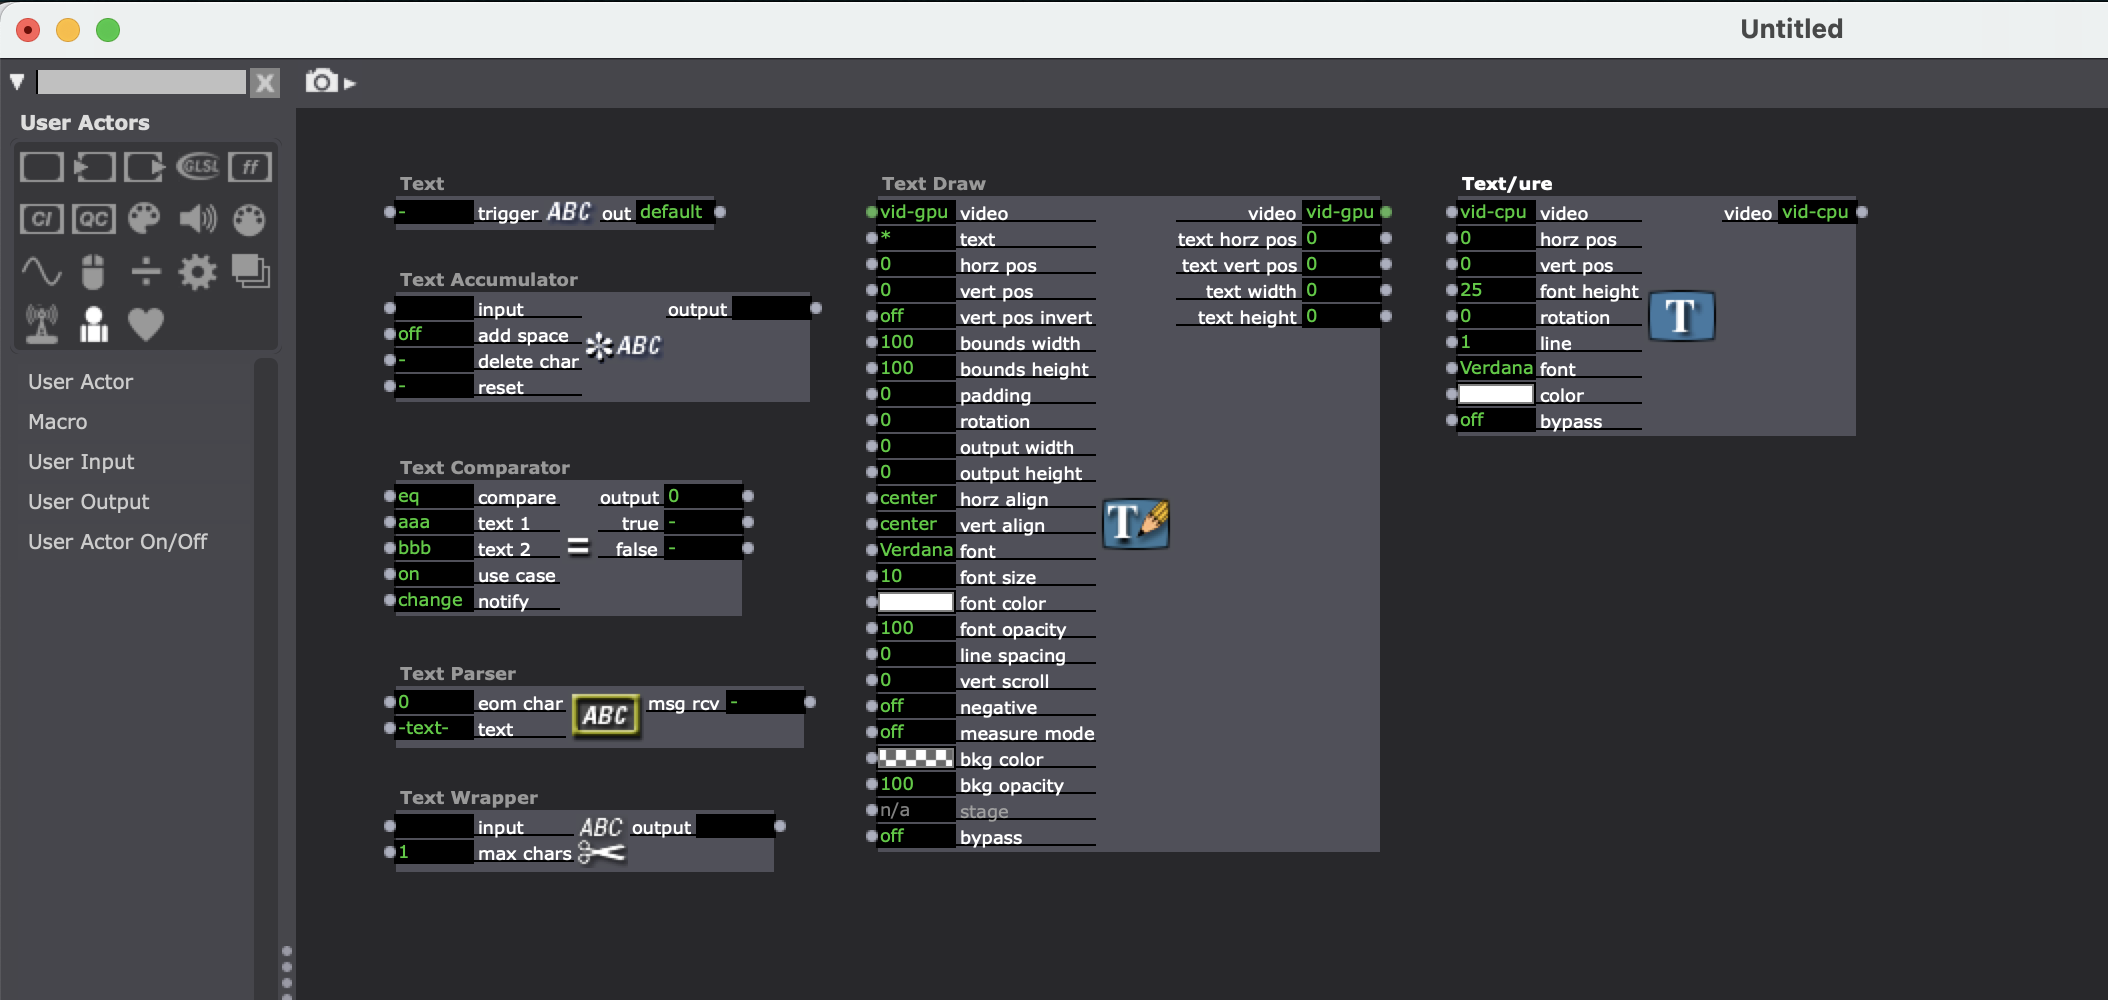](https://bookstack.hku.nl/uploads/images/gallery/2023-08/screenshot-2023-08-30-at-11-12-26.png)
## Tutorials
- [Using te Text/ure actor with multiple words](https://matthewragan.com/2014/04/19/shuffling-words-around-isadora/)
**Kinectic type**
- [example 01](https://www.youtube.com/watch?v=a2CS3b2LehY)
- [Simple example wonderwall](https://www.youtube.com/watch?v=O4Q6PN8SB2w)
### Tips&Tricks:
- There are many actors who do "something" with text. the "Text Draw" actor is the one to draw text on screen.
- There is a trigger text actor you can use to triger different pieces of text after eachother
- The "value to text" actor is very handy if you want to dispaly some values
- With the Get/POST URL text you can use live sources form the internet.
### Practice Assignment
Make a text animation based on the song Wonderwall. Don't forget the possibilities of the Tex/ure actor.
# Logics
[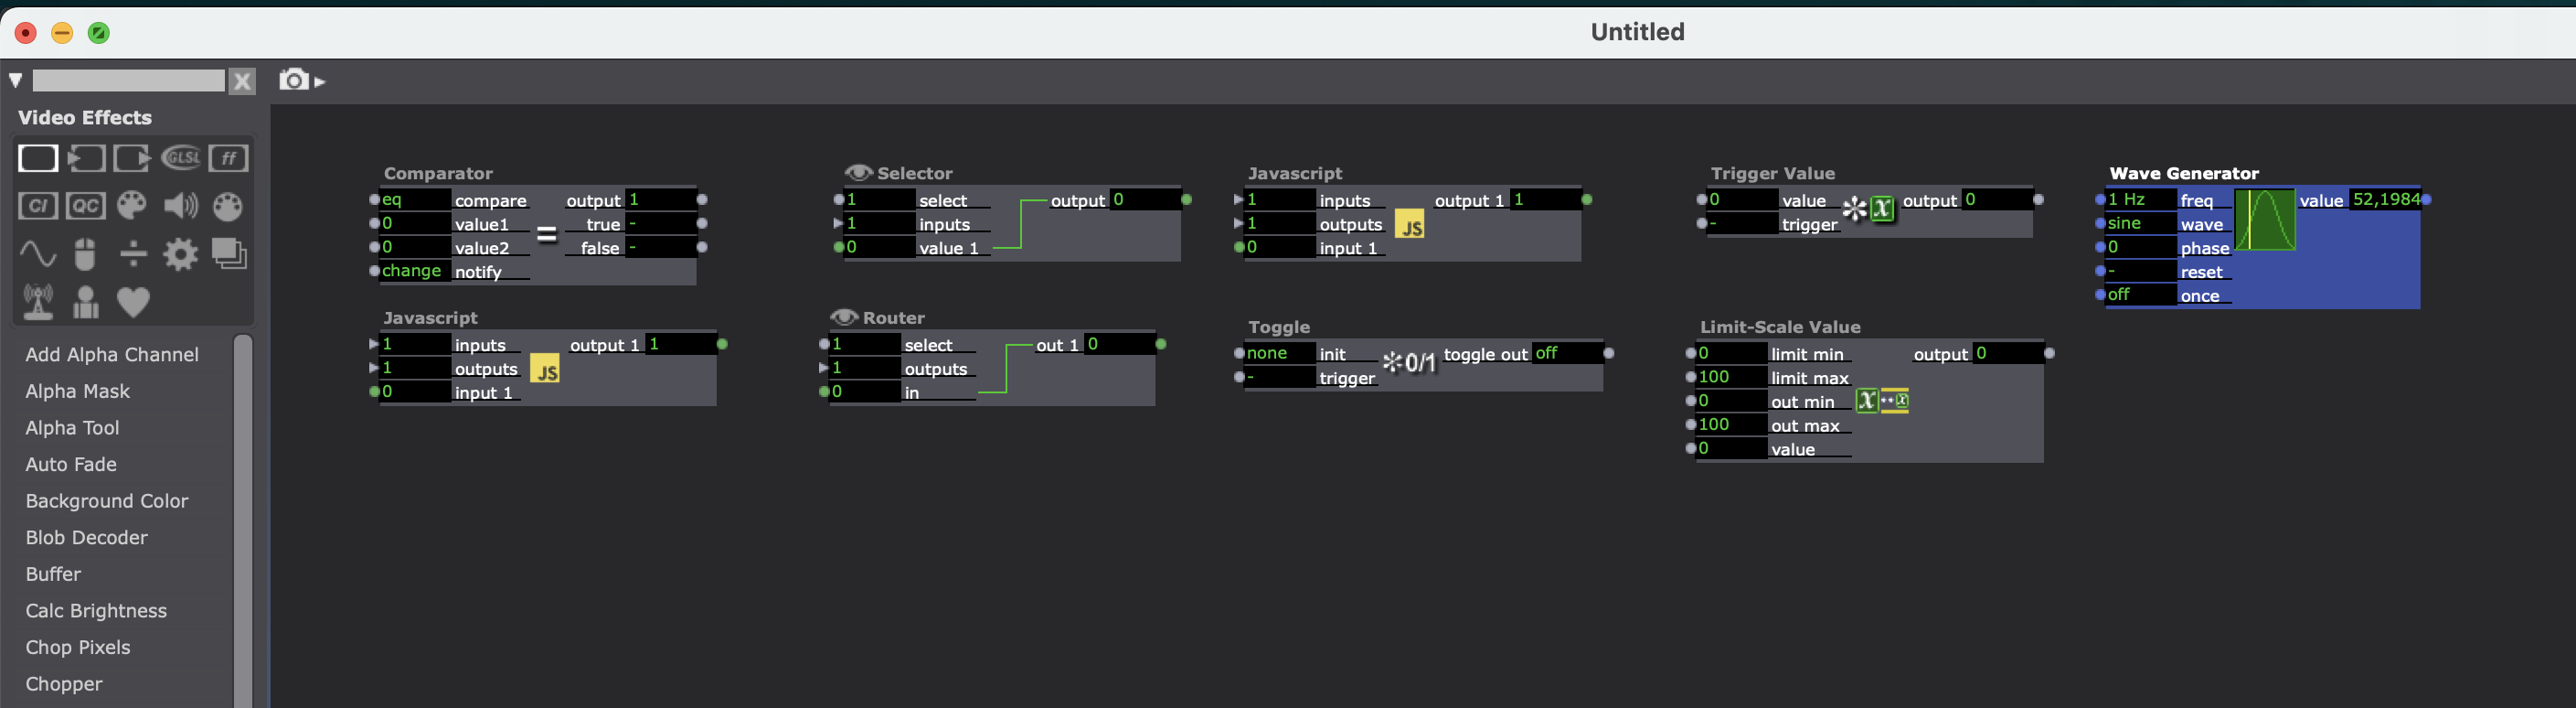](https://bookstack.hku.nl/uploads/images/gallery/2023-08/screenshot-2023-08-30-at-11-23-33.png)
### Tutorials
- [Isadora 101 #9 Using the Generators Actors](https://www.youtube.com/watch?v=qnfsiLS0UXM)
- [Using Wave Generators](https://www.youtube.com/watch?v=nzbPTz3Arh8)
- [How to Scale Values](https://www.youtube.com/watch?v=WuPpy461cIo)
### Using Logics
When you start understanding Isadora you will get more ideas of what you can do and how you can use Isadora in a interactive dynamic way. Then it is important to get to know the different actors that can better help you to "program" Isdora to do what you want.
A good start is tale a look at this list of actor for creating logics:
- comperator
- selector /router
- javascript
- toggle
- trigger value
- limit-scale
- generators
## Practice Assignment
Try to make a patch where the movie only plays when you move infront of the webcam.
Try to make a patch where a movie or animation only moves when the mouse does NOT move.
# Projectionmapping
[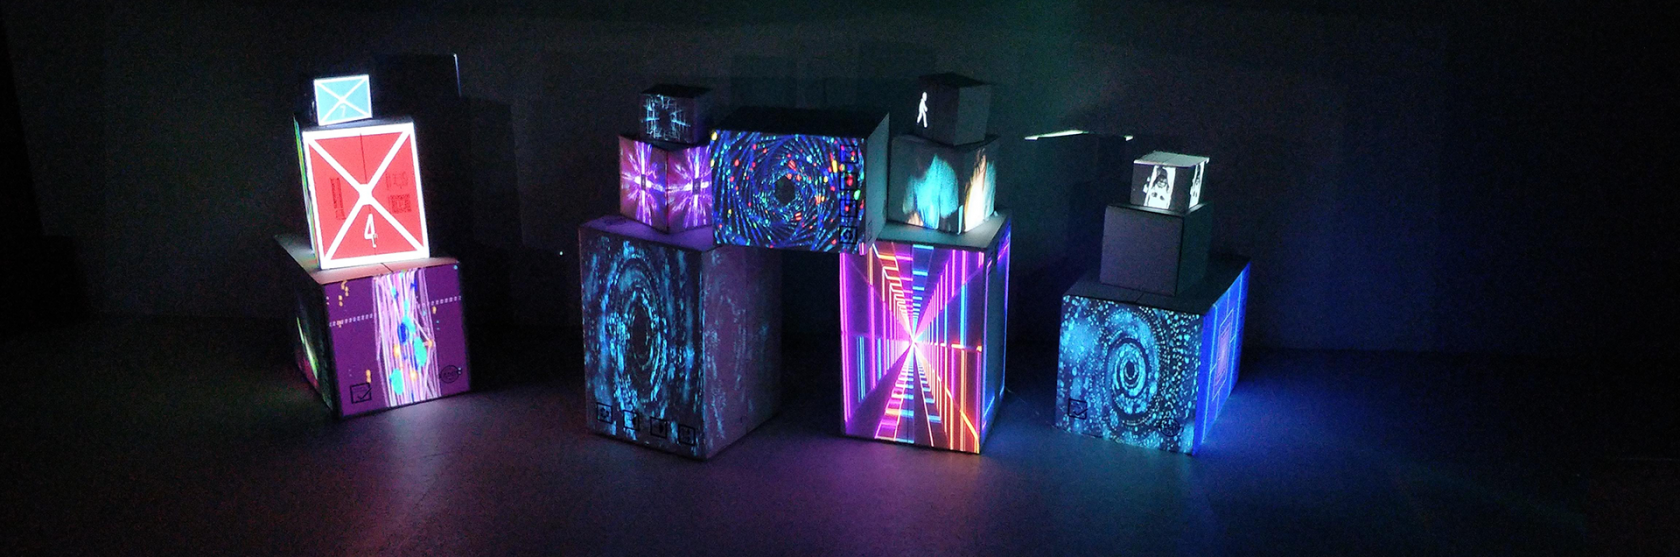](https://bookstack.hku.nl/uploads/images/gallery/2023-08/img-20221124-120536.png)
## Tutorials
- [Knowledgebase Article](https://support.troikatronix.com/support/solutions/articles/13000014931-isadora-2-getting-started-with-projection-mapping-izzymap-)
- [Isadora Guru session](https://www.youtube.com/watch?v=mEWWxPE3ZkQ)
- [Sam's Demo/Activitiy projectionmapping patch](https://community.troikatronix.com/topic/7884/demo-activity-patch-projection-mapping)
## What is projectionmapping?
Projection Mapping uses everyday video projectors, but instead of projecting on a flat screen (e.g. to display a PowerPoint), light is mapped onto any surface, turning common objects of any 3D shape into interactive displays. More formally, projection mapping is "the display of an image on a non-flat or non-white surface"
## Tips&Tricks:
- Set the output resulotion in izzymap to the resolution of your projecter to see the limit of the projection
- You can manipulate the Input and Output be aware of the difference. Input is the cropping of the source material, Output is how the input is projected.
- in Izzymap you have differen layer optiuons with different shapes dependig on the object that you are mapping.
- You can publishing mapping properties so you can control them outside of izzymap.
- Once you have used izzymap the blend cna only be set inside of the izzymap window
- Izzymap is so versatile you can easily create nice video effects within one projector
## Practice Assignment
Choose a season as theme and:
Map a cube with a single movie
Map an object with a hole
Map a piece of cloth
# User Actors
[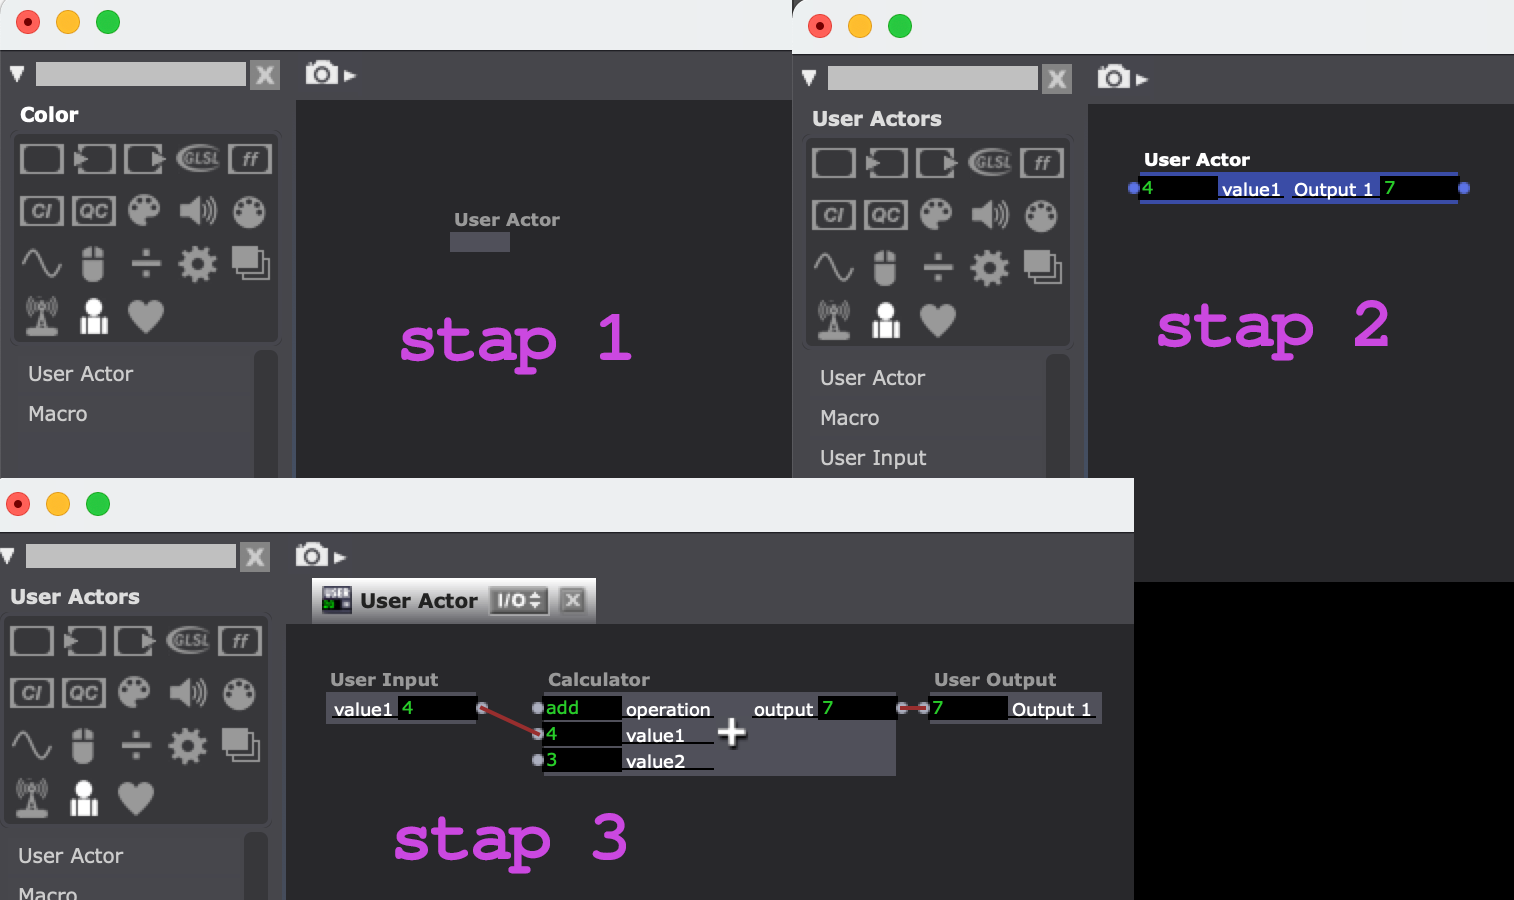](https://bookstack.hku.nl/uploads/images/gallery/2023-08/useractor.png)
## Tutorials
- [Isadora 1010 session](https://www.youtube.com/watch?v=i39M0qu-DHo)
- [Isadora addons](https://troikatronix.com/add-ons/)
## What are User Actors?
User actors are important to bring order to your Isadora patch. They help organize your patch and think about your program in order of modules. You can compare it with function/object based programming. You can put user actors inside useract6ors but be careful.
## Tips&Tricks:
- Build up slowly and add inputs/outputs as needed
- You can label your inputs/outputs to know hat they are
- You can lable you useractor so you know what it does
- Inputs/Outputs are Mutable and you san set the type
- You can change the sequence of your userActor inputs/outputs
- There is a difference between UserActors and Macro's
## Practie Assignment
**Step 1:**
Create a small visual interesting looping animation
**Step 2:**
Put this animation into a user actor.
Think about which inputs/outputs you need with the user actor
**Step 3:**
Create a scene with a couple instances of the user actor.
# Control panel
[](https://bookstack.hku.nl/uploads/images/gallery/2023-08/screenshot-2023-08-30-at-10-51-51.png)
## Tutorials
- [Isadora 010 session](https://www.youtube.com/watch?v=Grt3qM1iUJk)
- [Examples control panels](https://community.troikatronix.com/topic/7790/any-examples-of-isadora-for-vjing-av-performance/)
- [Control Panel Basics Pt 1](https://www.youtube.com/watch?v=_RADErGnwO8)
- [Control Panel Basics Pt 2](https://www.youtube.com/watch?v=3RIWEQSf6Ps)
- [Control Panel VJ](https://www.youtube.com/watch?v=ES1gJj7iUjI)
## What is Control Panel?
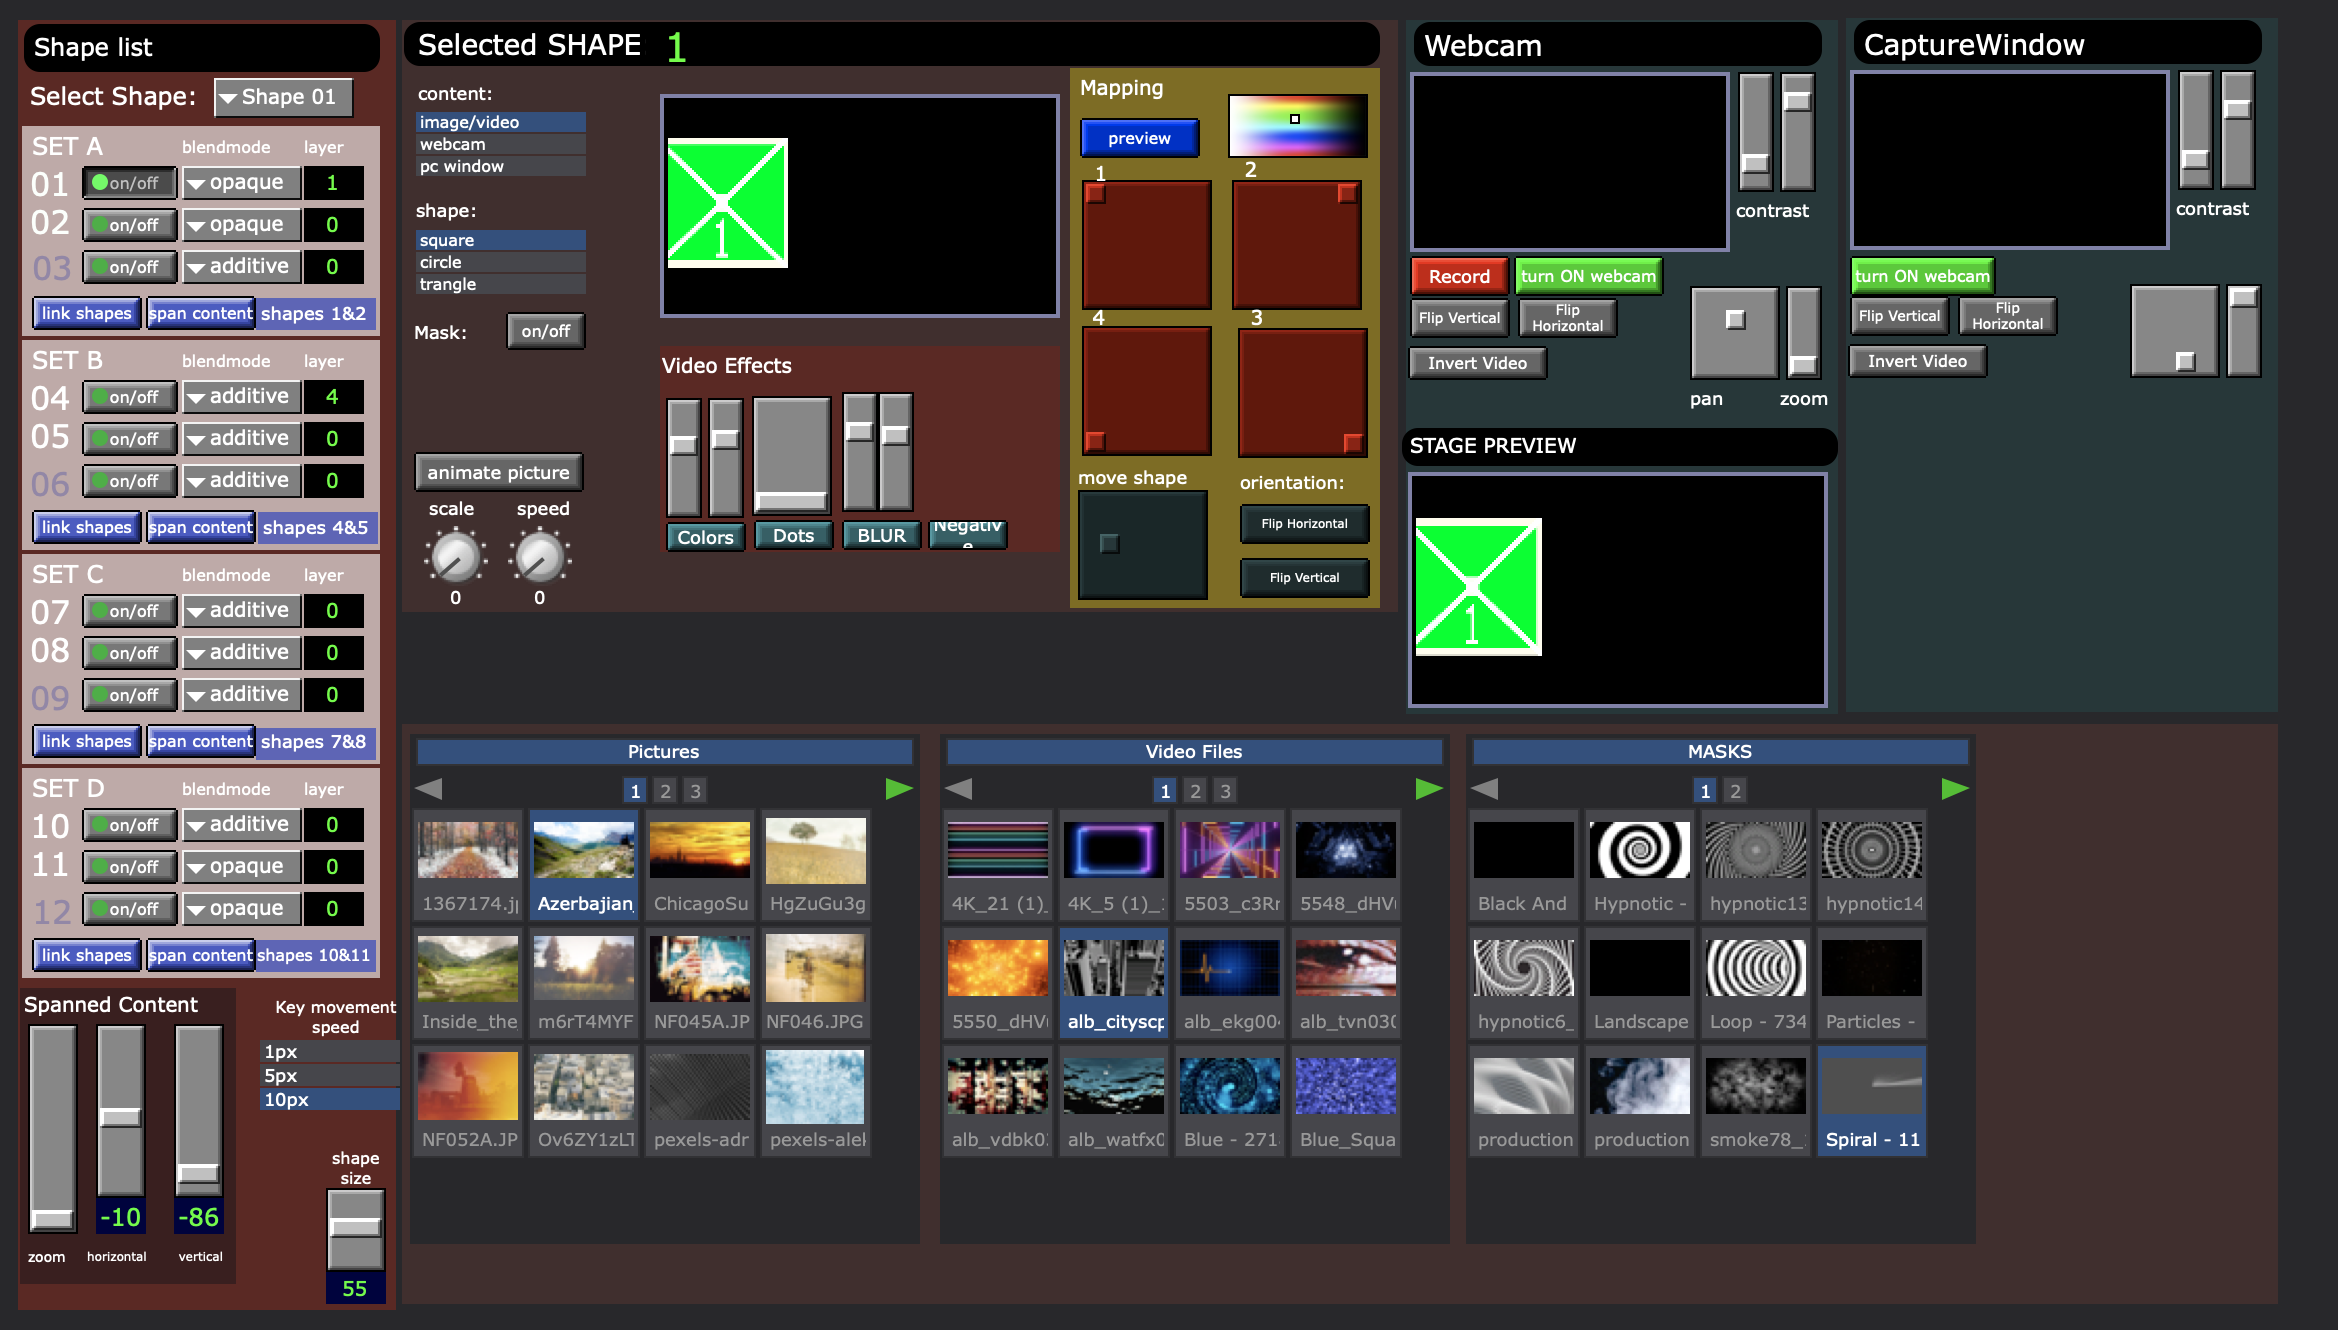
Isadora's Control Panel feature allows you to create a custom user interface, with buttons, sliders, knobs and more. Yhis enables you to build a patch with an interface that can be operatied by anyone.
## Tips&Tricks:
- click with right mouse button to choose actor/control split to work on it
- toggle between "edit mode" to see how control panel will look
- be aware thet in controlpanel view (or split view) you will only see the contropanel actors on the left
- Double clik on control panel item to view properties
- You can connect control panel items to inputs and outputs
- double click on a input/output to set or remove a controlpanel link
## Practice Assignment
Make a small VJ application with an interface using the controlpanel. You get Bonus points for design (thing backgroudn image, background colors and design of buttons).
Make sure teh folowwing functionality is present:
- The ability to choose a video (Bin Picker)
- The use of two sources
- A slider o corssfade between the two sources
- abbility to add effects.
# Serial OSC NDI
[](https://bookstack.hku.nl/uploads/images/gallery/2023-08/screenshot-2023-08-30-at-11-47-56.png)
## Tutorials
**Serial data / Arduino**
- [Arduino Frimata](https://troikatronix.com/add-ons/arduino-firmata/)
- [Very old Wiring tutorial](http://wiring.org.co/learning/tutorials/isadora/index.html)
- [Github using BareConductive with Isadora](https://github.com/hku-ect/BareConductive)
- [Simple Arduino-ISadora tutorial](http://art-research2010summer.blogspot.com/2010/06/tutorial-01-isadora-and-arduino.html)
**OSC**
- [Isadora Guru session #9 Interaction using OSC](https://www.youtube.com/watch?v=THZCUXOFJdA)
- [Using Isadora with touch OSC](https://support.troikatronix.com/support/solutions/articles/5000692145-using-touchosc-with-isadora)
- [Isadora Gurusession #9 Interaction using OSC](https://www.youtube.com/watch?v=THZCUXOFJdA)
- [Using accelorometer data with Isadora](https://matthewragan.com/2013/06/13/understanding-accelerometer-data-isadora/)
**NDI**
- [The Isadora NDI addon](https://troikatronix.com/add-ons/ndi-watcher/)
- [Isadora Guru session #10 Faciliting remote Performances](https://www.youtube.com/watch?v=HkVH1zaKxPg)
- [Small NDI example to Unreal](https://www.youtube.com/watch?v=Gqy9y8mxVJI)
## Wat is Serial / OSC / NDI?
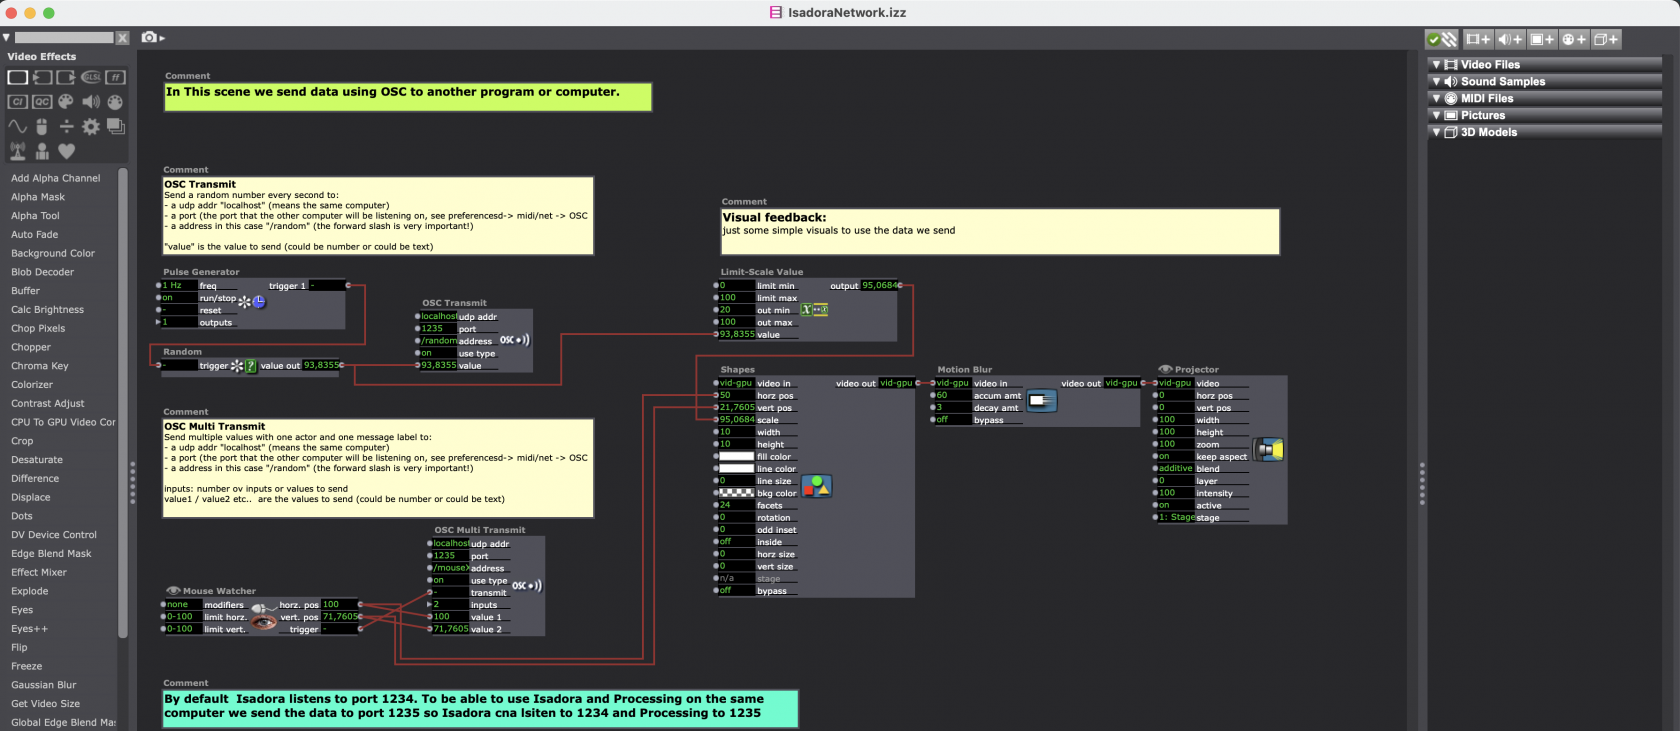
One of the many features of Isadora is that it can communicate using many protocols. Communication over the Serial port is handy for a wide range of devices (even DMX), bnut mostly it is used to communicate with Arduino or other micro controller boards. OSC (Open Sound Control) is a high bandwith foillouw protocol form MIDI. With this protocol you can send data between different devices and programs. this give you the possibility to use many different software together. ([OSC background info](https://www.linuxjournal.com/content/introduction-osc), [Wikipedia](https://en.wikipedia.org/wiki/Open_Sound_Control)) NDI is a communication protocol for sending video over the network. Like OSC you can us eNDI to send a video stream form one computer to another computer or one program to another program ([What is NDI?](https://www.everetimaging.com/what-is-ndi/)).
For serial/Arduino: 9 in 1 [multi function expansion board](https://www.benselectronics.nl/9-in-one-multifunctional-expansion-board.html)
## Tips & Tricks
- For OSC and NDI make sure the computers are on the same network and whithin the same IP range. Be on the lookout for networks that have closed ports as a security measure. If possible create your onw network with fixed IP addresses.
- For data intesive applications a wired network is always better and more stable then Wifi.
- An OSC port can be opened only ONCE. So you can not listen on the sam port on the dsame computer with different programs!
- When starting with Isadora an Arduino start with the most simple excersise! Check the Serial Monitor in the Arduino IDE first to see if the data is send correctly before figuring out how to recieve the data in Isadora.
- A serial Port can be opened only ONCE! If the port is open In Arduino Serial Monitor) then it cannot be opened in Isadora
## Practice Assignment
Create visuals using images/movies and other elements that you control with your phone. Use the theme: "Walking A Storm"
# Midi
[](https://bookstack.hku.nl/uploads/images/gallery/2023-08/what-does-midi-do.webp)
## Tutorials
- [Isadora Guru tutorial](https://youtu.be/PDGvvJPQXPU)
- [Midi example from Forum](https://troikatronix.com/add-ons/simple-midi-example/)
- [Control abelton form Isadora](https://support.troikatronix.com/support/solutions/articles/13000081452-control-isadora-from-ableton-live-with-midi)
## What is MIDI?
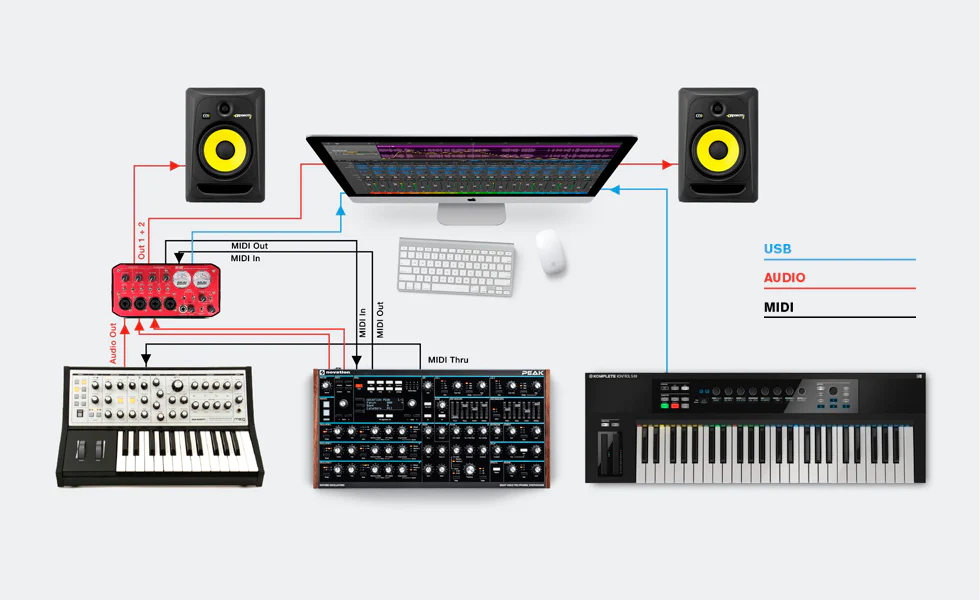
MIDI Musical Instrument Digital Interface) is a technical standard that describes a communications protocol, digital interface, and electrical connectors that connect a wide variety of electronic musical instruments, computers, and related audio devices for playing, editing, and recording music. [wikipedia](https://en.wikipedia.org/wiki/MIDI)
## Tips&Tricks
- Actors with the word "watcher" are used to watch or listen for hardware inputs. Use the Note On wathcer and Control Watcher to see which button does what on your midi device.
- To set-up your midi-input/output go to "Communications"and then midi-setup
- Each MIDI port can transmait or receive up to 16 channels each channel you can send various messages. The three most common ones are note off/on and the control change.
- Each note has a pitch between 0-127 and a velocity between 0-127
## Assignment
Create a drummahine where you cmbine sound and visuals. Choose which sample to paly with which button and make a small animation for each button/sample. For inspiration look [here](https://patatap.com/)
# Sound
[](https://bookstack.hku.nl/uploads/images/gallery/2023-08/screenshot-2023-08-30-at-11-31-09.png)
## Tutorials
- [Isadora 101 #5 Sound playback](https://www.youtube.com/watch?v=WO0p62_1ZL4)
- [Multi channel audio](https://support.troikatronix.com/support/solutions/articles/13000084953-tutorial-getting-started-with-multi-channel-audio-in-isadora-3-0-8)
## Tips & Tricks
- You can use both WAV/AIFF or MP3, but MP3's will be played using the movieplayer which works different then the sound player
- With the sound player you can play with speed to get a lot of interesting effects
- With the MP# player you can play sound backwards
- On macOS you have a lot of extra audio actors that are part of core Audio that you do not have on Windows
- You can use the tone generator actor to generate a tone with different frequncies and create effects.
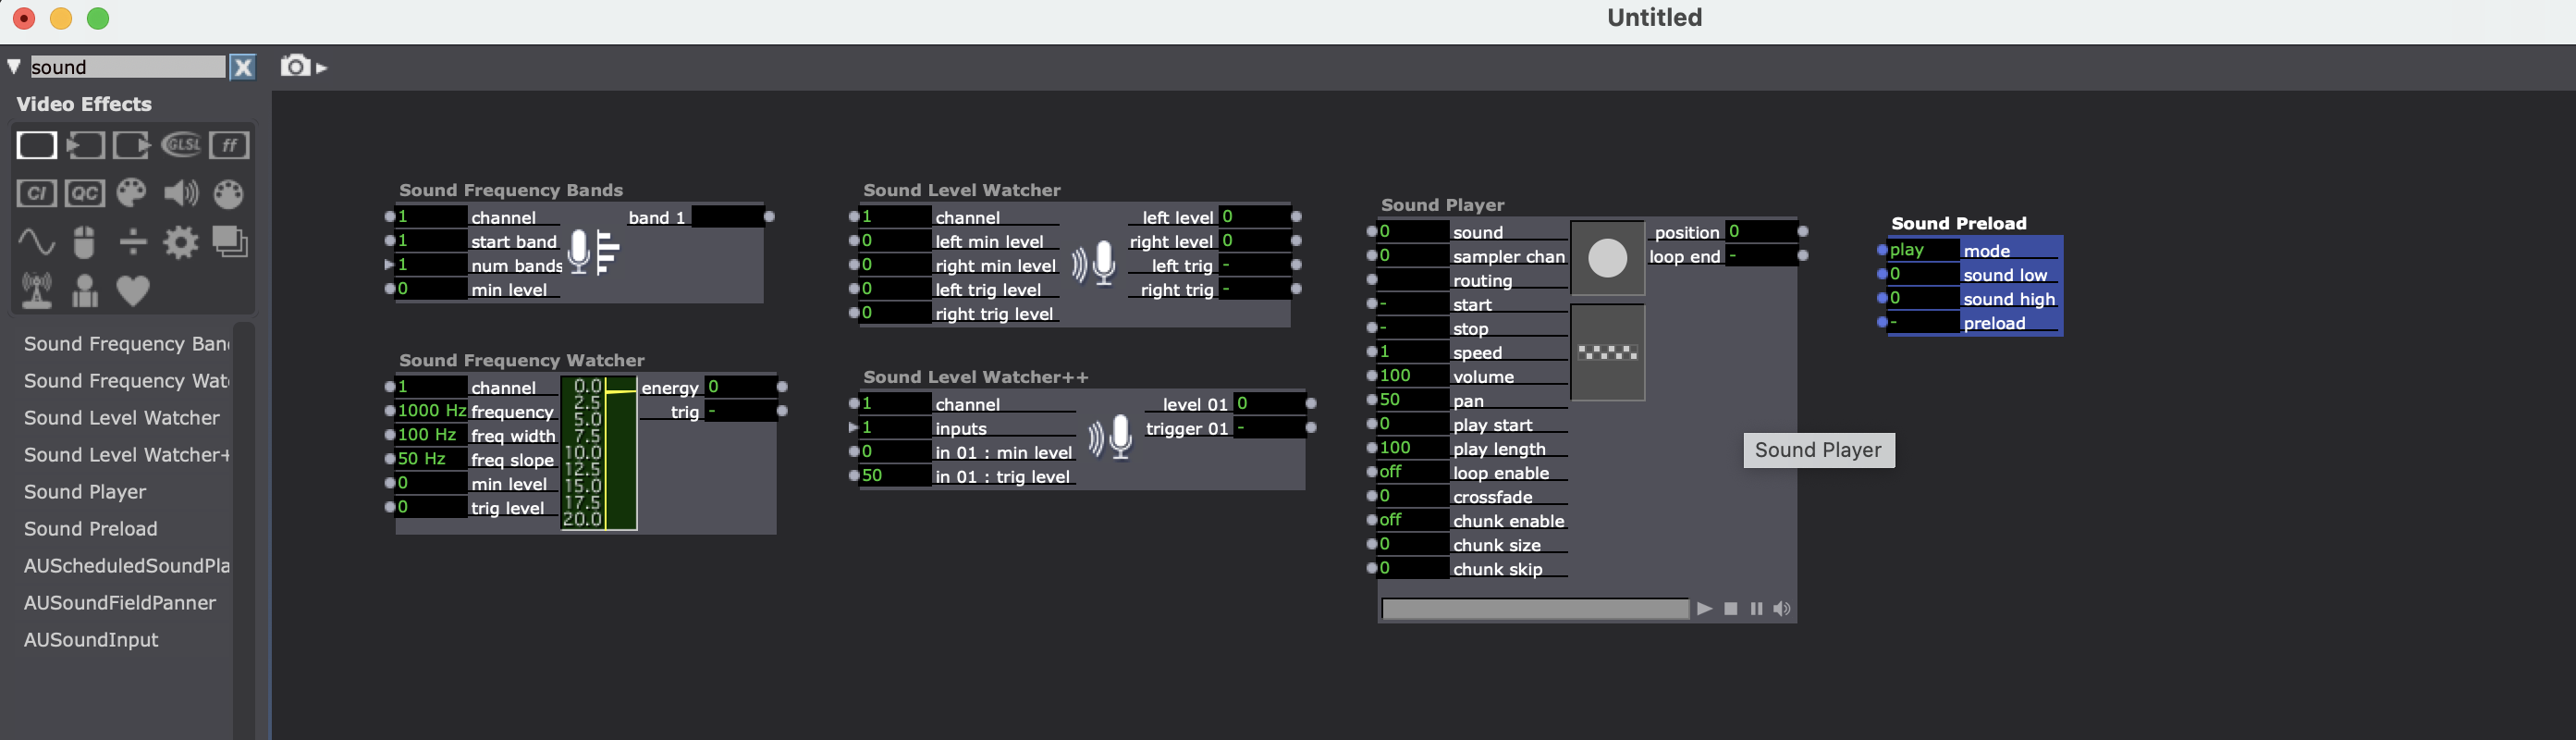
- Do not forget to play with uysing sound as an input! Try the Sound Level Watcher actor, the Sound Frequency watcher actor and the Sound Frequency Bands actor.
## Assignment
Make a simple story with sounds only. Hint, use timed triggers and audio speed.
Make an audio sequencer? Make Horror story
# Motion Tracking
[](https://bookstack.hku.nl/uploads/images/gallery/2023-08/screenshot-2023-08-30-at-11-42-31.png)
## Tutorials
- [Camera Tracking Part 1A - Difference Movement pt 1](https://www.youtube.com/watch?v=KxmNtn42TnA)
- [Camera Tracking Part 1B - Difference Movement pt 2](https://www.youtube.com/watch?v=Cf5o_2jFpbI)
- [Camera Tracking Part 2 - EYES Difference](https://www.youtube.com/watch?v=zm0EtpKFK6g)
- [Camera Tracking Part 3 - EYES Freeze](https://www.youtube.com/watch?v=yEYpE4ACrKE)
- [Camera Tracking part 4A - Chroma Tracking pt1](https://www.youtube.com/watch?v=GcNnEWrvkL0)
- [Camera Tracking part 4B - Chroma Tracking pt2](https://www.youtube.com/watch?v=RVwaEaM69Y4)
- [Basic Motion tracking Tutorial](https://troikatronix.com/add-ons/tutorial-basic-motion-tracking/)
- [Isadora Guru session #17 Motion Tracking with Eyes++](https://www.youtube.com/watch?v=RKSwV4vjq7o)
- [Infrared tracking tutorial](https://www.youtube.com/watch?v=4tPOE0ueNhU)
- [Isadora Camara Tracking examples](https://www.youtube.com/watch?v=irDvxRpAetQ)
### Motion Tracking
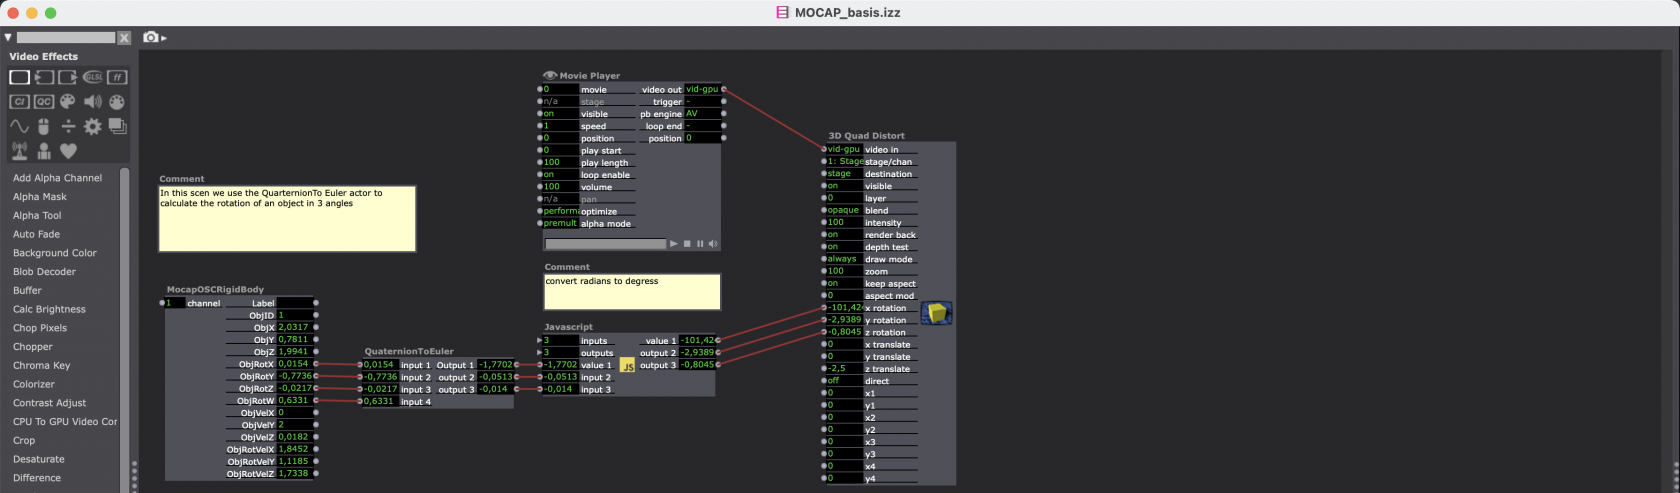
Using a (web) camera as live video input in Isadora gives you a lot of possiblities for interaction. You can make reactive visuals that "listen" to what happens in front of the camera in many different ways. It is quite a complex and often unstable topic, but very interesting.
## Tips & Tricks
- Light is very important! If you change you lightsettings you need to re-callibrate.
- If you do not want to be dependend on natural light you can use an camera with a visible light filter and infrared lights.
- Experiment and try! Motion tracking can be instable so embrace the chaos and keep trying.
- You can use camera tracking as a motion detector or as a "is there someone present" sensor. Meaning you can make it so simple or complicated as you want.
## Practic Assignment
Make viusuals that responds to a live video source.
# Working with 3D
[](https://bookstack.hku.nl/uploads/images/gallery/2023-08/screenshot-2023-08-30-at-12-01-51.png)
## Tutorials
- [3D guru session](https://www.youtube.com/watch?v=ZYdCidE_rlQ)
- \[Isadora Guru Session #7: Generative Visuals with the 3D Ropes Actor\](Isadora Guru Session #7: Generative Visuals with the 3D Ropes Actor)
- [Thoughts & Examples of using 3D in Isadora](https://community.troikatronix.com/topic/2187/3d-objects-in-isadora)
- \[First person 3D navigation in Isadora\](https://troikatroni x.com/add-ons/3d-game-style-navigation/)
[Background in 3d rotations](https://community.troikatronix.com/topic/6277/answered-inverse-kinematics-using-3d-player-and-calc-angle-3d-actors)
## Working with 3D
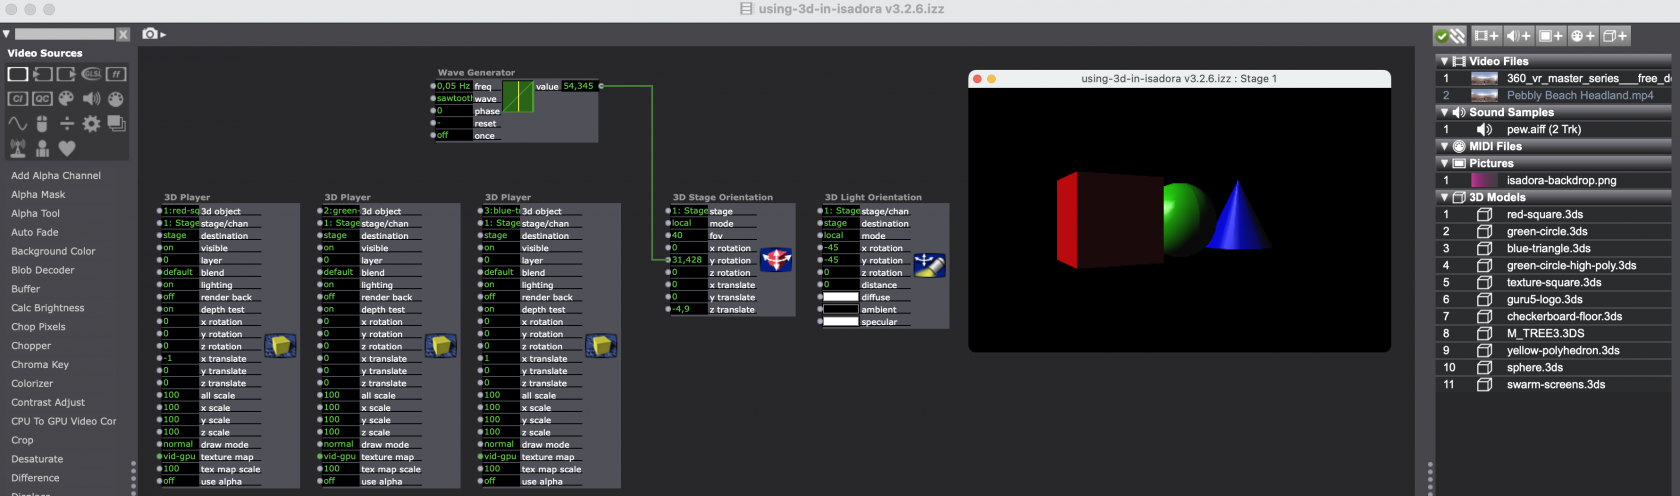
In isadora you are not limited to working in 2D but can just as easily work in 3D. Either witn 3D particles or 3D models that can be displayed using the 3D player. You can also position 2D materials in 3D space using the 3D Projector actor.
## Tips & Tricks
- You can only use .3DS models in Isadora
- The 3D stage orientation is an important actor to add to your scene when working with 3D, because with it you position the camera (when the camera and the 3D object are on the same spot you will not see the object)
- Do not forget your light settings when working with 3D. They are set using the 3D light orientation actor.
- You can also work with 2D material in the 3D world using the 3D proejctor actor or the 3D mode of the regular projector (click on the eye icon of the projector to enable the required inputs)
## Practice Assignment
Either use the 3D model particles actor to create an 3D scene or download a 3D model and import this in Iadora.
# Shaders
[](https://bookstack.hku.nl/uploads/images/gallery/2023-08/screenshot-2023-08-30-at-12-15-49.png)
## Tutorials
- [Isadora Guru #11: Generative Visuals and Shaders](https://www.youtube.com/watch?v=ysaPeyVL1Xc)
- [Isadora made Shaders](https://troikatronix.com/add-ons/tt-glsl-shaders-for-isadora-2-3/)
- [Shader tutorial](https://support.troikatronix.com/support/solutions/articles/13000025645-glsl-shader-actor-tutorial)
- [Shader Guru tutorial](https://youtu.be/ysaPeyVL1Xc)
- [Shader repo](https://community.troikatronix.com/topic/6474/some-new-glsl-effects)
- [Forum post about shaders](https://community.troikatronix.com/topic/8170/glsl-blur)
- [The book of shaders](https://thebookofshaders.com/)
## What are Shaders?
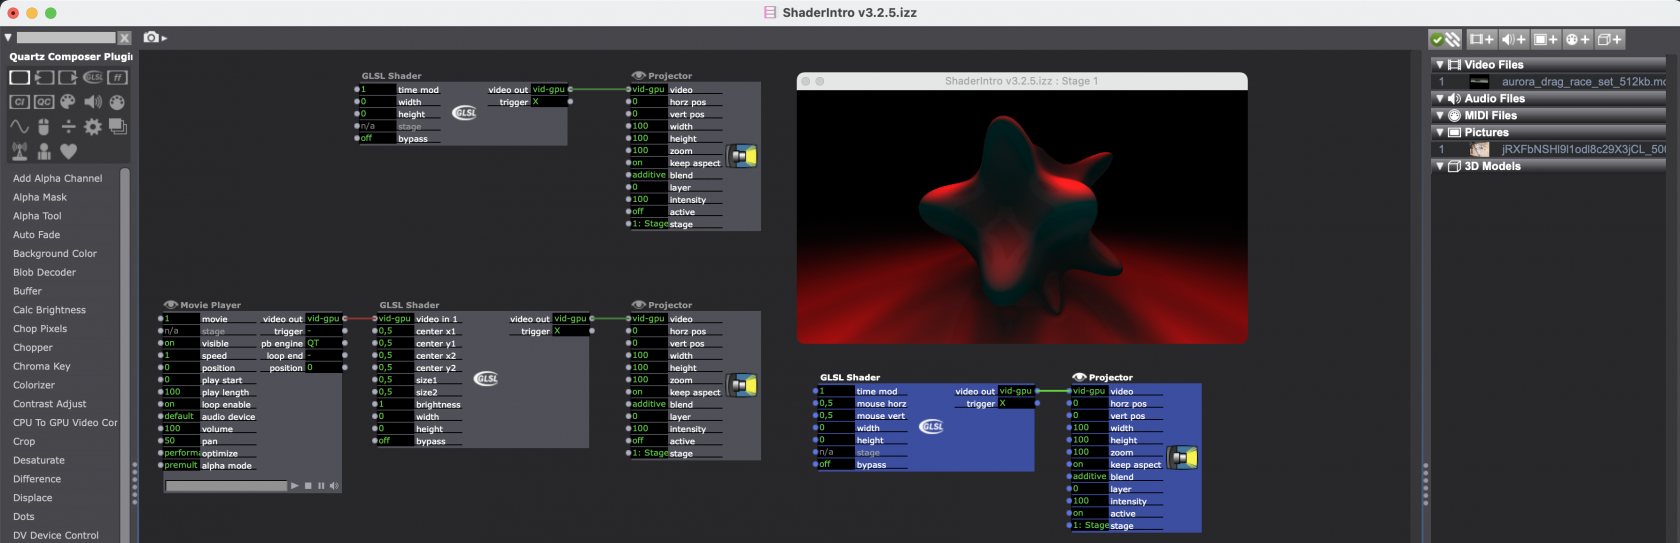
Shaders are computer programs programmed in the OpenGL Shader Language (GLSL). GLSL is a programming language, similar in style to the C programing language, that tells your graphics card (GPU) how to manipulate or generate images. The power of GLSL shader programs is that, unlike programs that run in your computer's main processor (CPU) they run in parallel for every pixel of the image. This means they are incredibly fast, even with very high resolution images. As of version 2.3, Isadora offers an actor called GLSL Shader that allows you to compile and run GLSL code.
The GLSL Shader actor allows you to integrate stunning computer-generated imagery as well as new video effects into your projects
## Practice Assignment
Create a new Isadora file with a couple of images and videos. Then try-out some of the shaders that can be found [here](https://troikatronix.com/add-ons/tt-glsl-shaders-for-isadora-2-3/) or [here](https://community.troikatronix.com/topic/6474/some-new-glsl-effects). Then create a visual composition inspried by the words: Gold, Dawn, Human, Minority
# General Resources
Here you will find a general list links to different Isadora resources.
## Knowledge
- [Isadora Main site](https://troikatronix.com/) (for general info)
- [Isadora Help](https://support.troikatronix.com/support/home) (many knowledge articles and tutorials)
- [Isadora Forum](https://community.troikatronix.com/) (ask your question and find answers)
- [Isadora Add-ons](https://troikatronix.com/add-ons/) (for useractors & plugins)
- [Isadora manual](https://troikatronix.com/files/isadora-manual.pdf) (good for reference)
- [Isadora Instagram](https://linktr.ee/troikatronix_isadora) (a couple of random tutorials)
## Tutorials
- [Isadora 101 tuorials](https://www.youtube.com/playlist?list=PLqiBJCe8prQuKpxQZUwaye7chQG_gvweg)
- [Isadora Guru Tutorials](https://www.youtube.com/playlist?list=PLqiBJCe8prQsB0quh0mOunT3iwH9DNr31)
- [Isadora mini tutorials](https://www.youtube.com/playlist?list=PLqiBJCe8prQuy0ajX94TTKpXRGN7L79oc)
- [Isadora Let's built it tutorials](https://www.youtube.com/playlist?list=PLqiBJCe8prQvabhqhvWhHZA4lAd3Ph0fn)
## Isadora Workshop/Resources of other people
- [Milton Lim](https://www.miltonlim.com/isadora)
- [Matthew Ragan](https://matthewragan.com/teaching-resources/isadora/)
- [Jamie Griffiths](http://www.jamiegriffiths.com/isadoraworkshop/)
## Materials
#### Isadora patches
- [Isadora Example Patches on Github](https://github.com/hku-ect/IsadoraPatches "Isadora Example Patches on Github") *These patches are developed to show case different sensors, devices and concepts as discussed n the Isadora lessons*
- [Isadora User Actors on Github ](https://github.com/hku-ect/IsadoraUserActors)*User actors in Isadora are custom selfmade actors that contain other actors think of them as handy little puzzle pieces. To import an user actor right click somewhere in your scene and choose "Place User Actor/Macro.."*
- [Isadora Workshop files on Github](https://github.com/ikbenmacje/IsadoraWS) *These patches where originally developed for a specific Isadora workshop but give a good overview of different Isadora subjects.*
##### Isadora Materials
- [Materials for Github repo Examples](https://cpu-theatre.org/isadoraWS/Materials.zip) *This is a zip file with various materials to use in your Isadora projects.*
- [Nextcloud folder with Material](https://nextcloud.hku.nl/s/ZmszR7XG67M4wtT) *This is a Nextcloud folder with various images, videos and audio*
##### Stock Materials
For stock materials you can visit [this](https://bookstack.hku.nl/books/stockfootage "Stockfootage") bookstack page
## Video codec information
- [Isadora performance tips](https://support.troikatronix.com/support/solutions/articles/5000692142-optimizing-for-speed-making-isadora-run-faster)
- [Isadora Knowledgebase article on HAP codec](https://support.troikatronix.com/support/solutions/articles/13000044970)
- Encode to HAP:
(Video files with an H.264 codec might freeze when played in Isadora. You can convert your file to an AVI with a HAP codec to solve this issue by following the instruction below)
1: download video convertion software: [Shutterencoder](https://www.shutterencoder.com/en/)
2: download the codec on this [Github page](https://github.com/Vidvox/hap-qt-codec/releases) " HapQuickTimeCodec.Mac.v12.pkg " or " HapQuickTimeCodec.Windows.v12.msi " depending on what system you work with.
3: Install the codec by opening the file you just downloaded. This is a plugin that works within your video software. After installing this you can find the HAP codec in the list of video codecs in your video convertion software (Like Shutterencoder)
4: [Tutorial encode to HAP](https://www.youtube.com/watch?v=aZNBgTOhT7g)
# Receive data from Arduino in Isadora
**Isadora settings**
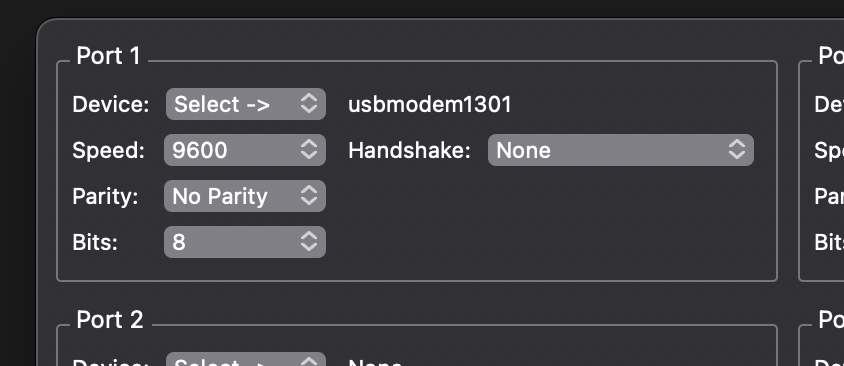
Communications:> Serial port setup
Port 1
Device: select -> usbmodem
Communications>
Enable serial ports
[](https://bookstack.hku.nl/uploads/images/gallery/2025-01/screenshot-2025-01-14-at-10-52-26.png) [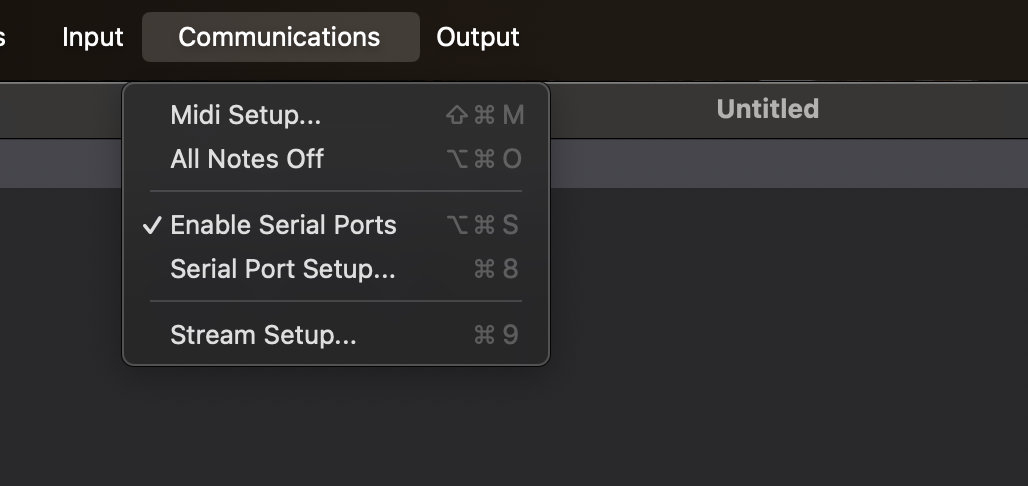](https://bookstack.hku.nl/uploads/images/gallery/2025-01/screenshot-2025-01-14-at-10-51-58.png)[ ](https://bookstack.hku.nl/uploads/images/gallery/2025-01/screenshot-2025-01-14-at-10-52-26.png)
**NB!** If you have this on, close the serial monitor in Arduino,
If the serial monitor is on, Isadora cannot connect to the Arduino.
This also works the other way around. If you want to adjust your code in Arduino and you want to test the code, you must turn off the serial monitor in Isadora.
**Open serial monitor in isadora:**
windows > show monitor
Here you can see that the data is coming in from the Arduino. On the far right you can see that the value changes from 0 to 400(or more depending on the sensor). The serial monitor is for monitoring purposes only. You can turn it off when you see that the connection works.
In the Serial in watcher actor you see that the value changing. You can use that output for your patch.
#### Example with 3 LDR light sensors + code
A sensor usually outputs a range of data. In that case use the Serial in watcher - Text
[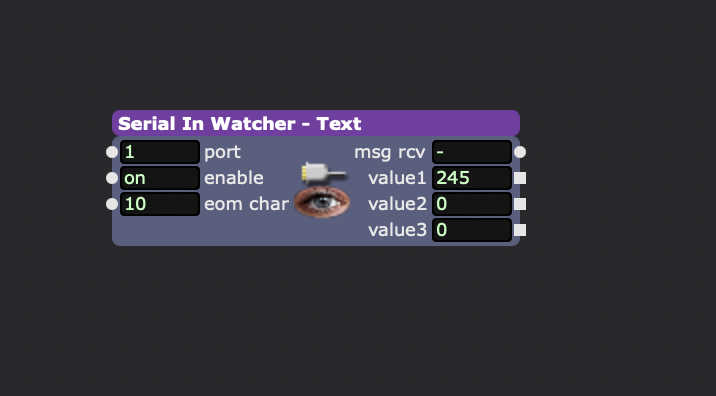](https://bookstack.hku.nl/uploads/images/gallery/2026-06/screenshot-2026-06-02-at-12-18-15.png)
open the actor by double klikking it and fill in this code : **value:int=eol**
in actor put **eom** **char** on **10**
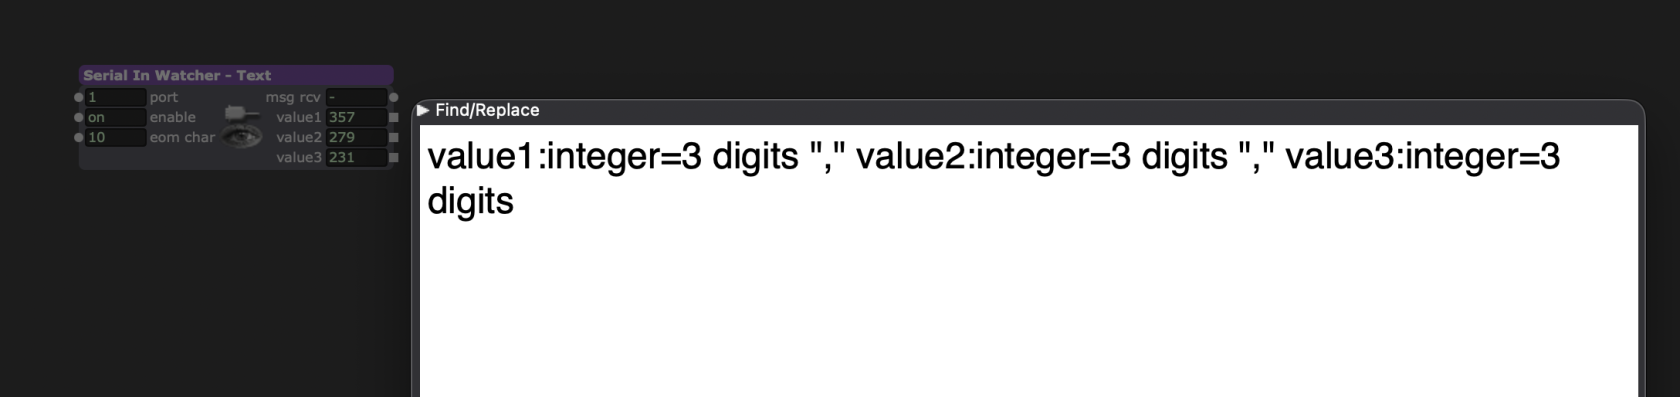
Double click on the actor and fill in : value1:integer=3 digits "," value2:integer=3 digits "," value3:integer=3 digits
[](https://bookstack.hku.nl/uploads/images/gallery/2026-06/screenshot-2026-06-02-at-14-33-42.png)
[you could folow this tutorial](https://www.youtube.com/watch?v=XwJQJnY6iUs) for connecting the LDR sensor
**I used this arduino code for 3 LDR light sensors:**
void setup() {
Serial.begin(9600); // Start seriële communicatie
}
void loop() {
int ldr1 = analogRead(A0);
int ldr2 = analogRead(A1);
int ldr3 = analogRead(A2);
Serial.print("value1=");
Serial.print(ldr1);
Serial.print(" value2=");
Serial.print(ldr2);
Serial.print(" value3=");
Serial.println(ldr3);
delay(100);
}
download Isadora example file:
[Arduino sensors LDR.izz](https://bookstack.hku.nl/attachments/142)
**Touchdesigner tutorial: https://www.youtube.com/watch?v=4dO7Q5oQbRg**
# Send information from Isadora to Arduino
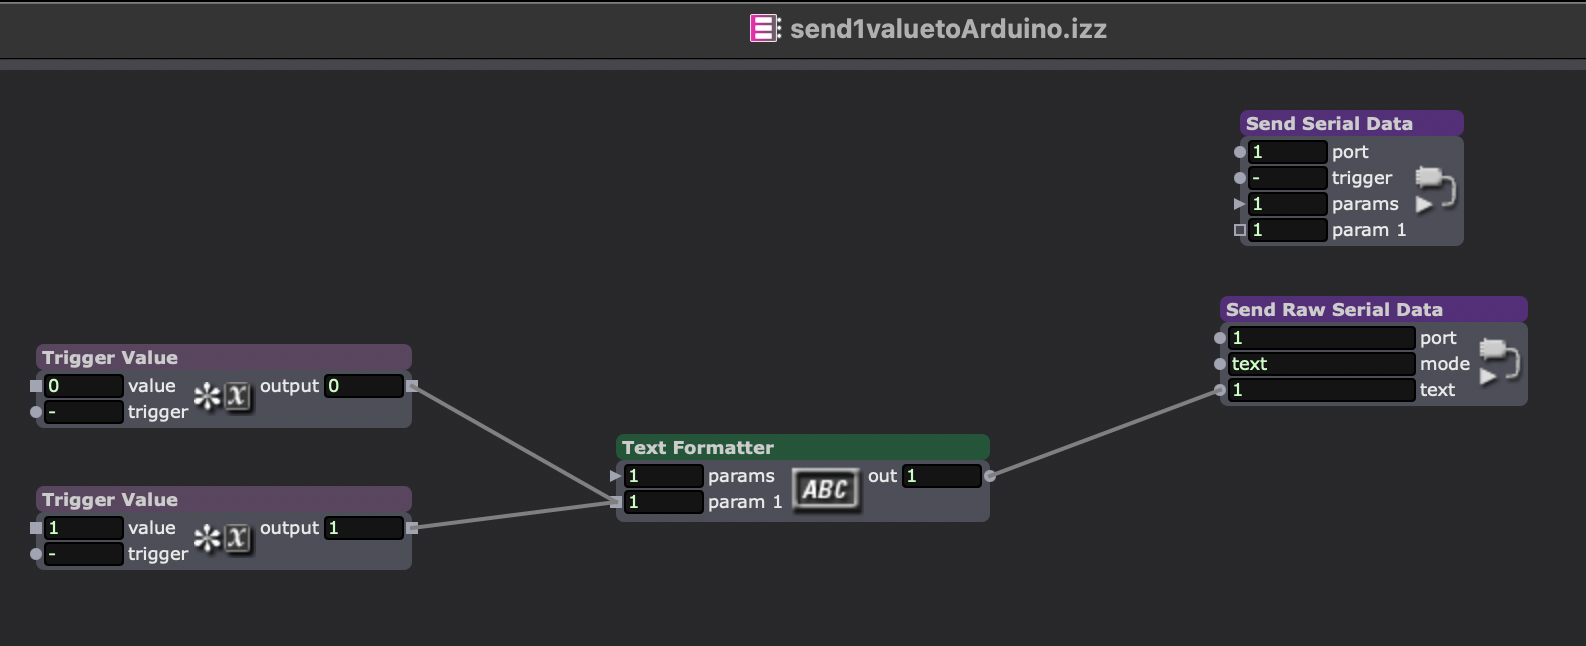
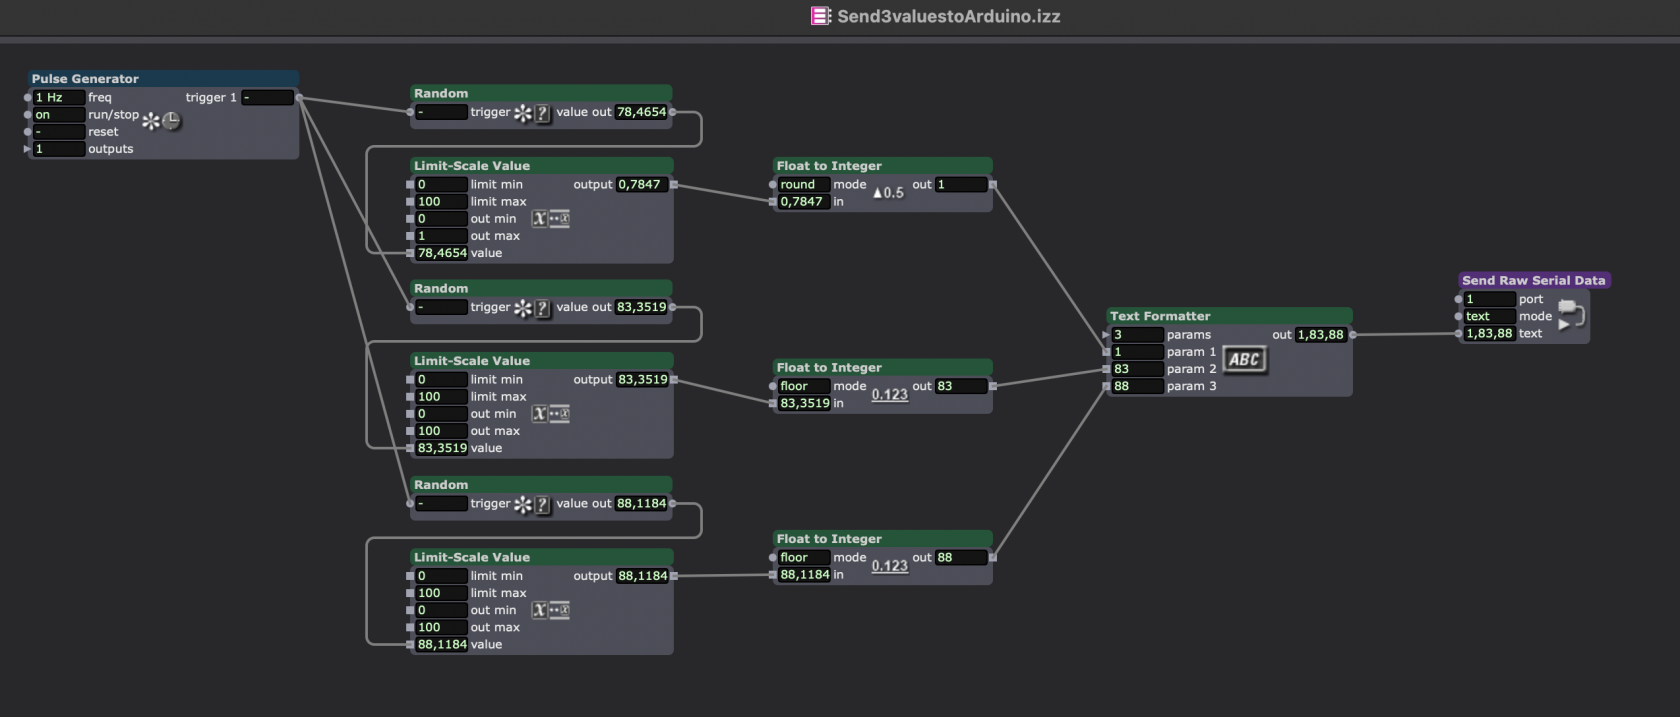
Think of it as if you were building the circuit in Arduino and you use the message from Isadora to Arduino to turn the circuit on or off.
Work files for Arduino & Isadora are added to this book, screenshots just for show ;)
[](https://bookstack.hku.nl/uploads/images/gallery/2025-02/screenshot-2025-02-05-at-15-48-51.png)
[](https://bookstack.hku.nl/uploads/images/gallery/2025-02/screenshot-2025-02-05-at-15-49-18.png)
Files not made by me, for more info contact me (Simone van Dordrecht) or Machiel Veltkamp <machiel.veltkamp@hku.nl>