# Demo's & Carousels
This book contains a repository of different set-ups used for educative demo's and carousels. It give's workshop educators and participants the opportunity rebuilt or study the code, software and hardware of a set up.
# Interactive "painting" controlled with OSC data from phone to Isadora
**Description:**
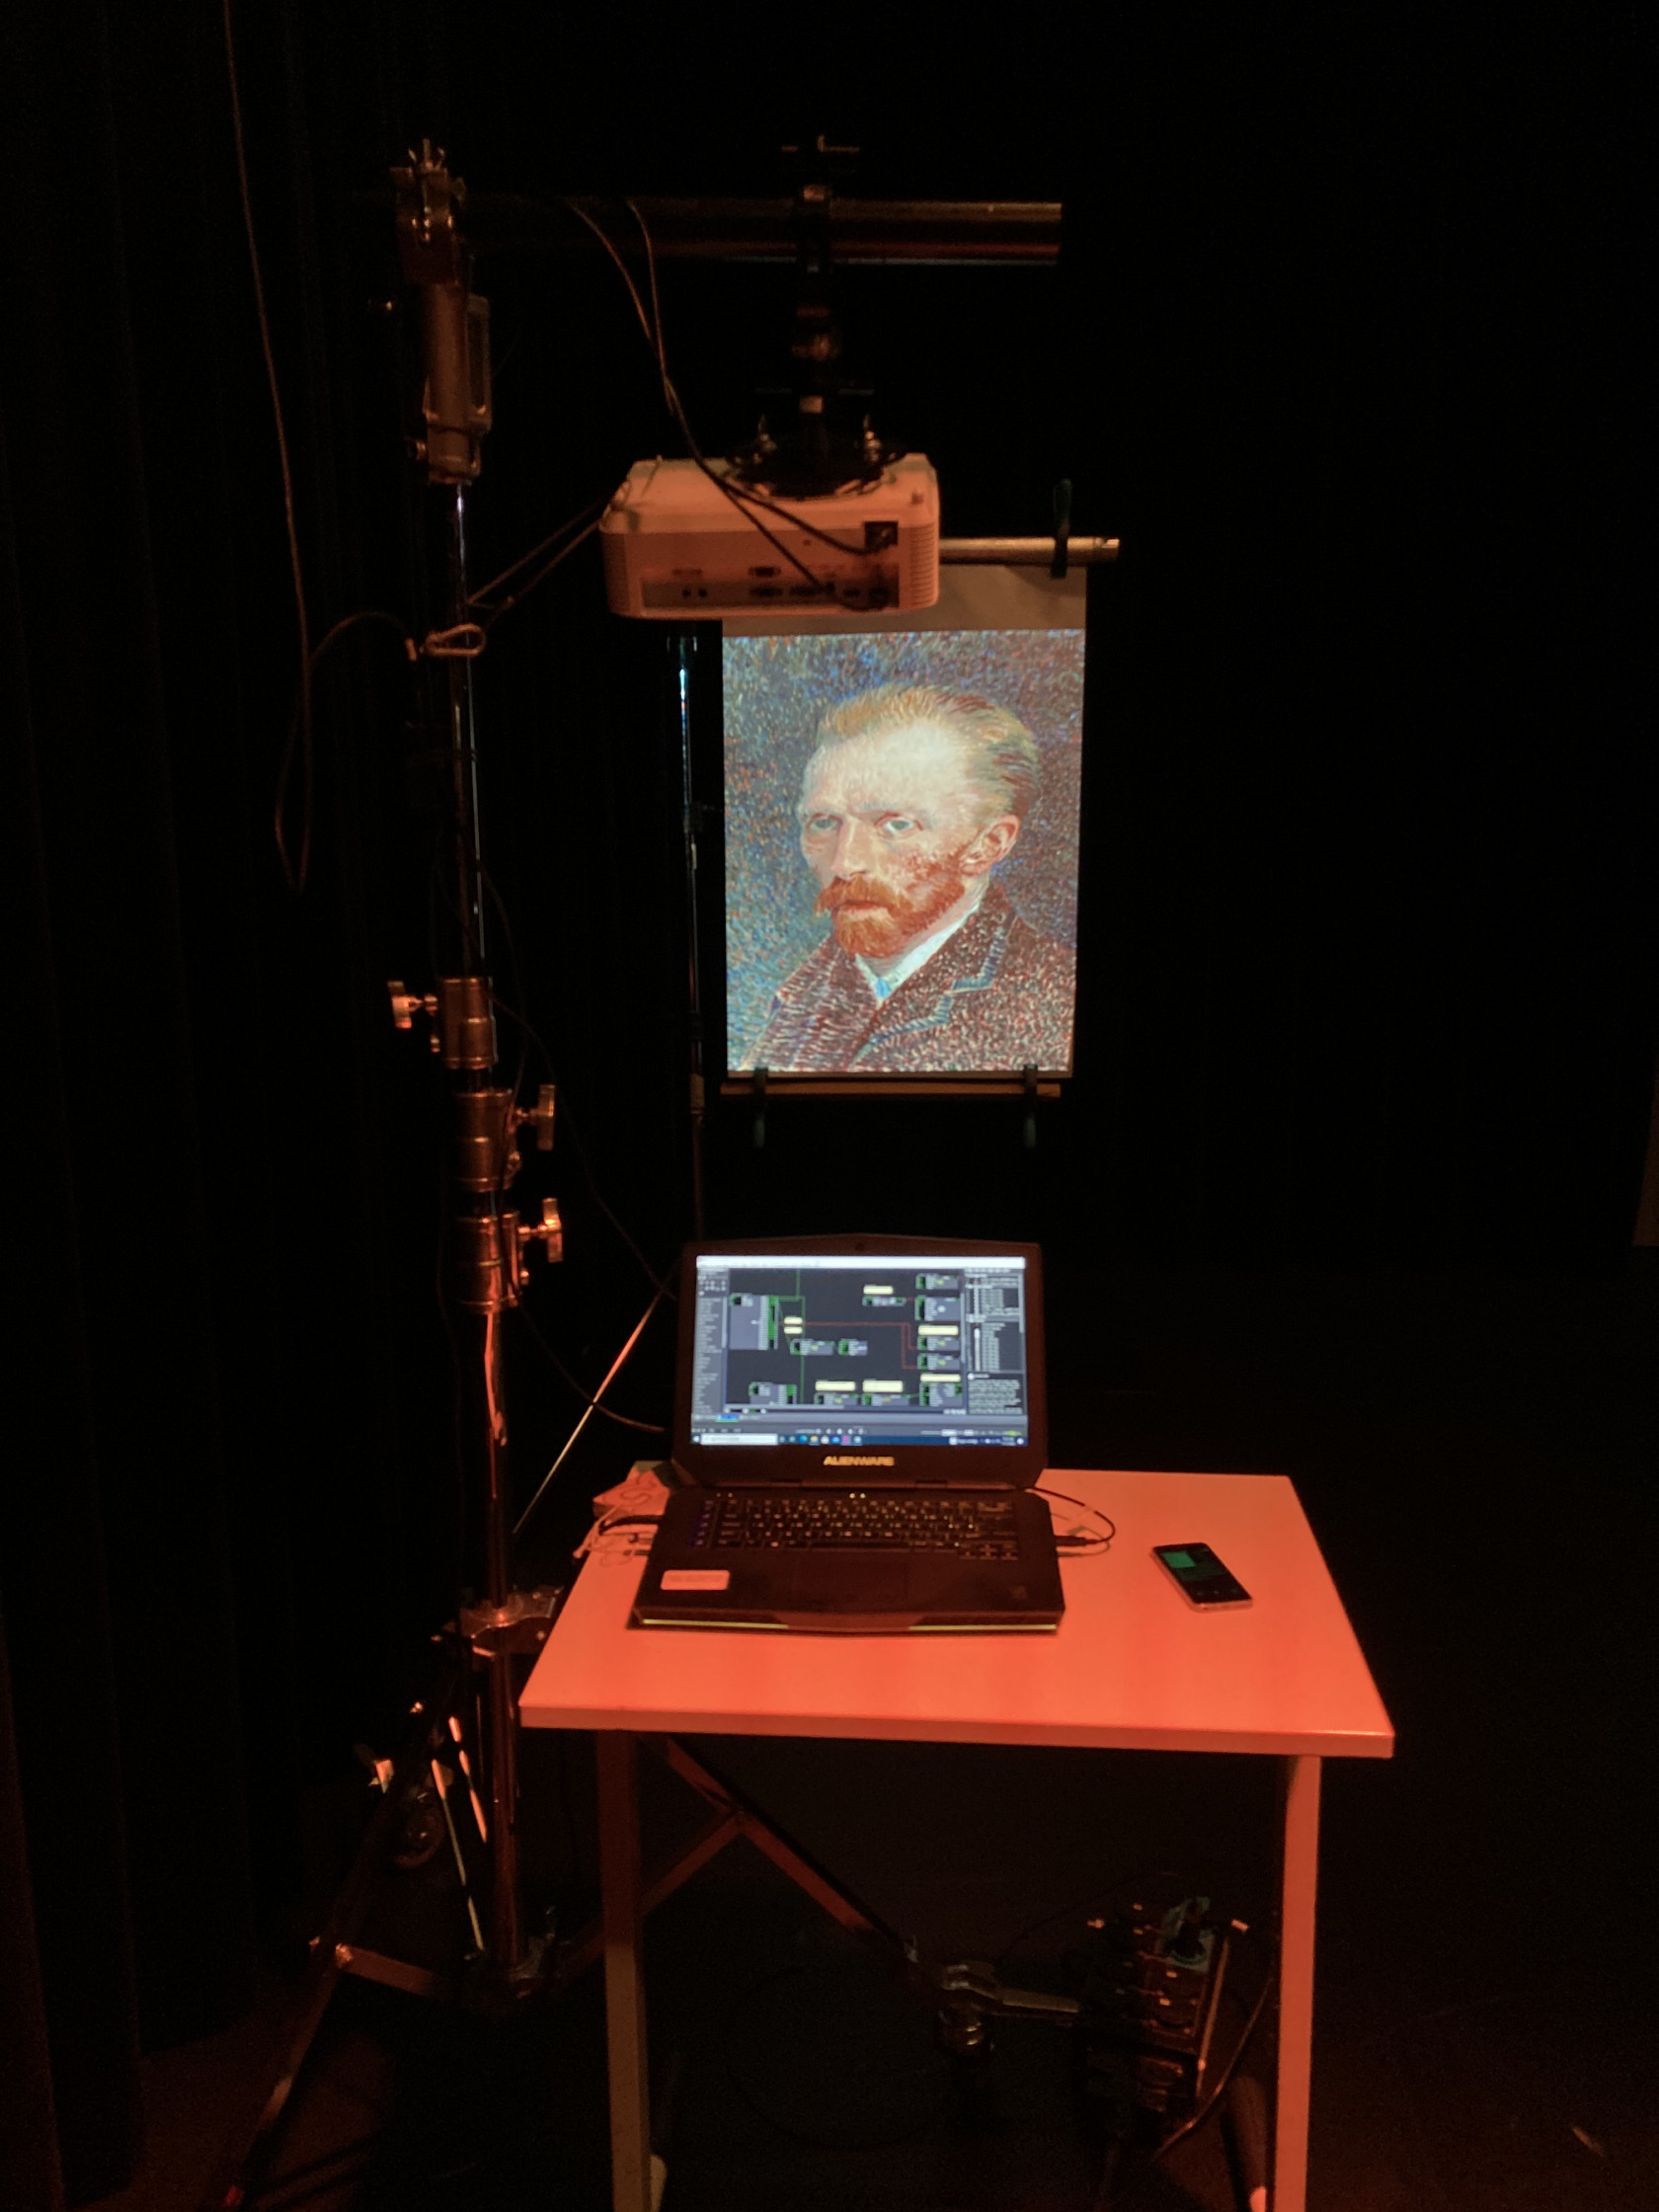
A set-up with an interactive "painting" and light fixture named "Van Gogh heeft een oogje op je foon" controlled by the smartphone sensors with ZigSim to OSC, Isadora, DMX light and a projector. The installation demonstrates the use of smartphone sensors within in a creative context.
**Required components:**
- Smartphone with [Zigsim](https://1-10.github.io/zigsim/getting-started.html) app
- Computer with Isadora (Isadora patch via this [link](https://nextcloud.hku.nl/s/sDmGtM4PjZkmSpz))
- Projector or display
- Isadora patch and media files:[ Files.zip](https://bookstack.hku.nl/attachments/33)
**Order from input to output:**
\- Smartphone sends [OSC](https://en.wikipedia.org/wiki/Open_Sound_Control) data using the [ZigSim](https://1-10.github.io/zigsim/getting-started.html) app:
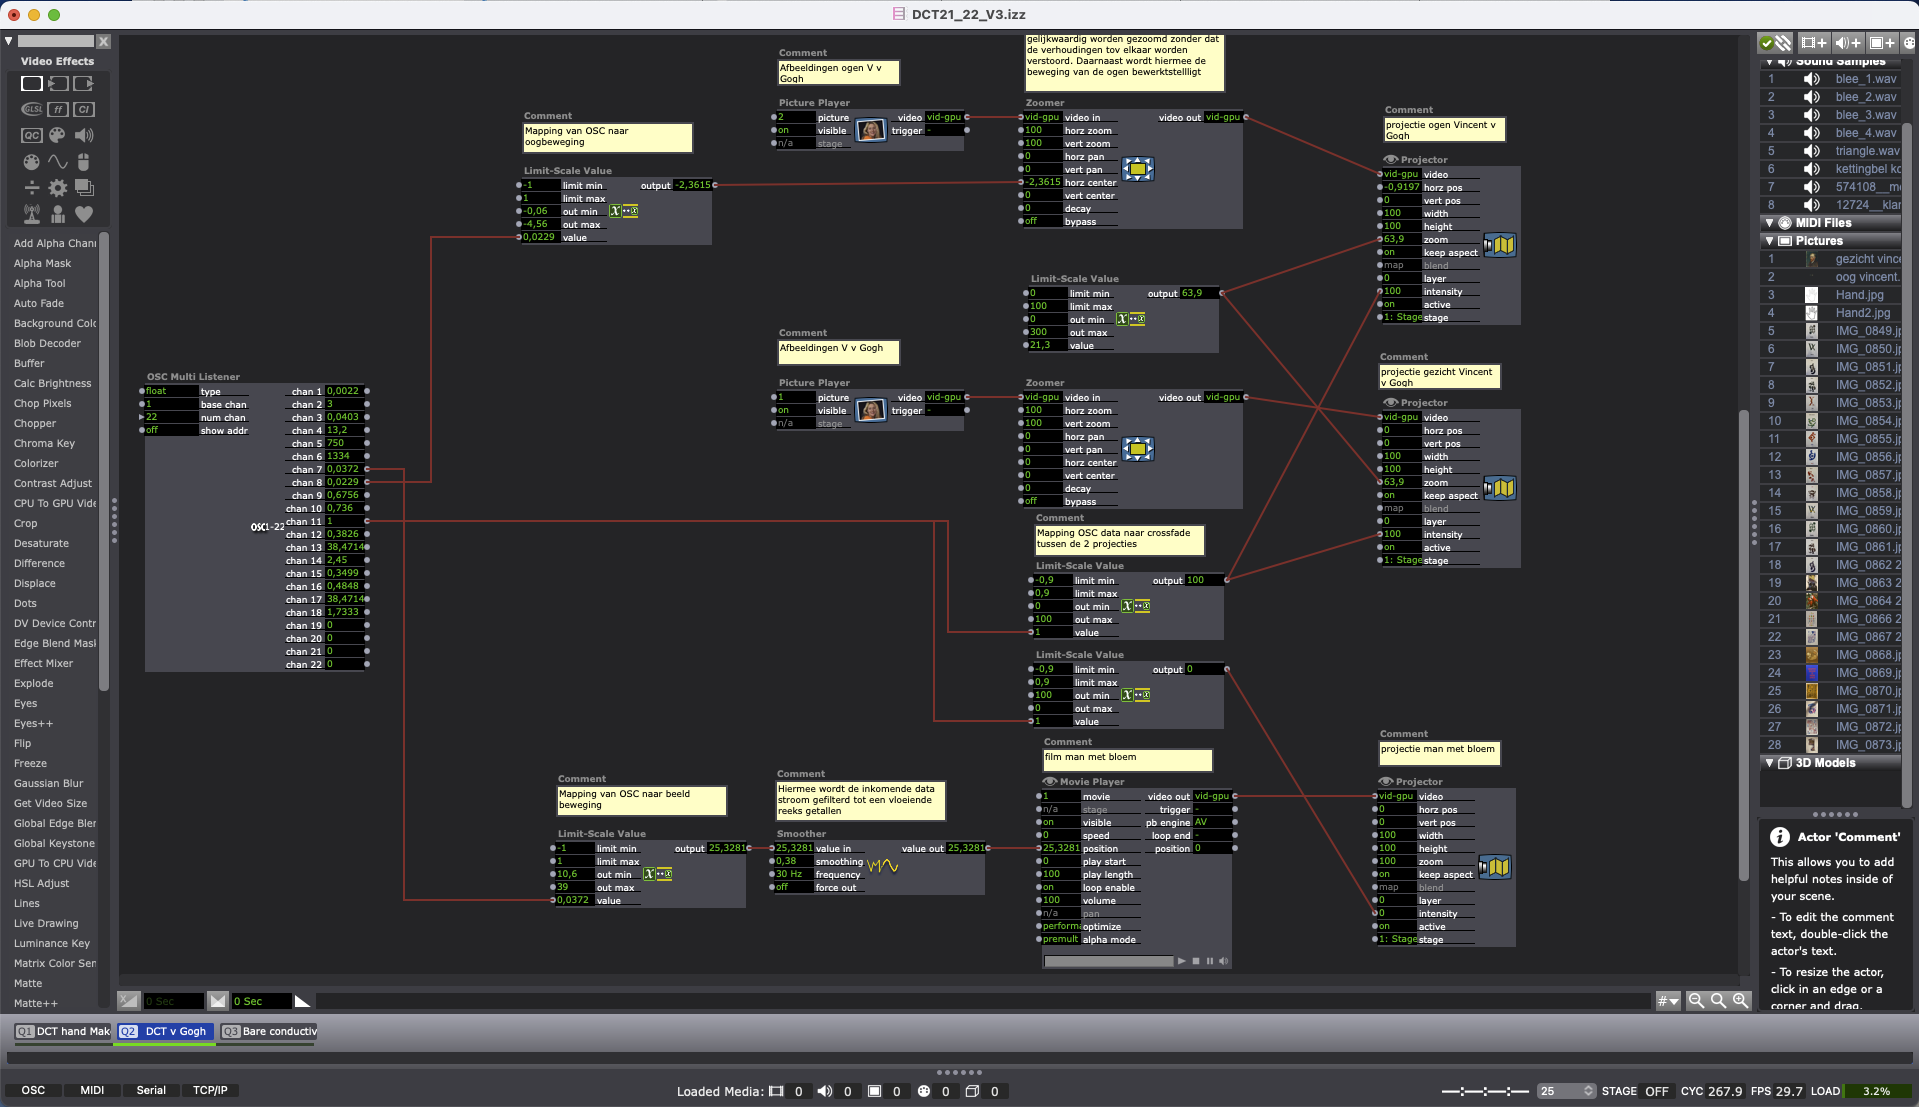
\- OSC data is received by the visual programming environment [Isadora](https://support.troikatronix.com/support/solutions/articles/13000056359-pricing-for-isadora-3).
\- In Isadora, the data from phone rotation and finger position on the touchscreen is converted into, among other things, eye movement, fade between projections and scrolling through frames.
\- [Gazebo](https://github.com/hku-ect/gazebosc) was used as a bridge to convert telephone data to [DMX](https://nl.wikipedia.org/wiki/DMX512) for controlling theater lighting. Most recent versions can be found [here](https://pong.hku.nl/~buildbot/gazebosc/). More info [here](https://bookstack.hku.nl/books/gazebosc).
[](https://bookstack.hku.nl/uploads/images/gallery/2023-11/img-1018.jpeg)
[](https://bookstack.hku.nl/uploads/images/gallery/2023-11/screenshot-2023-11-20-at-16-45-43.png)
**Terminology:**
- [OSC](https://bookstack.hku.nl/books/osc-open-sound-control)
- [DMX](https://en.wikipedia.org/wiki/DMX512)
- [Patch](https://en.wikipedia.org/wiki/Patch_(computing))
# Conductive soil, video projection and Makey Makey
[](https://bookstack.hku.nl/uploads/images/gallery/2023-11/img-1017.jpeg)
**Description:**
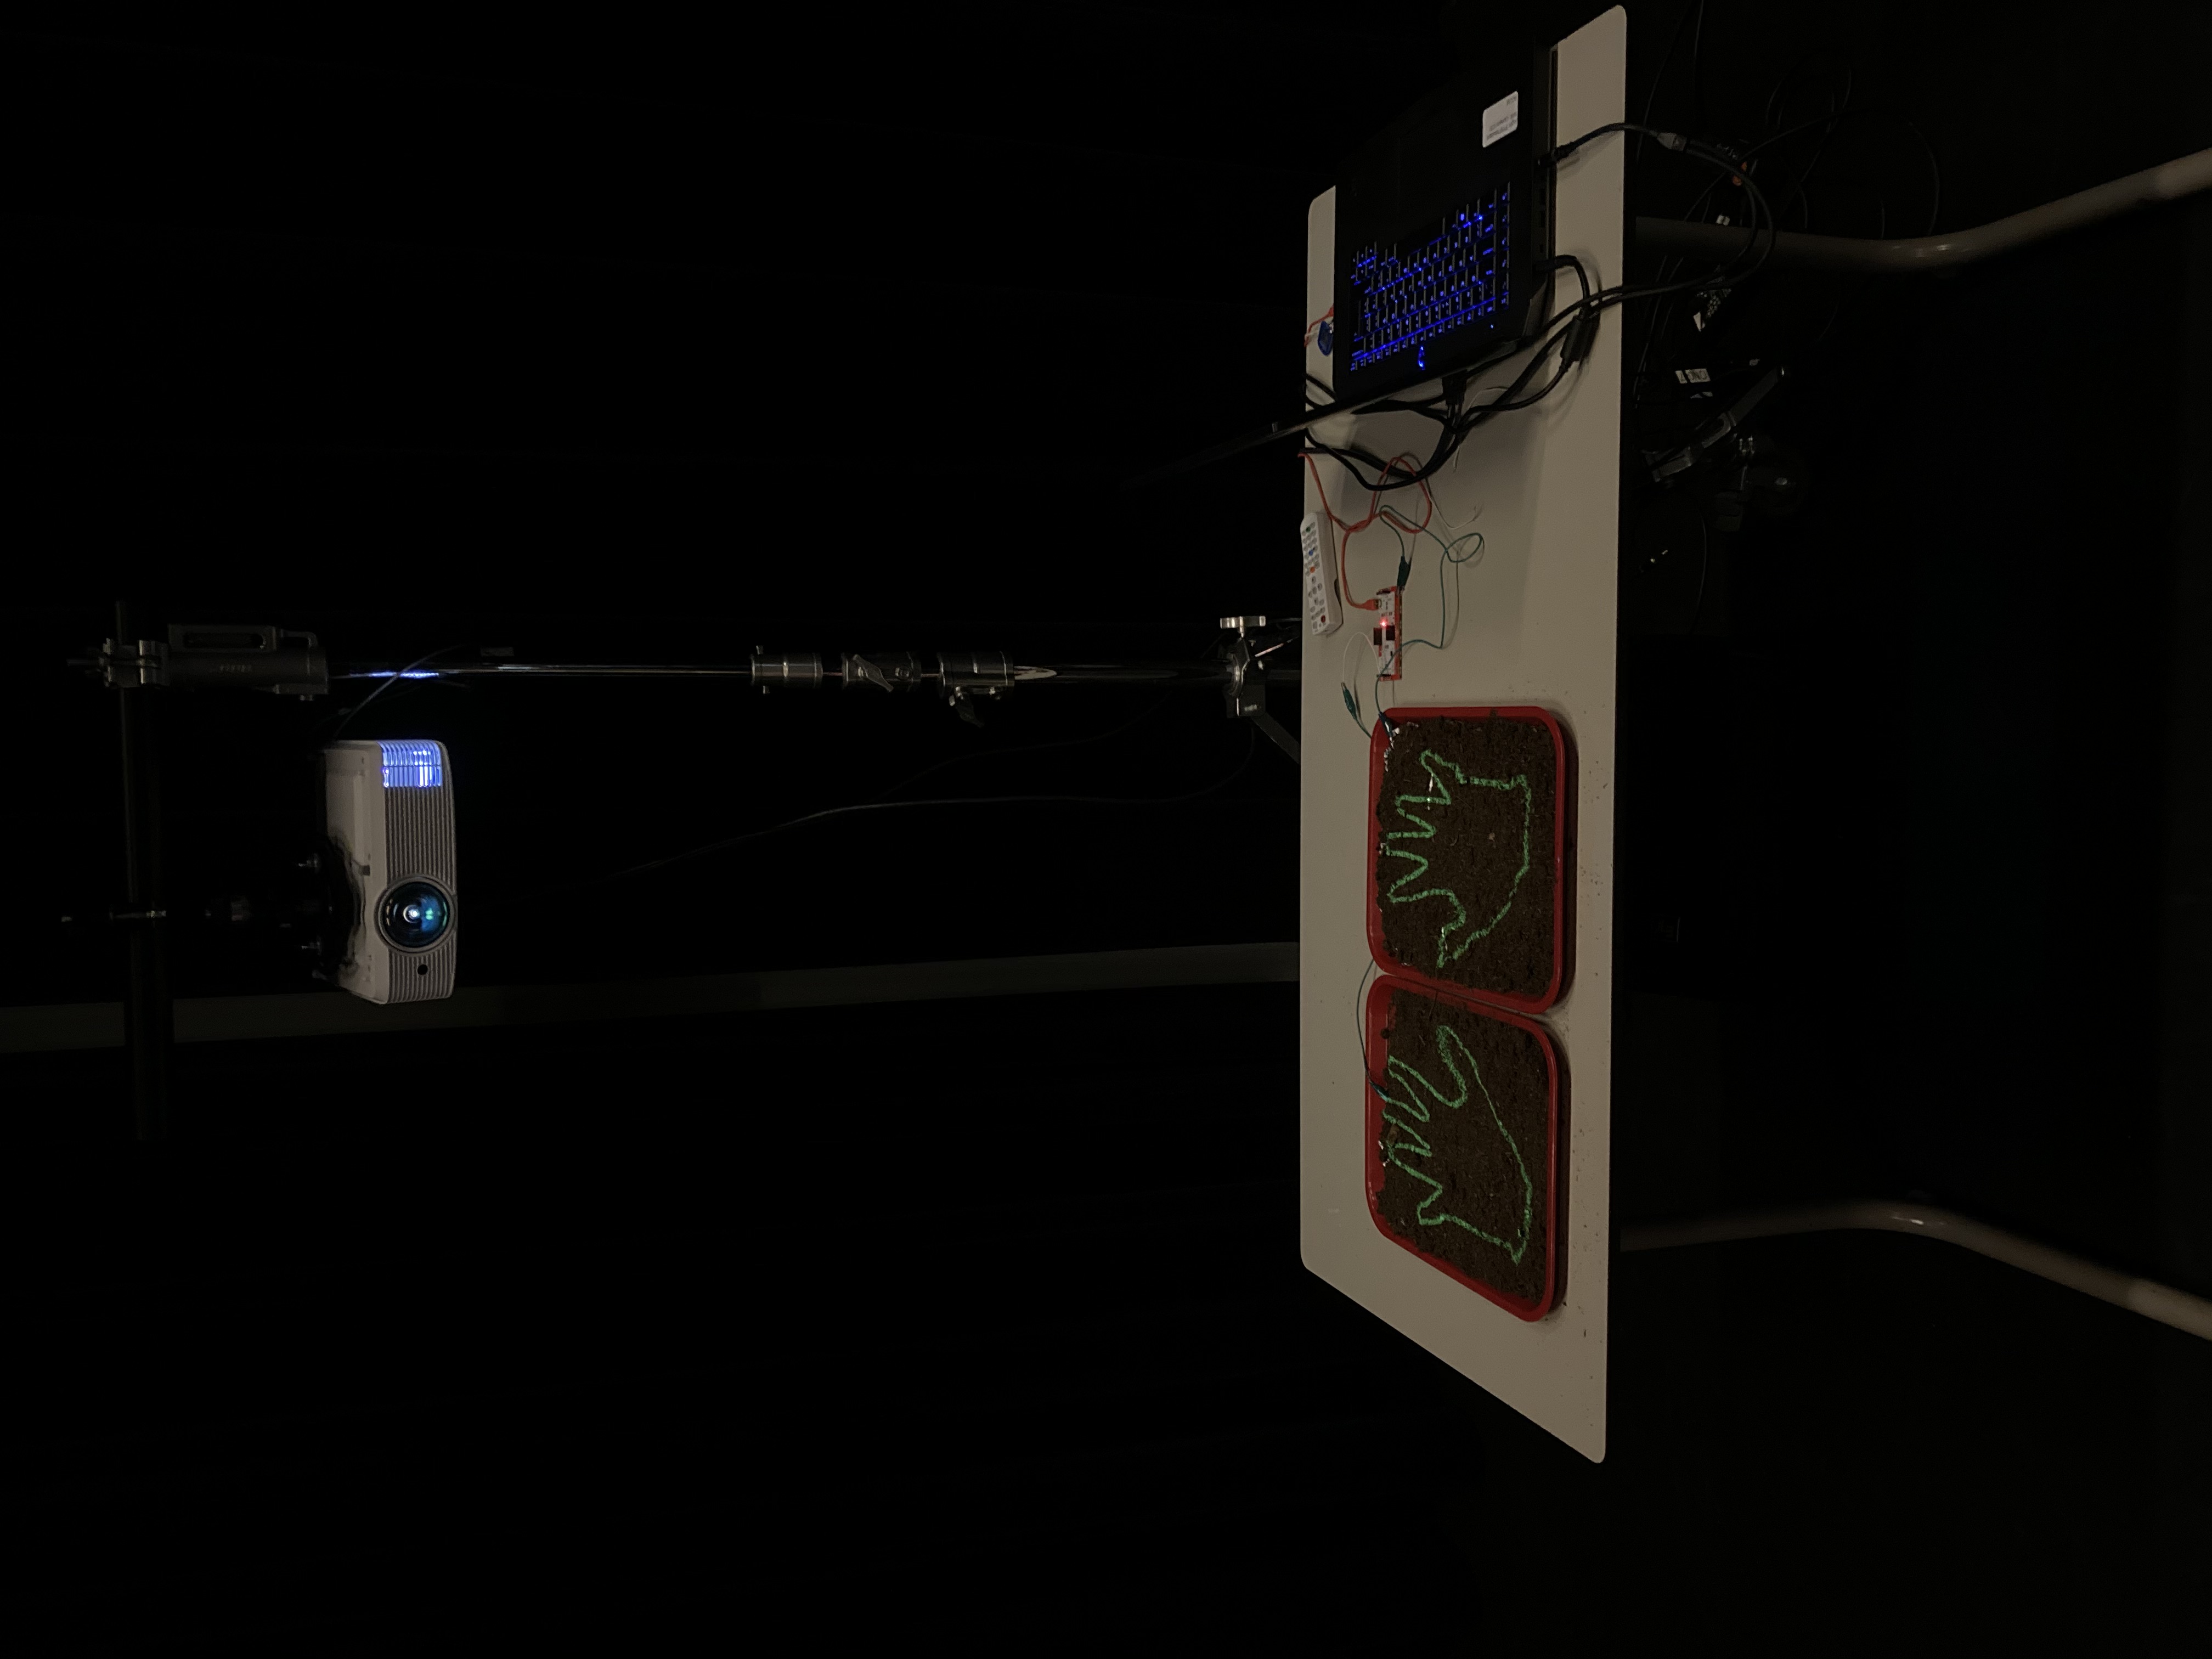
A demo set-up named "Groene vingers" demoing the [Makey Makey](https://makeymakey.com/) board by utilising soil as a conductive material to switch between between two images. The switching and image handling is done within Isadora.
**Required components:**
- 2 trays with moist soil
- Makey Makey board with alligator clips and aluminium foil
- Computer running Isadora (Isadora patch via this [link](https://nextcloud.hku.nl/s/sDmGtM4PjZkmSpz))
- A projector pointing at the table
**Order from input to output:**
\- The 2 trays with soil form the positive and negative 'switchboard' of a circuit, which is closed when a person places both hands on it.
\- The Makey Makey sensor board detects when the circuit is closed and sends for example the letter 'g' as a keyboard command.
\- the 'g' key activity is detected in Isadora and used to fade between projections of photos, film and text and to start a sound.
\- Using the projection mapping (a.k.a. video mapping) function in Isadora (see online [tutorial](https://www.youtube.com/watch?v=mEWWxPE3ZkQ&t=18s)), the images are projected in the correct perspective and within the frames of the trays.
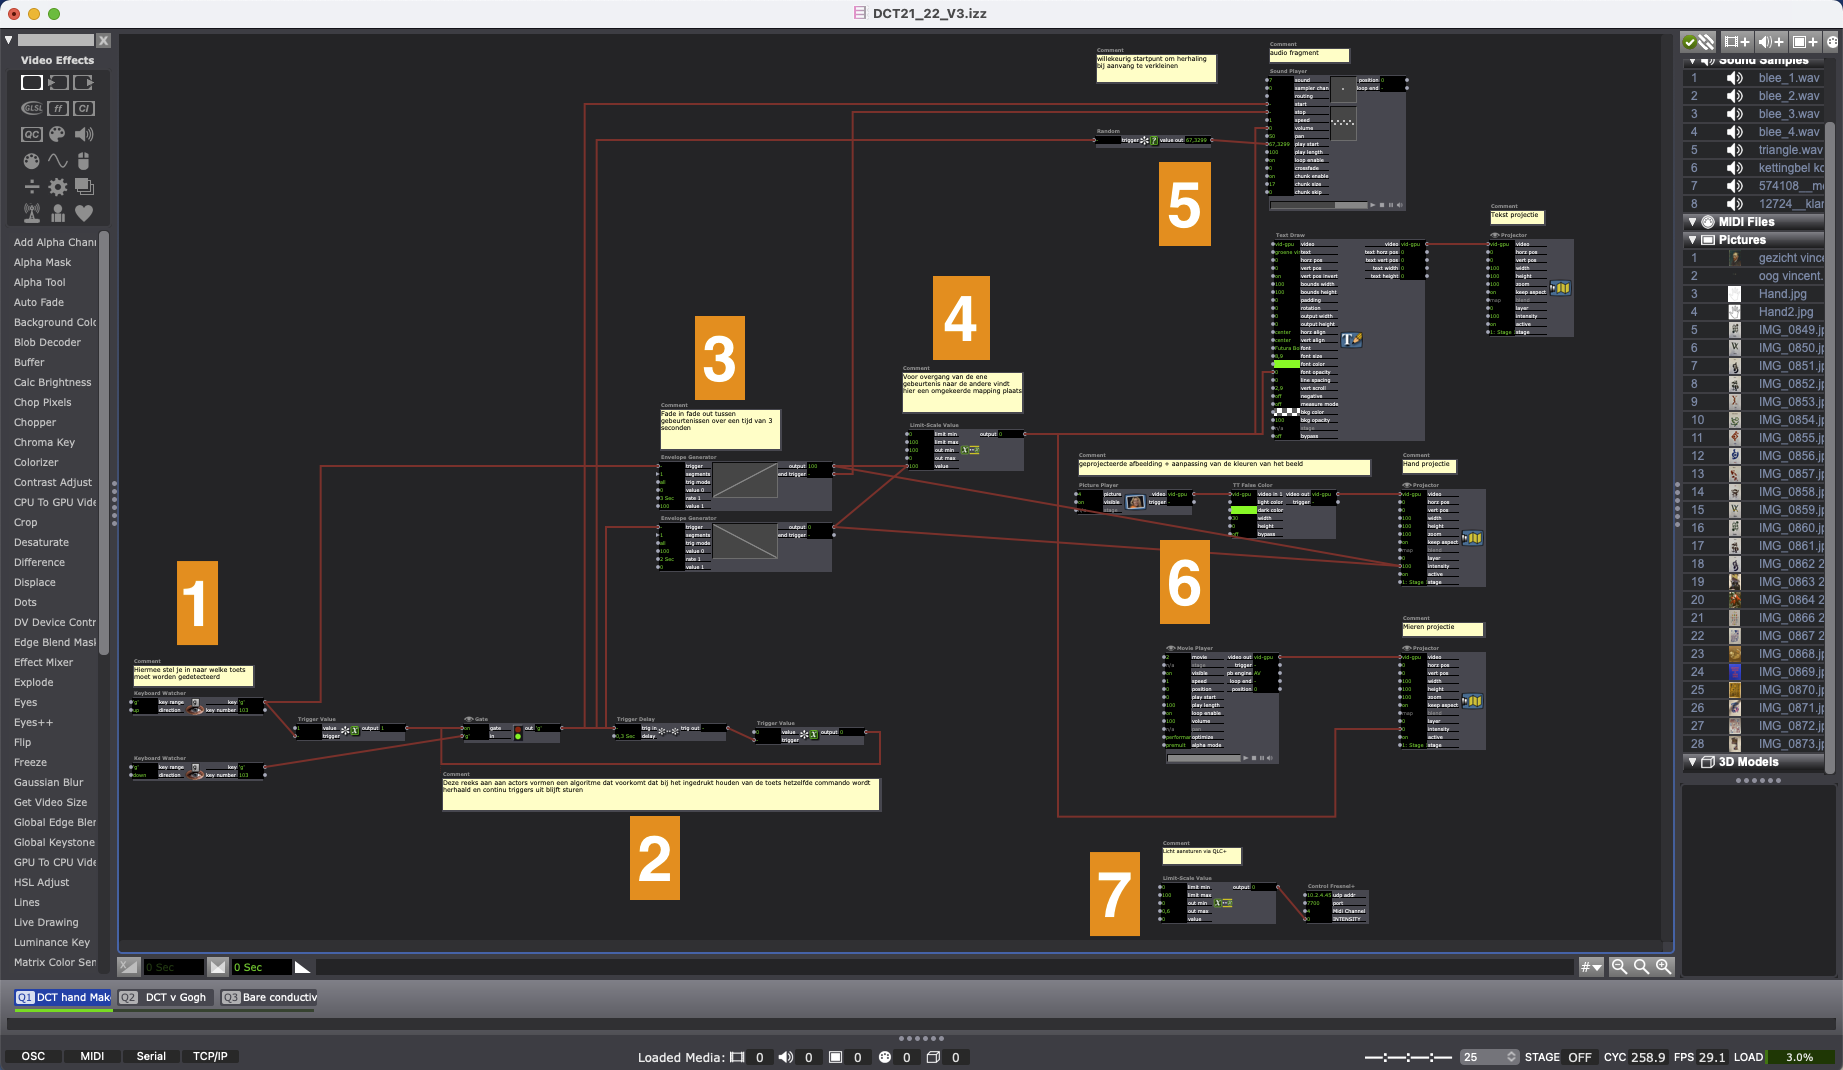
**Patch explainer:**
1. Key strokes received from the Makey Makey
2. An algorithm preventing continuos keystrokes
3. A fading circuit to fade between projected images when a keystroke is activated by touch
4. Inverting the values for fading in an image while fading out the default image
5. Randomisation of audio startpoint to prevent repeats + green projection of displayed text
6. The default hand projection and movie which appears when triggered
7. An extra attribute to control the theatre lights
[](https://bookstack.hku.nl/uploads/images/gallery/2023-11/screenshot-2023-11-20-at-15-56-04.png)
# Interactive book pages with projection and Bareconductive
[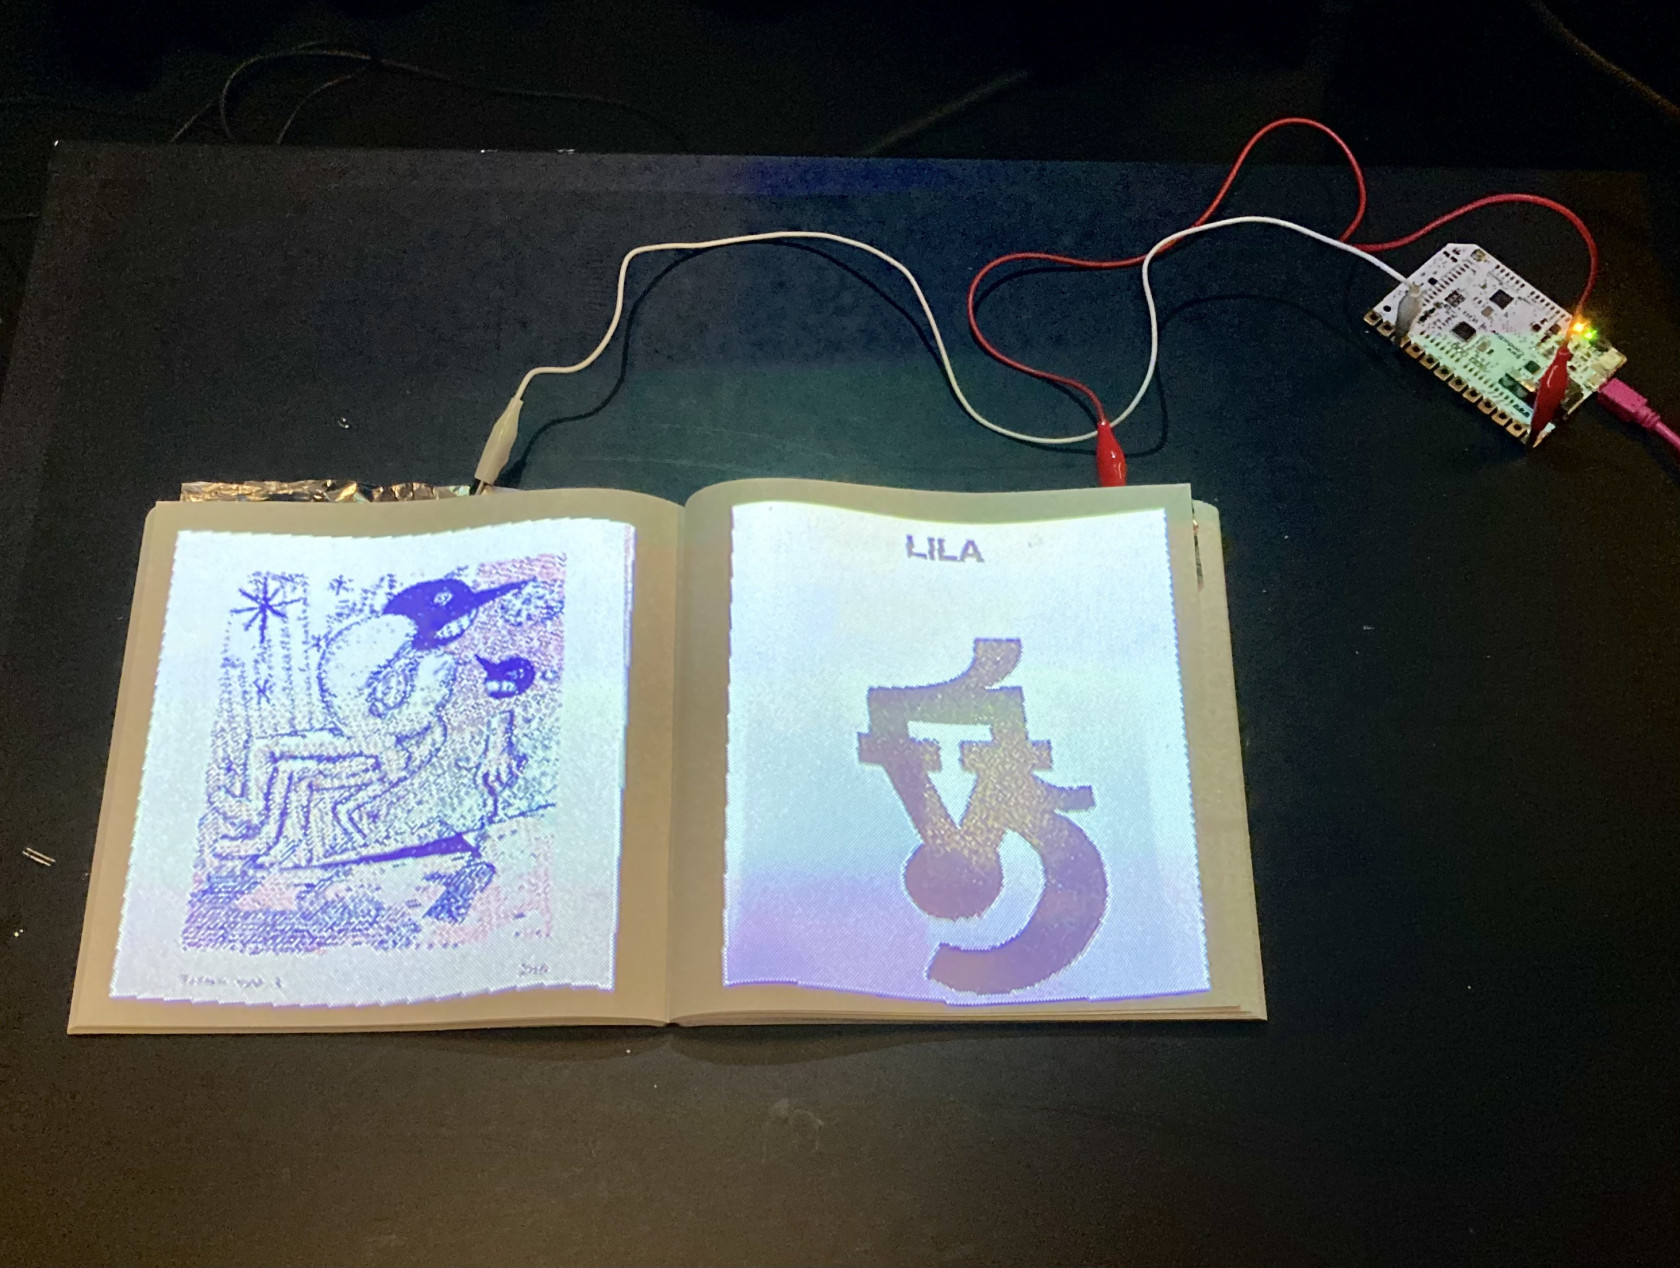](https://bookstack.hku.nl/uploads/images/gallery/2023-11/njaimg-1015-2.jpeg)
"To swipe or not to swipe"
Volgorde van input naar output: - Met behulp van de proximity functie van het Bare Conductive sensorbordje worden de bladzijden interactief gemaakt. - 2 aluminiumfolie blaadjes dienen als "antennes" voor het bordje, die de nabijheid van een geleidend object kan detecteren en omzet naar variabelen die worden ingelezen door Isadora. - In deze opstelling zet de Bare Conductive de gemeten waardes om naar MIDI, welke ook kan worden "gelezen" door andere software (bijv. Ableton Live of zelfs soft- of hardware synthesizers) - Binnen Isadora selecteert de inkomende MIDI informatie willekeurige afbeeldingen voor elk blad. - Met behulp van de projection mapping (a.k.a. video mapping) functie in Isadora worden de beelden in correct perspectief en binnen de kaders van de bladzijden geprojecteerd.
# Virtual drumkit with mocap (NIET AF)
todo: insert photo @ Blackbox in action
**Description:**
A setup with an imaginary drumkit triggered by motion capture.
This is an example of how sounds can be placed in space to create a virtual spacial experience,
**Required components:**
- Mocap (motive @ Blackbox IBB/ON or Vive tracking)
- Computer with Touchdesigner (patch via this link)
- Projector
- Speaker
- example files
**Setup of Pyshical components**
**Callibrating tricks**
# 4 seasons Virtual Experience (niet af)
todo: insert photo/video @ Blackbox in action
**Description:**
Experience the 4 seasons in light, audio & image triggered by motion capture.
This is an example of how sounds can be placed in space to create a virtual spacial experience,
**Required components:**
- Mocap (motive @ Blackbox IBB/ON or Vive tracking), 1 or more rigid bodies/trackers
- Computer with Touchdesigner
- Projector
- Speakers
- Digital Lighting (control through ArtNet or Entecc)
-
- Touchdesigner Patch
- example files
Relevant Bookstack links:
[- setup mocap + osc bridge in Motive&Gazebo and Vive&Touchdesigner/Gazebo](https://bookstack.hku.nl/this_is_to_be_made "this_is_to_be_made")
\- [digital-lighting-control-from-computer](https://bookstack.hku.nl/books/digital-lighting-control-old "Bookstack: digital-lighting-control-from-computer")
\- [books/osc-open-sound-control](https://bookstack.hku.nl/books/osc-open-sound-control "Bookstack: osc-open-sound-control")
**Setup of Pyshical components** requires support from Blackbox mangers!
insert photo's
**Callibrating tricks** Place the rigid body in the desired location.
insert TD export screencapture example