Led strips
An LED is the acronym for Light Emitting Diode. Unlike a regular incandescent light bulb, there is no filament that produces the light. Almost all of the electricity is used for making light, which makes the LED more efficient. On the other hand, think of an incandescent light as a heater that happens to emit light as well. Incandescents and fluorescents emit light with very high beam angles. Since LEDs are small and powerful with a definite beam angle, it is important when using them to have them arranged in a way that the emitted light is even upon the surface you desire to light.
An LED strip, tape, or ribbon light is a flexible circuit board populated by surface-mount light-emitting diodes (SMD LEDs) and other components that can come with an adhesive backing. Traditionally, strip lights had been used solely in accent lighting, backlighting, task lighting, and decorative lighting applications and art.
- Everything you need to know about ledstrips
- smart LED string & app (phone)
- WLED
- Controlling LEDstrips with Arduino
Everything you need to know about ledstrips
LED strip lights are new and versatile forms of lighting. Unlike regular LED strips, addressable LED strips allow you to control each individual LED, creating a wide range of color and animation possibilities. There are many variants and exceptions, but for the most part, they have the following characteristics:
- Consist of many individual LED emitters mounted on a narrow, flexible circuitboard.
- Each LED (or each group) on the strip has its own integrated circuit that communicates with the control circuit, allowing for precise control over the color and brightness of each LED.
- Operate on low-voltage DC power
- Are available in a wide range of fixed and variable color and brightness
- Bought in a long reel (typically 5 meters), can be cut to length, can include double-sided adhesive for mounting
- LEDstrips can be tints of 'white' , RGB(W), various colours controlled with an app/remote or even (individually) addressable & controlled by software.
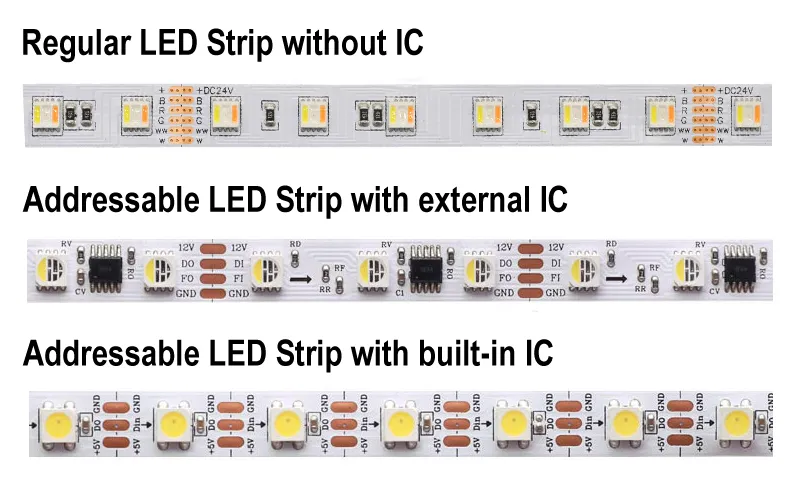
How do I know if my LED strips are addressable?
1) Check whether there is IC or not. There are two kinds of IC, external IC, and internal IC. If has IC, then it is an addressable LED Strip Light.
2) Check the cable, if there are signal data cable, then it is addressable LED Strip Light.
 Educate yourself before buying the wrong strip!
Of course there is much more to learn and know about LED strips check out these resources for in-depth info:
https://aidiwattlighting.com/the-ultimate-guide-to-addressable-led-strip/
everthing you need to know about the various kinds of ledstrips, controllers and drivers
https://www.waveformlighting.com/led-strip-lights
another great, comparable, source of info on led strips
COB ledstrips:
https://www.aliexpress.com/p/wiki/article.html?keywords=aliexpress-leds
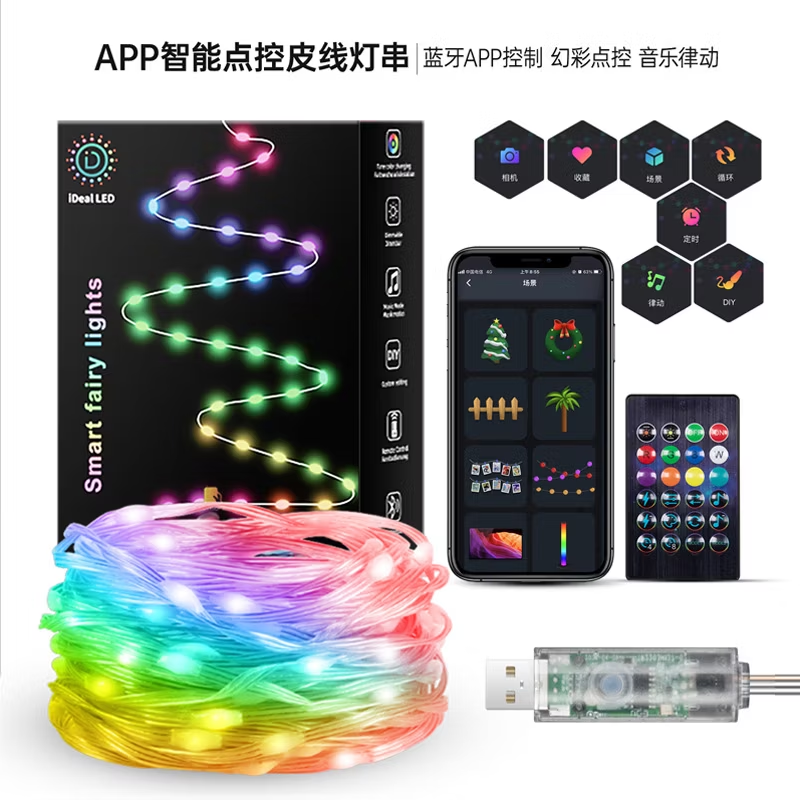
smart LED string & app (phone)
At the BBox Jk you can borrow LED strings that connect to a powerbank through USB
The lights (5/10 meters, 50/100 LEDS) can be individually controlled through an app. (multiple strings simoutaneously)
android: https://play.google.com/store/apps/details?id=com.tech.idealled&hl=nl
iphone: https://apps.apple.com/us/app/idealled/id1568029498
WLED

WLED is one of the most popular packages for controlling LED
strips with, or example, the WS2812B through cable & wifi.
The software also supports some other types, such as the WS2811 and WS2815, both on 12 volts. The first step is to flash the software on, for example, an ESP32.
The ULTIMATE WLED Beginners Guide!
Resources
website: https://kno.wled.ge/
community: https://wled.discourse.group/
A tool to stream video to WLED matrix displays: https://github.com/fieldOfView/WLED-video :
A Python application to stream videos, images, and animations directly to your WLED-powered LED video wall: https://github.com/BradyMeighan/WLED-Studio :
WLED & Touchdesigner:
Another instruction for connecting a WLED controller and TouchDesigner
The following instruction below wil walk you through the steps to connect TouchDesigner with a WLED LEDstrip controller.
WLED installation: https://wled-install.github.io/
For the tinytronics Universal Digital LEDstrip Controller V1.1:
Board type / software version:
ESP32-S3 (4MB Flash, with Audio reactive Usermod)
(Connect the controller to USB-C while holding down the 'Boot' button. Otherwise, it won't enter update mode and the WLED installation won't be able to upload.)
After installation, manually use the RST button to reset.
WLED-AP (AP = Access Point) will appear under Wi-Fi networks. The default password is wled1234.
The WLED console will open automatically. You can change the settings here to your local AP. (for example the workshop is in the 10.0.1.xx range, so it's useful to set a fixed IP to, for example, 10.0.1.99.)
Continuing to use the dedicated AP mode directly also works, of course.
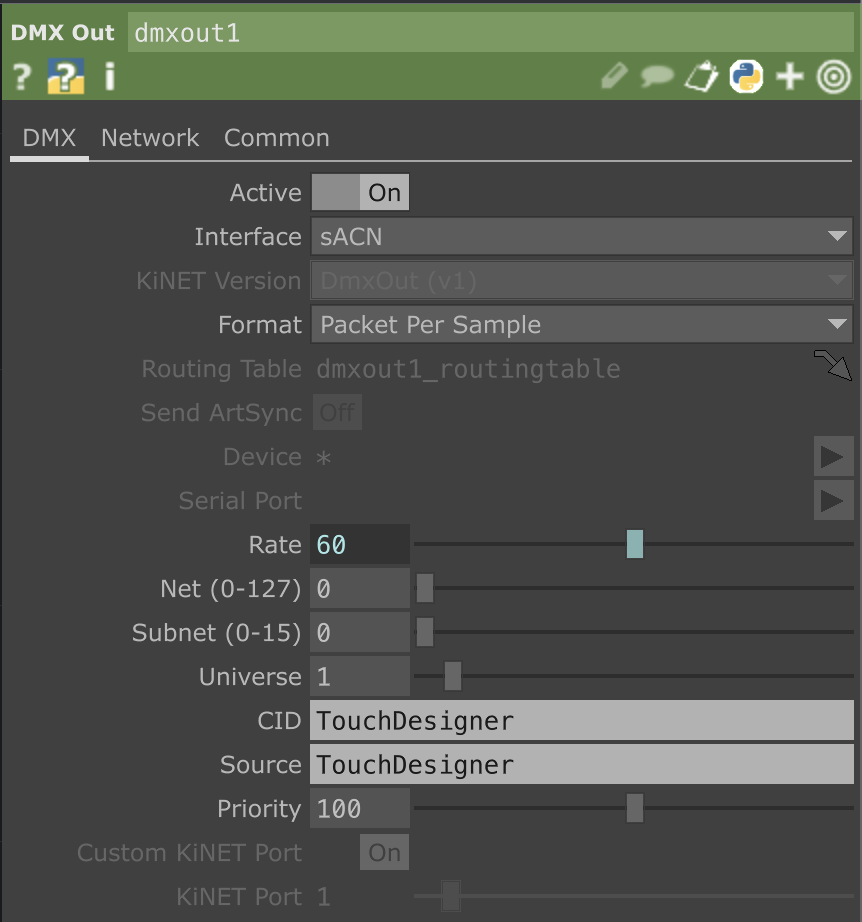
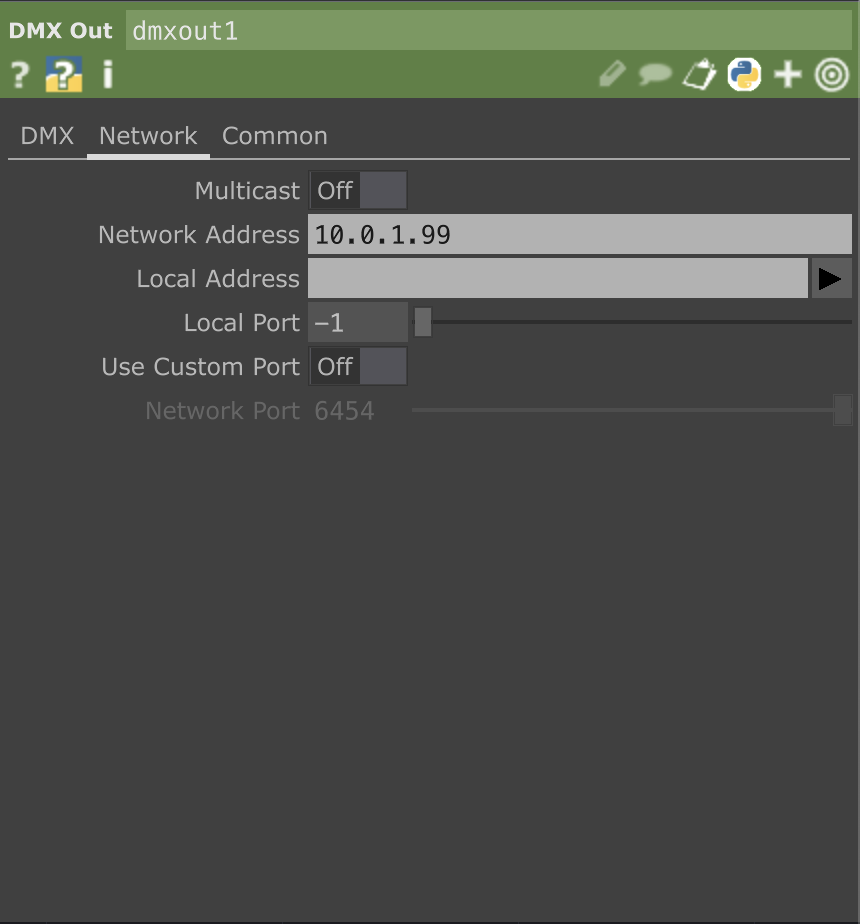
TouchDesigner, DMX Out CHOP Interface on sACN, in the network tab Multicast Off and set the IP address of the WLED controller.
Here's a preset for Touchdesigner WLED.tox
Controlling LEDstrips with Arduino
LED Strips and Arduino
With the Adafruit Neopixel library, it is very easy to work with controlling different types of LED's using Arduino. Adafruit has a very extensive "Adafruit NeoPixel Überguide" available online, where you can follow a step-by-step guide for controlling LED strips, panels and individual led's.
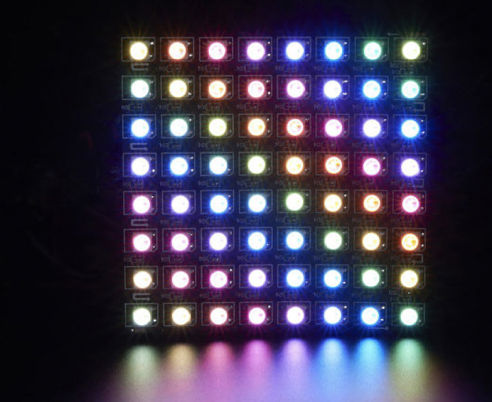
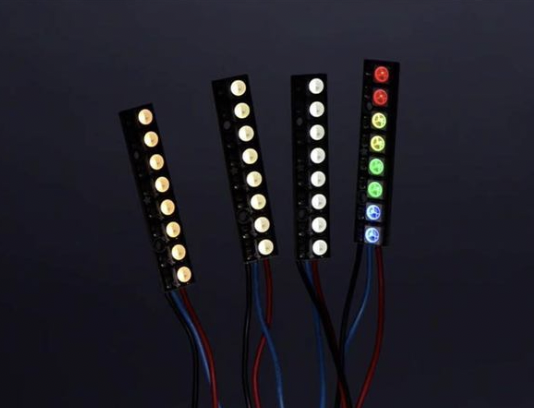
NeoPixel options:
 |
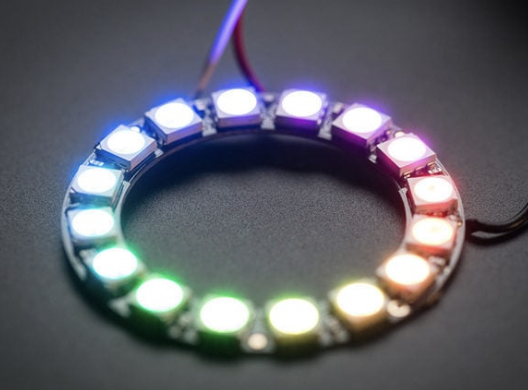 |
| Strips | Rings |
|
|
|
|
Matrices |
Pins |
|
|
^^ link to more options available via kiwi electronics |
|
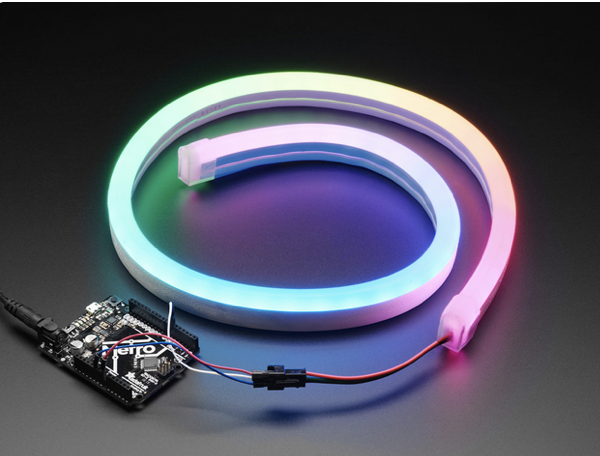
Neon-Like Stips |
Images from Adafruit |
Basic NeoPixel LED strip setup
HARDWARE
Materials needed:
- Arduino Uno (or other available Arduino, but Nano is most beginner friendly)
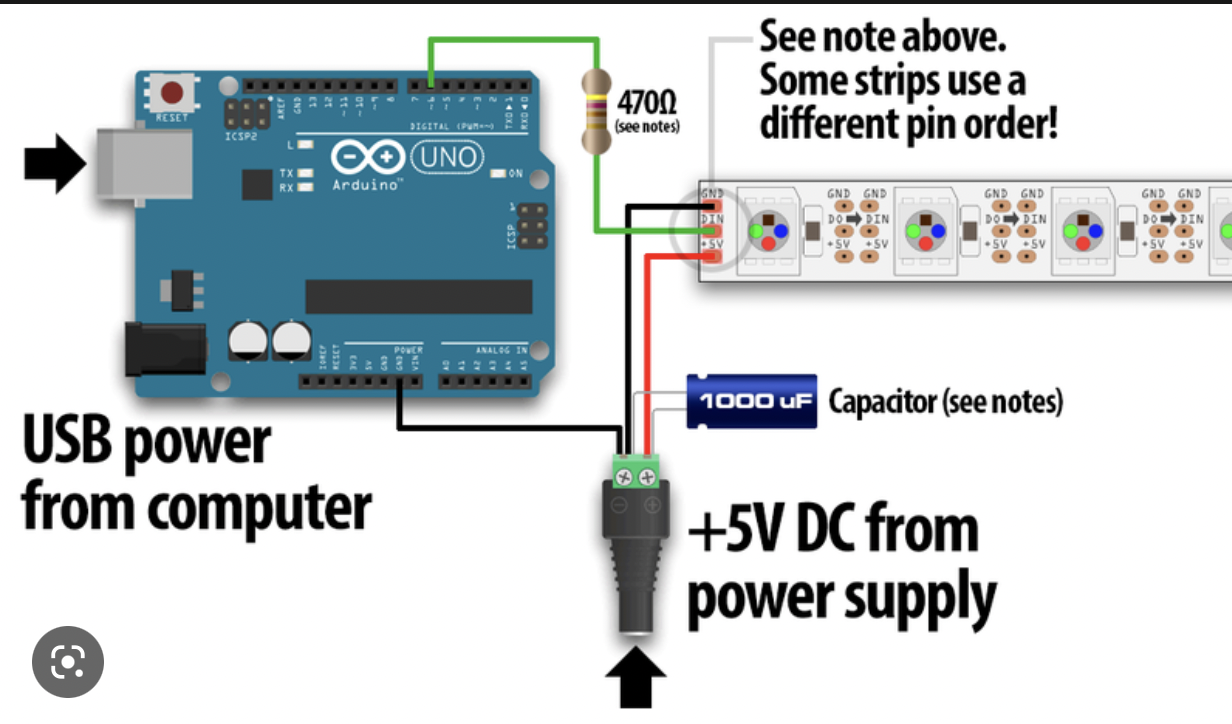
- 1x 300 to 500 Ohm Resistor
- 5V power supply (this type is recommended for simple setup)
- 1x 500–1000 µF Capacitor
For controlling LED strips and Arduino you can build the following hardware:
SOFTWARE
Launch the Arduino IDE.
If you have not installed the NeoPixel Library for Arduino, first make sure to do that first.
https://learn.adafruit.com/adafruit-neopixel-uberguide/arduino-library-installation
If you want to understand more about Arduino and Libraries? Read more here...
Examples→Adafruit NeoPixel→strandtest
Powering NeoPixels in different ways
Other methods for powering ledstrips beside the simple standard power supply are:
- DC wall wart adapters (5v)
- lithium-polymer battery (Lithium Ion Polymer Battery - 3.7v 2500mAh)
- Three alkaline cells (such as AA batteries)
- Four nickel-metal hydride (NiMH) rechargeable cells
You must use a 3-5V DC power supply to power these strips, do not use higher than 6V or you can destroy the entire strip– yikes!
Example 1 AA or AAA = 1,5 V
When choosing any option for powering the ledstrips, always take into account that you have enough amperage provided for the strips. Checkout the Adafruit page for more details regarding power options.
Powering Arduino in different ways
If you want to use a powerbank in some cases depending on how much power the arduino needs from the bank it might turn off after 1 - a few minutes even though the powerbank is fully charged. It depends on the kind of powerbank. Some have a safety built in. But most of the time it is not mentioned in the description.
Try different types of powerbanks or use info from these links:
https://www.youtube.com/watch?v=I7MrL5Q7zvY
https://forum.arduino.cc/t/simplest-battery-power-to-arduino-nano-solution/530242
Im still experimenting with this myself once i find more info i add it to this book.
At the moment i have tried 2 powerbanks (5000 & 10000 mAh) for Arduino Nano with seperate power for my small Neopixel Jewel (7 leds). Both dont work. Using batterypack 4xAA atm.