| [](https://bookstack.hku.nl/uploads/images/gallery/2024-10/barec1.gif) 1\. Verbind de koptelefoon of speaker. Zet de speaker aan (knopje aan de zijkant) | [](https://bookstack.hku.nl/uploads/images/gallery/2024-10/barec2.gif) 2. Verbind de USB kabel en de adapter voor stroom, en zet het bordje aan |
| [](https://bookstack.hku.nl/uploads/images/gallery/2024-10/barec3.gif) 3. Raak de sensor pads aan om geluid te horen. | *All images and video's Copyright Bare Conductive* |
**Reageert de Bare Conductive niet meer als je iets nieuws hebt aangesloten?** Het bordje even aan- en uitzetten helpt meestal.
**Leg het Bare Conductive bordje niet op een metalen oppervlak**, dat kan kortsluiting geven.
[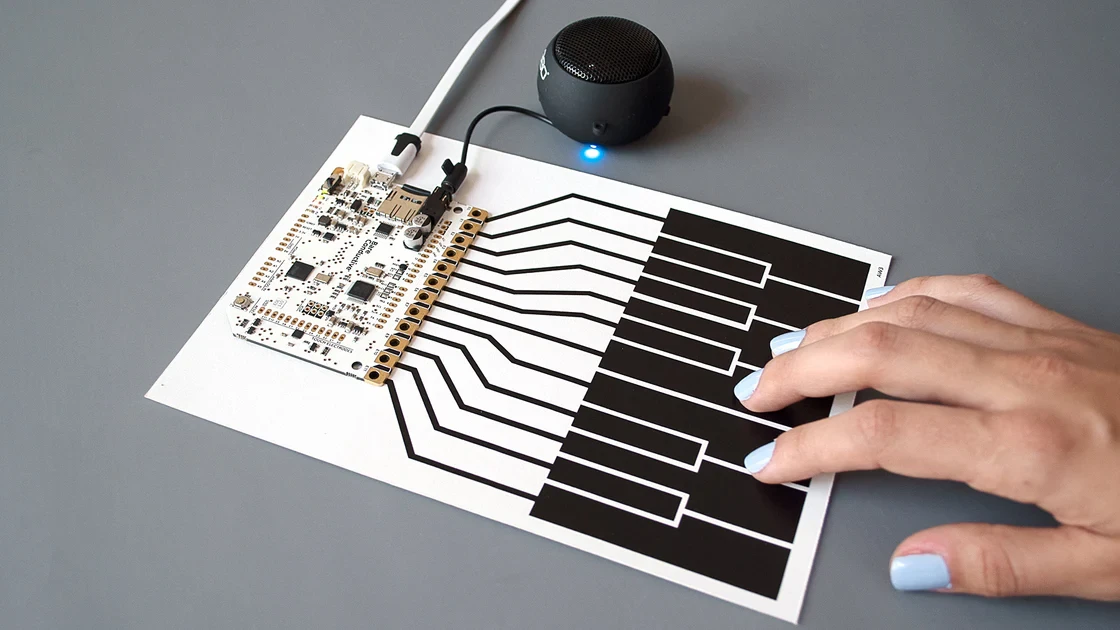](https://bookstack.hku.nl/uploads/images/gallery/2024-10/conductivepiano.webp) ### 3. Andere geluiden gebruiken Wil je iets anders horen dan de standaargeluiden? Bijvoorbeeld je eigen stem, of een geluid dat je opgenomen hebt? De geluiden die je hoort staan op de micro SD kaart die in de Bare Conductive zit en zijn makkelijk te verwisselen: 1\. Zoek of maak je geluiden en sla ze op in MP3 formaat 2\. Noem de bestanden zo: TRACK000.mp3, TRACK001.mp3 enzovoorts. Het nummer verwijst naar de sensor pad: TRACK000 is voor sensor 1, TRACK001 voor sensor 2. 3\. Kopieer de bestanden naar de Micro SD van de Bare Conductive \----- (This page is reused from [the page here](https://bookstack.hku.nl/books/tech-cases/page/aan-de-slag-met-bare-conductive)) # Edit code, use as Isadora input #### Bare Conductive as touch input for other devices If you want to use the Bare Conductive board as a touch input for a different device (such as your pc), check [the ECT Github](https://github.com/hku-ect/BareConductive). #### Bare Conductive as touch input in Isadora If you want to use the BC board as touch input in Isadora, check [the ECT Github](https://github.com/hku-ect/IsadoraPatches) under bareConductiveDemo.izz. If you want to use the Bare Conductive in Isadora and you know it already has the right arduino file follow these instructions: 1\. Go to: https://github.com/hku-ect/IsadoraPatches 2\. Click on the green "<> Code" button and then on "Download ZIP." 3\. Unzip the file, and inside the folder, you'll find "bareConductiveDemo.izz." This is the file you'll be working with. 4\. Connect the Bare Conductive to your computer. You'll need a USB cable, which unfortunately is still not included with the two boards that are on JBP. 5\. There's a slider/button on the Bare Conductive to turn it on. Use it to power up the board; a light will come on. 6\. In Isadora, go to "Communication" -> "Serial Port Setup..." Under Port 1, select the appropriate device. On OSX, it's called usbmodem41223 or something similar; on Windows, it might be COM3 or another number. 7\. Click "Ok." 8\. Next, go to "Communication" and click on "Enable Serial Ports." If everything is set up correctly, a second light on the board should start blinking, and you'll see numbers coming into Isadora as the values change when you touch the contact points on the board with your finger. 9\. There's also a reset button on the Bare Conductive. Use it after connecting new wires/foil/conductive materials to the Bare Conductive. # Tox for touchdesigner To read the info coming from bare conductive add these tox to your project. download: [Bare\_ConductiveV2.tox](https://bookstack.hku.nl/attachments/140) (edited by Tony) To use this, prepare your TouchBoard in the Arduino IDE: 1. Install the [Arduino IDE](https://www.arduino.cc/en/Main/Software) 2. On Windows, install the [touchboard driver](https://bookstack.hku.nl/books/bare-conductive/page/bare-conductive-driver) 3. Install the Touch Board Arduino Plugin [Touch\_Board\_Manual\_Install.zip](https://bookstack.hku.nl/attachments/92) 4. Upload the "Datastream.ino" to the touchboard [DataStream.ino](https://bookstack.hku.nl/attachments/87) Dive inside the TOX to see what is happening :) You can adjust certain choices to get other outputs More InDepth info can be found here: [https://github.com/hku-ect/BareConductive](https://github.com/hku-ect/BareConductive) # Bare conductive driver You may need this to run de BC on Windows. This is a copy of the original files on Github, as this may be deleted because BC is discontinued as of 2025 [link to the github](https://github.com/BareConductive/touch-board-driver?tab=readme-ov-file) This is the signed Windows driver for the [Bare Conductive Touch Board](http://www.bareconductive.com/touch-board). ## Install