For all online platforms (paid or unpaid), please be aware of your data and privacy!
### Gaussian Splatting locally 1: with Sky Splat Full workflow from video to splat runs from within Blender, uses the Colmap tool for making the splats. Tried on Windows. Additional notes to the video above: Install the skysplat plugin. Plugin appears in the plugin bar on the right (press N). Tab 1: open video. This will extract stills from the video. Tab 2: Colmap. First under Colmap settings, enter the location of the Colmap folder (Colmap.exe in the Bin map). Then: - Click Load colmap model, - Manually rotate the point cloud upright, - Click Export transformed model, (and Export camera if you want to) - Click Prepare Brush Dataset Tab 3: run brush training. When opening the brush training on Windows, **this only works when Blender is opened with Administrator rights**. If it's not this step will result in an error, or hangs on starting the training. ### 2: with LichtFeld Open source splatting tool, not yet tested [https://lichtfeld.io/](https://lichtfeld.io/) [https://github.com/MrNeRF/LichtFeld-Studio](https://github.com/MrNeRF/LichtFeld-Studio) LichtFeld needs a more detailed dataset than 'just' the images, it requires "undistorted images + pointcloud + camera locations". The pointcloud and camera locations can be generated using the Colmap process above, or from Reality Scan. ### 3: with PostShot (tried first, no longer free)March 2026 Update: Can't export to .ply in the free version of Postshot anymore...
Workflow in Postshot: - Install Postshot from https://www.jawset.com/ - Make a video of the object or space. You can import multiple videos in the software, taking all videos with the same camera will have better results. - Drag the videos into Postshot - Render. Postshot mainly runs on GPU. The render below (50 sec video) took about 20 minutes. - After rendering you can crop the image to exclude all the fuzzy blobs. For this look under Paramters - Edit in the menu on the right - After rendering you can export to .ply - To import to different software you will need a plugin There are plugins for - After Effects (not tested here) - Unreal (paid plugin, not tested here) - Blender (lower resolution, slightly more abstract results). - Unity (not tested here) Below: the same chair model in Postshot and Blender| [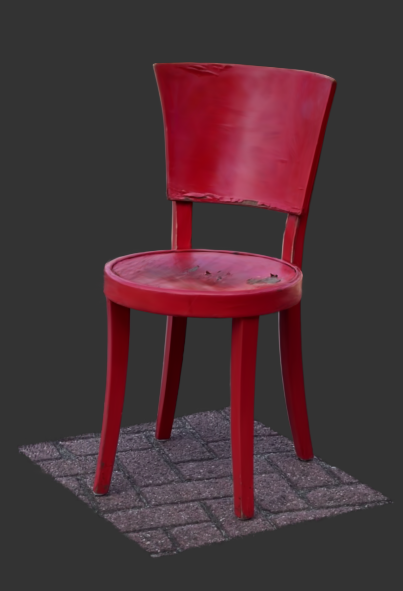](https://bookstack.hku.nl/uploads/images/gallery/2025-06/screenshot-2.png) Postshot | [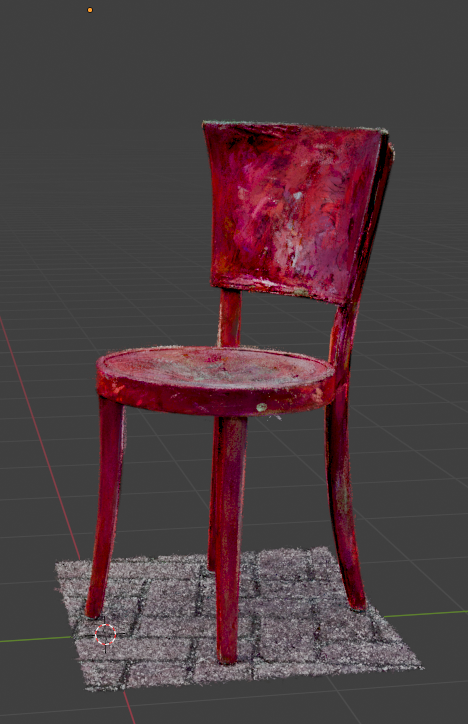](https://bookstack.hku.nl/uploads/images/gallery/2025-06/screenshot-3.png) .ply in Blender |
| [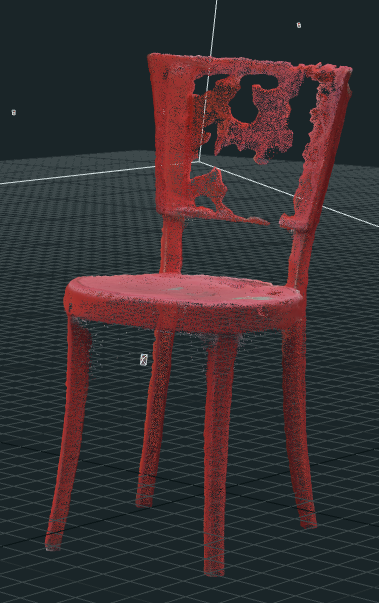](https://bookstack.hku.nl/uploads/images/gallery/2025-06/screenshot-5.png) In RealityCapture | [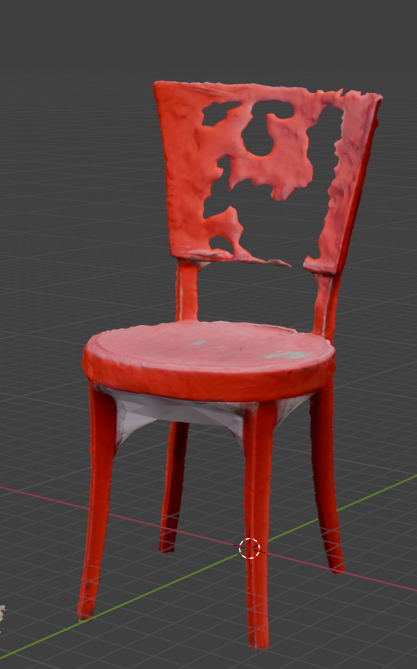](https://bookstack.hku.nl/uploads/images/gallery/2025-06/screenshot-6.png) .obj imported in Blender |
| ## Depth Camera (TrueDepth system – e.g. Face ID on iPhone/iPad) - **How it works:** - Uses **infrared (IR) structured light**. - The projector shines ~30,000 tiny IR dots on your face. - An IR camera captures how those dots are distorted by the 3D shape of your face. - Software reconstructs a **depth map**. - **Range:** Short — typically **0.3 to ~1 meter**, optimized for faces and selfies. - **Use cases on Apple devices:** - **Face ID** (unlocking and Apple Pay). - **Animoji / Memoji** face tracking. - Portrait selfies with depth. - AR effects at arm’s length. - **Strengths:** - Very accurate at close range. - Compact — fits in the notch of iPhones/iPads. - Works in total darkness (IR). - **Limitations:** - Not designed for room-scale scanning. - Limited depth resolution past ~1m. | ## LiDAR Scanner (on iPad Pro, iPhone Pro models since 2020) - **How it works:** - Uses **time-of-flight LiDAR**. - Shoots pulses of infrared laser light. - Measures how long they take to return → direct **distance measurement**. - **Range:** Much longer — **up to ~5 meters indoors**. - **Use cases on Apple devices:** - Room and object scanning. - AR apps that need instant, accurate scene mapping. - Faster autofocus in low light (because it knows the distance to objects). - 3D scanning (e.g., for art, furniture, architecture). - **Strengths:** - Works at room scale. - Very fast: instant AR scene setup. - Great for **3D modeling & scanning**. - **Limitations:** - Lower resolution than cameras (you don’t get a detailed point cloud like pro LiDAR sensors). - Still consumer-grade, not survey-grade accuracy. |